[MakerSpace] wanted to 3D print an RFID card holder. On one side is a slot for a card and on the other side has recesses for the RFID antenna. They used these to control access to machines and were milling them out using a CNC machine. Since there were no flat surfaces, he had to turn on supports in the slicer, right? No. He does use supports, but not in the way you might imagine.
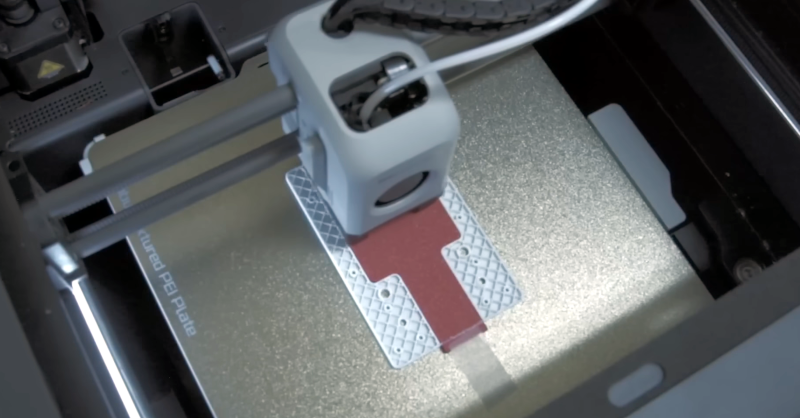
Inspired by creating cast iron using sand casting, he decided to first 3D print a reusable “core” using PETG. This core will support future prints that use PLA. When printing the actual item, the printer lays down the first few layers and pauses. This allows you to stick the core in and resume the print. After the print completes, you can remove the core, and the results look great, as you can see in the video below.
While the PLA doesn’t stick well to the PETG, it can stick a little, but using a glue coating as a release agent solved that problem. This is one of those ideas that once you see it, it seems obvious, but it probably isn’t something you’ve thought about doing until you see it at least once.
There are a few other tricks in the video. For example, the core is a little larger than necessary, so there is a tab that sticks out. This makes it easy to tape down to the bed and also helps when you try to remove it from the PLA print. The results are great, and it makes us want to revisit our abandoned badge holder project from years ago.
Some people never print flat. Others do very specific support structures at key points. It seems there’s always multiple ways to print the seemingly unprintable.


Printing it in 2 parts and gluing together could also do the trick
So would putting one half into a jig with the flat surface up, to then print the other half directly onto it.
All of these are different tools to use where appropriate. (I personally am not a fan of glue because I mostly print prototypes and contamination precludes recycling.
I do that a lot. Putting pins in to align or a sacrificial flange works well. See: https://hackaday.com/2017/12/29/3d-printing-without-support-2/.
Could have split that white part in the middle to get a flat side. Everything is screwed together anyway.
Chapstick works well if you have large flat areas too if you need a release agent. I have used it on support material in the past. Printed material sticks kinda…but not really.
In my case I had to pause the print and apply to the interface layer…but in this case it would be instead of glue.
Corian?!? Having shopped for counter tops I think. I recall that being relatively expensive. Perhaps he had fallen source of scraps? But when those ran out, why not use something like MDF or even wood (!) ? I like 3D printing but it’s slow. I’ll assume it was wasn’t worth the time to make a mold and cast parts (more upfront time).
But enough kvetching, it’s a good technique to have, just have to think about layering and printhead collisions. I could envision stacked and indexed “cores” for other cavities.
Ottokorrect strikes again. Had found a source of scraps, that dried up.
I thought the same thing. My guess is he was using trim scrap.
Printing with that printer is by no mean slow. These Bambu Lab Printers are like the flash compared to a few years ago.
I’ll have to try this out. Usually split the part and print the split sides flat on the bed, then use 4-40 (3mm) without glue for a seamless complex part. With close tolerance holes, no issue with alignment.
Great idea but he could have printed the whole thing with no support if he stood it up. It might have needed a brim but I doubt it, especially on Core XY.
I can see a truly hacker spirit in this video as in a few comments to it. Never be blocked with the limitation of one technique always think out of the box and mix your skills. This will bring a real joy of making things.
The main benefit of RFID is not having to stick the tag into a receptacle, and the thing they design is a receptacle?
Then they waste all that time, effort, and electricity printing an object that could be made with 2 flat plates with a constant thickness gap between them?
Did I miss the part where we say “don’t do these things, this is a mistake”?
Why are we highlighting this?