Arduino Xmas Tree Shield

christmasshield

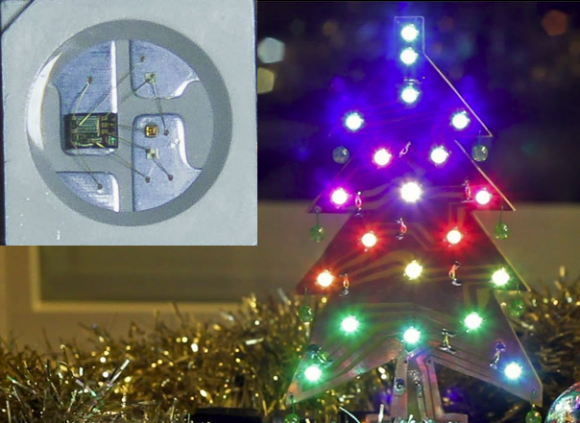
Nothing reminds us that it’s the holiday season more than an LED Christmas Tree submission. This obviously is not the first of its kind, but [Jose] does offer up a new technique using addressable RGB LEDs.

[Jose] decided to use 20 WS2812B RGB LEDs, which if you haven’t seen before, are RGB LEDs with an integrated controller. Yep, that’s right, just power/ground and 1 data line is all that is needed to control hundreds of RGB LEDs. This LED tree’s design is simple: a custom-etched PCB cut it in to the shape of a Christmas tree. The WS2812B LEDs helped keep everything clean, so the tree lacks any ‘ugly’ ornaments, except for the required bypass cap here and there. For an added bonus, the tree’s LEDs are synchronized to music generated by an Arduino via a piezo buzzer. Why is it a shield?  Well, the whole tree plugs in nicely to a standard Arduino interface. This looks like the perfect starter project to familiarize yourself with addressable LEDs, or at least to get you warmed up before building your own infinity portal.

Continue reading “Arduino Xmas Tree Shield”

Controlling High Voltage 7-Segment Displays

highvoltage7seg

The MAX7219 is one of those parts in your bin that has a “done and done” attitude. In case you’re unfamiliar, this chip can be used to control 7-Segment displays, 8×8 Matrix displays, or even a pile of random LEDs. You talk to it via a simple serial interface and it handles the tasks you don’t want to fuss with, such as multiplexing and modulation. Not all displays are alike, however, so [Raj] wrote in to show how he used the MAX7219 to control high voltage 7-segment displays.

The spec on the MAX7219 only allows an input voltage of 5V, which limits the driver output to around 4V and can cause problems when using large displays that series-connect LEDs internally. [Raj’s] solution allows the MAX7219 to control displays with combined forward voltages of up to 24V, and as an added bonus, the circuit maintains compatibility with existing microcontroller libraries. We imagine this could be a nifty trick to keep on hand the next time you need to control large scoreboard displays.

The circuit works with the help of intermediate drivers to essentially level-shift the voltage to the display, which both provides the high voltage and protects the MAX7219’s inputs. One of the drawbacks of this circuit is losing the MAX7219’s constant current feature, requiring that each segment connection includes a current-limiting resistor. We appreciate this design’s attention to default states, because you wouldn’t want all of your LEDs turning ON during boot-up!

Building Mosaic LEGO Lamps

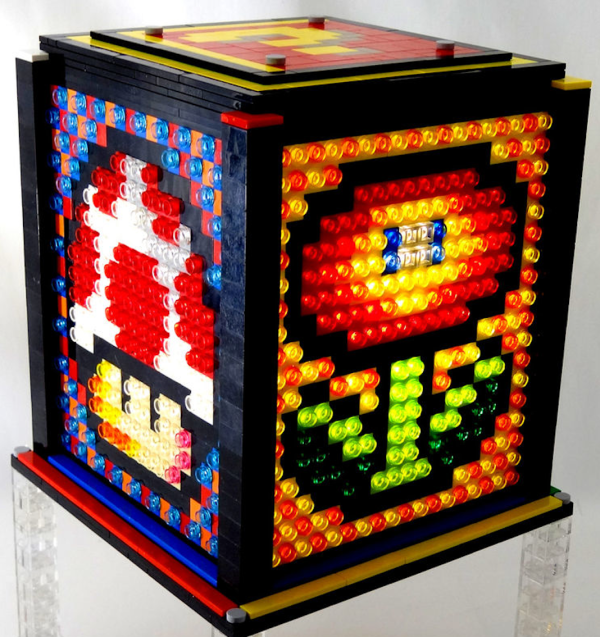
Looking for a throw back to your childhood, or maybe you just appreciate things that light up and look amazing? Well, [Baron] has a really impressive project for you. Not only does it look stunning and incorporate all of the things we love, it’s actually a pretty novel design. These lamps are built completely out of LEGO Technic pieces, the brand of LEGO that have holes drilled through them so you can build more advanced creations.

[Baron] used these parts with the drilled holes to create a dot matrix in which he placed colored transparent LEGO dots in the holes. The method of creating patterns is very similar to the way it’s done on the “Lite-Brite”. We especially love the theme of these lamps and they would match well with your LEGO mystery box. What’s really great about this tutorial is that it lays down the foundation for LEGO-built lamps that could be more interactive, involve more control (like RGB LEDs), or even introduce some LEGO mechanics!