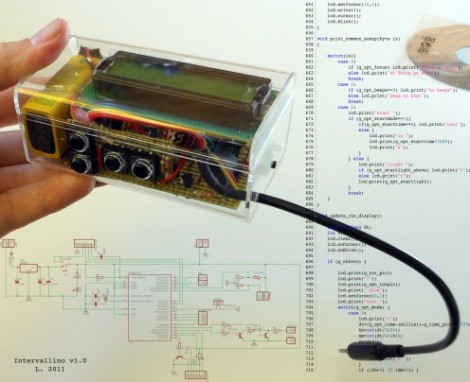
[L] just finished building this intervalometer and his verbose documentation of the project has a little bit of everything. The fabrication uses common prototyping materials, and simple skills that are easy to master even for the beginner.
The hardware is based around an ATmega8 microcontroller. After snooping around the Internet [L] wanted to see if the voltage divider based focus and shutter commands that are present in some camera remote shutter controls would work for his model. Investigation with a commercial shutter release showed him how it was done, so he incorporated that into his design. When it comes to firmware for the device we really like his explanation of the menu system. There’s a lot of settings and he did a great job of planning the user interface to make them all work on the finished product.
The schematic and board layout were done with Eagle. During the layout process he made choices for easy assembly using strip board, and even walks us through the steps when cutting the traces and adding jumper wires. It’s nicely finished in this clear plastic case and demonstrated in the video after the break.
[vimeo http://vimeo.com/34741554 w=470]


I’m surprised with the quality of the fit and finish, considering he didn’t even have a drill. I also like how using a transparent box removes the requirement to either find a bezel for the display (near impossible) or to be able to cut a near perfect rectangle out of your project box. For me, figuring out how to transfer a circuit from a breadboard into something that looks decent is a challenge. It appears that there was some thought put into its physical appearance.
That clear case is repurposed iPod packaging if anyone likes how it looks.
Protip: Almost anyone with a Cannon PowerShot camera can use CHDK to gain this functionality for free by software.
http://chdk.wikia.com/wiki/CHDK
That aside, nice build.
He is a genius!!! Bella Dudi!!!