SMD components have a lot of advantages over the through-hole parts our fathers and grandfathers soldered. Working with these tiny surface mount components requires a larger investment than a soldering iron and a wire-wrap gun, though. Here’s a few reflow ovens that were sent in over the past week or two.
[ramsay] bought a 110 V toaster oven off of eBay. Even though [ramsay] is in England and has 230 V mains, everything in the oven is mechanical and works just fine with a higher voltage. His first test didn’t go quite as planned; the solder paste wasn’t melting at 120° C, so he cranked up the temperature and learned that the FR in FR-4 stands for flame retardant. Never deterred, [ramsay] decided to build a controller so the temperature ramps up and cools off at the right rates for the flux and paste to do their thing.
Solder paste has a temperature profile that requires the board to be kept at a temperature between 150° and 180° C for a minute or so before climbing up to 220° for a second so the solder will melt. [Nicolas] had the interesting idea of putting a USB port in his toaster oven and storing the heating profiles on his desktop. The build uses an MSP430 microcontroller to turn the relays powering heating elements on and off. [Nick] is working on a C# desktop app to monitor and regulate the oven temperature from his computer, so we’re fairly interested in seeing the final results.
Watching the SMD self-alignment videos on YouTube is a lot more fun than messing around with tweezers, stereo microscopes, and extremely fine soldering irons. If you’ve got a better idea for a toaster/reflow oven, send it in on our tip line and we’ll check it out.


At work we just preheat the oven to 275F then put the boards in, increase the temp to 450F and set a timer for 5 minutes. At the end of the 5 minutes we check the boards and see if the solder’s reflowed. If it is, we give it 30 secs then turn the oven off. If not, we wait for it to reflow and give it the 30 secs once it has. 90 times out of 100 it’s ready to go at the end of the timer.
Solder paste does not “require” being kept between 150 and 180C for a set period of time. I use the hotplate method and all I do is set the plate for 220C and wait for reflow. Maybe it’s my OCD acting up, but ‘require’ is too strong of a word – it’s much more forgiving than that.
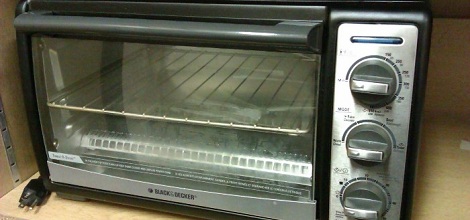
On another note, Ben Heck’s reflow oven put a good bit of the electronics in the side panel of the toaster. I don’t know if I would have done that since I could see where that space could get rather warm. Black & Decker, I noticed, confined all of the electronics to the control panel in front of the unit away from anywhere that could get warm. Just a note for those that may be inspired to make a reflow oven…
Roundup?
@signal7
I’m with you, I’m not sure where people got so obsessed with matching the reflow profile perfectly.
I bought a $70 Black and Decker that I’ve used hundreds of times now to solder DFN microcontrollers. I literally just pop it in the oven, set it for 300 degrees and when I see the solder reflow, I turn it off. Never had a problem.
Helps if you pick up a convection toaster oven (with the little fan) to distribute the heat. Prevents hotspots and scorching.
Hi!
I think, the reflow diagram founded mainly to avoid the heat shock of elements, and just second to melt the paste on a managed curve. Malfunction can happen later, even a year later if You take the parts to sudden heat and high temperature for longer time than in the specification. Not to mention the faster cooling than adviced. Some inner parts could be damaged because the cooldown shrinking.
Exactly. They don’t create and publish those graphs just to amuse themselves… if it’s in the documentation, there’s probably a reason for it.
Thank you Rob and Koz. J-STD-020 has a purpose and I’m glad that people realize this.
Here’s an idea for people building toaster oven reflow controllers: a lot of electronic parts are moisture sensitive, meaning that they will pick up moisture from the air if left out of a humidity-controlled environment. During a solder process, these parts can sometimes develop steam bubbles that damage the silicon. It doesn’t always happen, and might not be significant on a low-volume run where you can always just replace the chip.
However, it would be neat if a toaster oven reflow controller would support a 48 hour baking process in case someone wants to restore some humidity-exposed parts.
I have some very very pink looking moisture labels so I am quite keen to try this. If you have an oven controller that can maintain a temperature reasonably stably there seems no reason why it can’t manage a lower temperature for a longer time. My main concern, however, is that my history of things catching fire doesn’t make me want to leave this on overnight.
Some of the advice extends the 48 hours out to 8 days or more as well…
http://www.intersil.com/data/tb/tb363.pdf
Wow, thx for this document, it instantly went into my personal vault of “must knows” :) thx.
o/
Yes, humidity is an other important thing to consider. In a Linear Thechnology datasheet (they usually provide really much more information in their datasheets than other manufacturers -as my experience) they make a statement. If a new part arrives, and if You see the moisture detector (paper with colored circles on it) shows any difference than normal, You HAVE TO bake the IC for 48 hours at 120C, before the soldering process. This applies too, if a long forgotten part shows up, and have to be soldered with reflow.
I heard stories about misterious malfunctions a year later the assembly process, and not in every case the part gone malfunctioning, but the panel itself could be damaged. More than enough heat could weaken the pads on the board, and after 1 cycles of natural thermal changes (winter -> spring -> summer -> autumn), in an (nearly) open-air application the IC breaks the pads because the constant thermal size-changes. Sry about english if any problem with it :)
A couple years ago I bought a TechFX reflow controller for a Black & Decker Infrawave toaster oven. It worked great.
I had to take some time off from my electronics projects when my computer kind of blew up and I ended up 3+ months behind on everything. When I finally got back to what I had been doing, the company that made the TechFX controller had ceased to exist, along with the software for the oven! :(
I just recently de-modified the oven, so I could use it for powder coat curing. But I really need to make a new controller of my own. Something that will let me set a simple temperature target, a shutoff timer, and beep when it’s pre-heated/done. I’m afraid I don’t know nearly enough about PID though. :|
Anyone know a controller I can make with an AVR? (Preferably in arduino language!)
Hello. I need that software… i have a controller an worked great/ pls
I understand the premise behind hack a day and all, but we recently had to start reflowing boards, and I went on Ebay, and I was able to buy a small prototype reflow oven for 280 dollars. It has 7 preprogrammed stages and 1 programmable stage. At what it would cost us to hack a unit, it was worth the money.
This would be a great project if people would get together and contribute to a single model oven. Someone does the PCB layout, someone writes the code etc.
Ovens can be picked up cheap and basically we have a glorified toaster oven, but the cost versus man hours to do the hack just did not make sense.
Excuse me sir, but we must respectfully ask you not to try herding the cats!
Hey, 2X voltage also = 2X current. And since watts = voltage X current, you were running the toaster oven at 4X original wattage!
That’s not necessarily true.
If you use a transformer to convert a given voltage up or down, the current will go down with a higher voltage or go up with a lower voltage thereby maintaining the same wattage.
In order to increase current with an increase of voltage, the circuit must be designed specifically for that combination of specs otherwise you risk overheating the wires and starting a fire.