An Even More Useless Machine

Here’s the most useless machine we’ve seen so far. It comes from the workshop of [forn4x] and happily turns itself off whenever any one of its eight switches are flicked to the on position.

The build began when [forn]’s Canon 850i printer gave up the ghost because of a broken print head. All the other electronics and mechanics were still salvageable, so it was decided to turn this printer into something a little more useless.

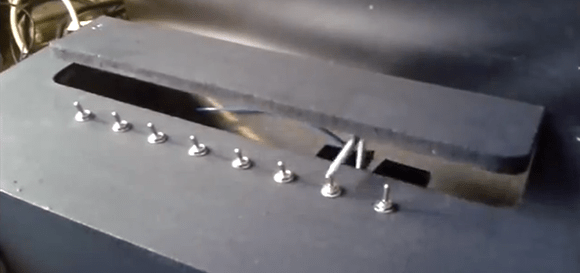
The printer used a regular DC motor with an optical encoder to move the print head. [forn] easily found the schematics for this optical sensor, because of the TTL output was able to read out the position of the slider. The rest of the build is an ATMega8, a servo, and an octet of toggle switches. [forn] has been able to get the accuracy of the servo-controlled arm down to about 0.1 mm, more than enough to accurately turn all its switches off.

You can see [forn]’s most useless machine in action after the break.

Continue reading “An Even More Useless Machine”

Fabricating Hardware From The Original Arcade Pong Schematics

original-arcade-pong-rebuild

This heavily populated PCB is a recreation of the original arcade version of Pong. That is an important distinction because the home version of Pong used a specialized chip to do much of the work. This is basically all stock logic, which explains the high component count. We wonder how many quarters it took just to pay for all 66 chips at the time?

[Pong74ls] was the person who took on this project. There is an original schematic available, but it’s incredibly crowded and rather difficult to figure out. Fortunately [Dan Boris] has already done a lot of the heavy work. He took the one-page nightmare and turned it into a sixteen page plan for building the original board (look for the schematic link under technical details).

Before the board could be laid out some redesign work was necessary. It sounds like some of the original chips are out of production and suitable replacements needed to be found. The board was then laid out in Eagle before sending the design off to a fab house. There was just one error which didn’t allow the ball to bounce when hitting a paddle while travelling downward. A couple of jumper wires fixed that right up!

[via Reddit]

[Original Reddit Post]

FireHero: Raspberry Pi Controlled Pyrotechnics

Fire Hero 3

To put on a live pyrotechnic show at a music festival, [Chris] built the FireHero 3. The result is remotely controlled flames shooting up to 100 feet in the air.

The system is controlled by a Raspberry Pi and an Arduino. A server runs on the Pi and allows a remote computer to control the system. The Pi sends commands over serial to the Arduino, which switches solid state relays that actuate the valves.

There’s also some built in safety features: the system won’t boot unless you have the right key and RFID tag, and there are pressure transducers and temperature sensors to ensure the system is operating safely. A CO2 actuated valve can quickly stop fuel flow in an emergency.

Vaporized propane creates the fireballs. The vapor is created by heating the supply tank in a hot water bath. An accumulation tank stores the vapor and custom built manifolds distribute it to the various flame cannons. At each cannon, a silicon nitride hot surface igniter (HSI) is used to ignite the flames once the valve is opened.

After the break, watch a video the the FireHero making some flames.

Continue reading “FireHero: Raspberry Pi Controlled Pyrotechnics”

Building A Tornado In A Bottle

vortex-tornado-machine

Recreate the look of a tornado by building this water vortex art piece. The components that go into it are all very simple and can be found in your recycling bin with the exception of a motor and a way to drive it. The hard part is going to be getting to the point where you don’t have any leaks.

[Ixisuprflyixi] went with an empty salsa bottle to house the vortex. It’s a pleasant shape for the project since it’s both tall and narrow and it’s got a bit of a sexy curve to it. The base of the machine is a plastic bottle which looks like it might have been for Metamucil, but we’re not sure.  The important part is that it needs to be made from HDPE, as a portion of the container will be used to make the impeller. That’s the part that attaches to the motor shaft inside of the container. Give it a spin and you’ve got yourself a tornado in a bottle. See it in action after the jump.

This is a much quicker and easier version than the one we saw [Ben Krasnow] build. He ended up doing some repair work on the gasket that seals the motor shaft. It’s an interesting read if you are thinking of building one of these yourself.

Continue reading “Building A Tornado In A Bottle”