Arduinofied QRP Radio Beacon

moxpd

A while back, [m0xpd] picked up an unbearably cheap AD9850 DDS module from ebay. He turned this in to a Raspberry Pi-powered radio beacon, but like so many builds that grace our pages, the trolls didn’t like using such an overpowered computer for such a simple device. To keep those trolls quiet, [m0xpd] is back again, this time using the AD9850 DDS module as a radio beacon with an Arduino.

The previous incarnation of this build used a Raspberry Pi, and as a consequence needed a level converter. This was thrown out as [m0xpd]’s own Arduino clone, the WOTDUINO – pronounced, ‘what do I know’ – is able to handle the 5 Volt IO of the AD9850.

In addition to fabbing a shield for the DDS module, [m0xpd] also constructed a transmitter shield to amplify the signal and allow the ‘duino to key out a few simple messages. It’s a quite capable device – one of [m0xpd]’s messages traveled from merry olde England to Arizona, his best ever westward distance.

A Remote-controlled, Autonomous Kite Generates Power

kite

Generating power from wind is easy – just stick a windmill on a pole and attach a generator. That’s not particularly cool, though, so [Adrien] and his team from his senior design project are using an autonomously controlled kite to generate power

The basic idea of generating electricity from a kite is to fly it around in figure-eights while unwinding the kite line from a spool. The very strong forces on the kite lines can be used to drive a generator which provides power for reeling the kite back in at a lower angle of attack. You can check out [Adrien]’s kite power theory page for a few more details on how this works.

Right now, [Adrien] and his team have a basic rig set up to generate power and are flying the kite via a joystick. Updates are coming, and you can check out the video of their RC kite in action after the break.

Continue reading “A Remote-controlled, Autonomous Kite Generates Power”

Reading Sensors With Scratch

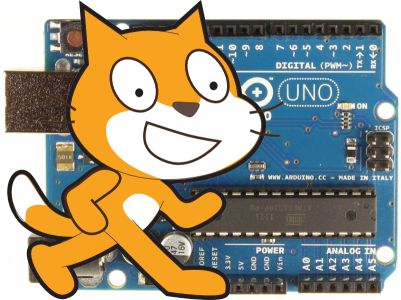
Scratch, a graphical programming language developed by MIT’s Media Lab, is an excellent tool for teaching programming. [Daniel] created an Arduino Sensor Shield to interface with Scratch, allowing for real-world input to the language.

This board is a derivative of the Picoboard, which is designed for use with Scratch. Fortunately, the communication protocol was well documented, and [Daniel] used the same protocol to talk to the graphical programming environment. The shield includes resistance sensing, a light sensor, a sound sensor, and a sliding potentiometer.

The main goal was to create a board that could easily be built by DIY etching. This meant a one sided board with as few jumpers as possible. The final design, which can be downloaded and etched at home, is single sided and uses only one jumper. Detailed steps on testing the board are provided, which is very helpful for anyone trying to build their own.

This board is perfect for educational purposes, and thanks to [Daniel]’s optimizations, it can be built and tested at at home.

Multibooting The Raspberry Pi

berryboot

Those of us have been dual booting Linux, Windows, and OS X operating systems for a while will be familiar with bootloaders such as GRUB and its ilk. Surprisingly, though, we haven’t seen a bootloader for the most popular computer of the last year – the Raspberry Pi. It makes sense to have a bootloader for the Raspberry Pi; with dozens of different distributions from Raspbian, Occidentalis, and a bunch of  more esoteric distros, we’re surprised we’re only just now seeing a proper bootloader for the Raspi.

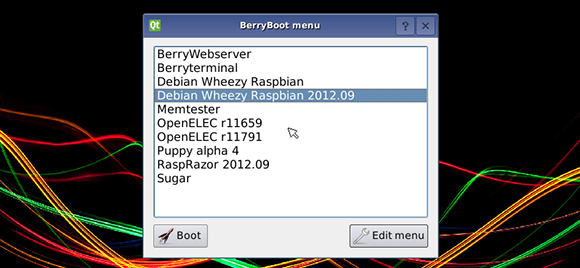
Berryboot is extremely simple to install – just copy it onto a FAT formatted SD card and you can install multiple OSes on your Raspberry Pi. On booting, Berryboot shows a dialog box of all the installed operating systems, with new ones able to be installed over the internet from a Berryboot menu.

You can grab Berryboot over on the gits. Berryboot also works with those Allwinner A10 single board computers, but the Hackaday tip line hasn’t seen hide nor hair of those boards.