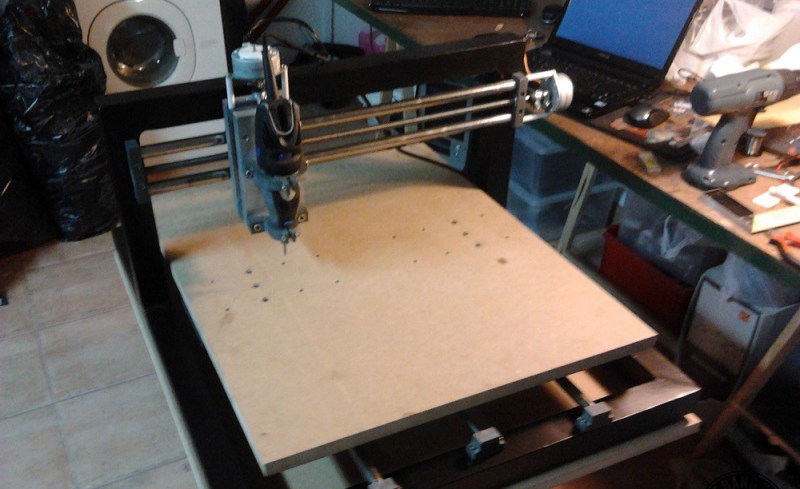
Do it yourself CNC machines can be never ending projects. Once you get one machine done, you want another. [Mario] found this out when he started work on his second CNC machine, TheMaker2. As its name implies, TheMaker2 is the successor to TheMaker1. It seems that [Mario] was trying to walk the fine line of precision at minimal cost. He wanted a rigid frame, so he chose to go with a moving table, rather than the moving gantry of TheMaker1. The frame is made up of galvanized steel stock, which makes it much stronger than many DIY CNCs out there. [Mario] had a friend weld the steel up for him, we hope he took the proper precautions when welding galvanized material.
Standard threaded rod was used as lead screws, with some very well made anti backlash nuts. Acme thread would have been a better choice here, however [Mario] doesn’t say if acme stock was available to him. Most of the mounts and small parts are made from easily worked PVC sheet stock. Precision rails were scavenged from old Ricoh copiers. Epson printers provided the tubing which became motor couplers.
One negative in this build are the stepper motors. [Mario] used NMB PM55L-048 motors he had pulled from HP printers. These motors have both a wide step angle (7.5 degrees) and a rather anemic torque. Thankfully [Mario] mentions upgrading NEMA 23 motors in the comments of TheMaker2’s instructables page.


I am 90% sure that is not galvanized tubing. Looks like generic cold rolled square.
I just wanna tell everyone that I recently acquired some sweet linear actuators from Goldmine. Perfect for the Z-axis on a build like this. And no, I am not affiliated with Goldmine in any way other than being a regular customer. http://www.goldmine-elec-products.com/prodinfo.asp?number=G19602 Buy them out and give Goldmine some capital to stock up on the next sweet thing I’ll covet!
i have pulled something similar out of a plotter … really nice little things if mounted right … but not retailing for $98 … maybe 1 of from the factory but ~$20 new max from ebay (tho they probably won’t go by that part number) and $10 used
Yeah… MSRPs are usually just pulled out of someone’s ass.
“Brand new but no other data available”, lol? :D
It’s pretty easy to figure out which wires go to which coils. What more do you need to know? Okay, max current rating… but that’s why I ordered four. :-P
Propper Precautions:
“bad bad zinc”
When you weld or solder(yes you can solder steel with silver filler*) any metal, you “generally” should take propper precautions, because the fumes are not healthy at all, or at least your body will have to cope with them (coughing or renewing of tissue).
For example zinc was mentioned due to it’s nearly immediate effect on the human body,
but I think one should mention then chrome at least , because some of the damages done by chrome are, in contrast to zinc, irreverisble.
The article about zinc acutally is too alarming, because that effect was well known and no long term effects have been spotted till now, however it’s best to minimize the health impact of all things you are working with.
Welding such small seems is quickly done, quickly == less heat put into the whole part, less zinc fumes
not exactly a new idea but its very well implemented!
I love the smell of galvanized metal fumes in the morning.
It would be easier to use regular steel frame and then painting after the weld. But still a interesting aproach!
I like the step by step instructions…
Would go nice with my CNC shield. ;)
http://blog.protoneer.co.nz/arduino-cnc-shield/
I think the anti-backlash attempt here is pretty well executed. I’ve been toying with the idea of a CNC build and that’s one of the things that seemed rather difficult until now, anyway. The design of the anti-backlash mechanism here can be simplified somewhat as there’s no need to use screws to hold the springs. A simple steel dowel would work just as well. Finding stiff enough springs might be an issue, though…
Thanks for sharing your thoughts on hoodie allen. Regards