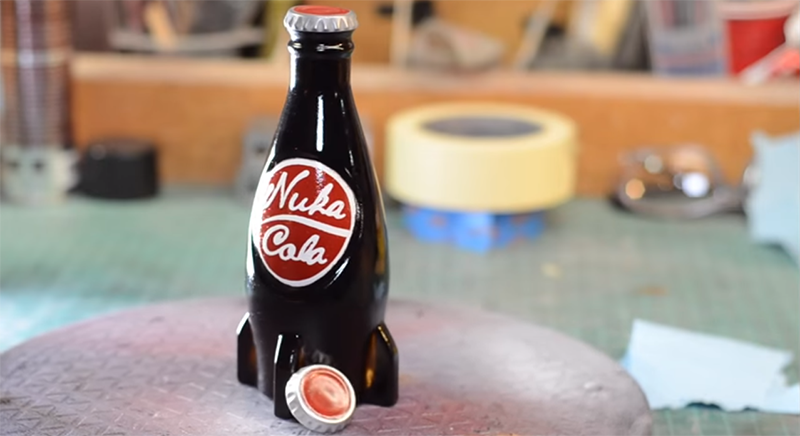
There’s less than a month until the next Star Wars is released, and consequently a few weeks until amateur propmakers and cosplayers go insane fabricating their own lightsabers with lightsaber cross guards and rolling robots. Until then, Fallout is pretty cool and [Bill] is here to give us an introduction to prop making with one of the defining objects of this post-apocalyptic universe. He created a real life copy of a Nuka Cola bottle and created a great introduction to resin casting in the process.
As with all proper part making endeavours, this project began with getting reasonably accurate models of the object to be copied. In Fallout, we’re lucky enough to have a way to look at a specific object while zooming and spinning around it, giving [Bill] the basic shape. The size was rather easy as well: all bottlecaps are the same size, so [Bill] just scaled the model to that.
With the model created and the part printed out, assembled, and finished, it was time to create the mold. [Bill] used a two-part silicone mold for the basic shape. The actual casting was done by rolling around a little resin on the inside of the mold. There’s no need for a solid, bottle-shaped block of resin; bottles are hollow anyway.
There are a few neat tricks [Bill] has up his sleeve, including coating the inside of the mold with aluminum powder and using a vinyl cutter to get the labels and logos exactly right. The finished product turns out great, perfect for leaving in the Wasteland for 200 years until the Sole Survivor stumbles upon it.
Video below.


An actual glass bottle in this style, filled with cola would be great…
You need to make a wooden mold and then get a glass blower to blow the glass into the mold to make one out of glass. It would take a few tries to get it right and the fins would probably end up as solid glass. A good glass blowing guy could probably make you one from a 3d Print buck for only a few hundred bucks.
I would probably make a plaster mold from the printed positive.
Depending on the school policies, you can try a glass blowing school and see if one of their students can make you the piece for a slightly lower cost. Some of those students are short on money and will gladly fabricate something within their lesson plan for the experience and portfolio expansion.
I did exactly the same thing for a custom shaped ceiling light after the old one shattered. Obviously not professional level, but satisfactory given the cost and the kid got a free days lesson out of it.
Wow, impressive work! I could have sworn that the bottle was cast from glass if I hadn’t seen the process. Very well done.
Just use the gcode on a CNC router and a piece of cherry wood for a glass blow mold or aluminum for plastic injection molding. I want to see some one build a 1950s style vending machine for these bottles.
So you mention cherry wood. I didn’t know it had unique properties. Apparently it takes to soaking in water, and then extreme heat, very well?
In addition to lower sap content and generally not reeking when it smilders. Technically any wood will work in a pinch but “fruit” wood is preferred from what I understand. Cherry, Pear and Apple to name a few.
Go for it, tech-no-pest. No better time to start than today! Looking forward to the video.
Excellent tutorial, got a subscription out of me at least :)
i tkink blowing pet bottles in this shape is pretty easy
Thanks for sharing this. I’ve been 3d printing for years and been meaning to try the casting process. Just never researched the process and tools properly. Now I think I have a holiday project.