Cheap benchtop power supplies are generally regarded as pieces of junk around these parts. They can measure well enough under perfect conditions, but when you use them a little bit, they fall over. There’s proof of this in hundreds of EEVblog posts, Amazon reviews, and stories from people who have actually owned these el-cheapo power supplies.
One of the guys who has had a difficult time with these power supplies is [Richard]. He picked up a MPJA 9616PS (or Circuit Specialists CSI3003SM) for a song. It quickly broke, and that means it’s time for a repair video. [Richard] is doing this one better – he has the 3A power supply, that sells for $55. With a stupidly simple modification, he upgraded this power supply to the 5A model that usually sells for $100.
The problem with [Richard]’s broken power supply were voltage and current adjustments knobs. This cheap power supply didn’t use rotary encoders – voltage and current were controlled by a pair of 1k and 10k pots. Replacing these parts cost about $5, and [Richard]’s power supply was back up on its feet.
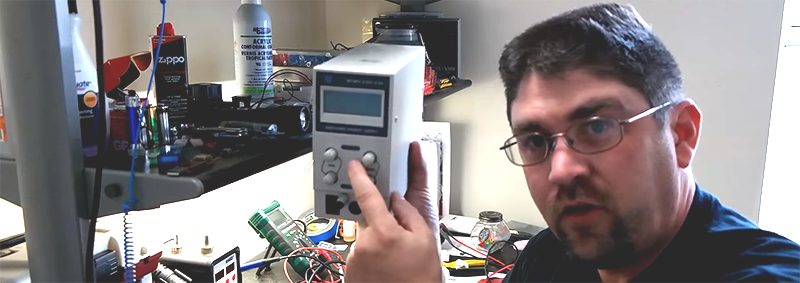
After poking around inside this power supply, [Richard] noticed two blue trim pots. These trim pots were cranked all the way to the left, and by cranking them all the way to the right, the power supply could output 5 Amps. Yes, the 3A version of this power supply was almost identical to the 5A version, with the only difference being the price. It’s a good repair to a somewhat crappy but serviceable supply, but a great mod that puts a beefier power supply on [Richard]’s desk.


The settings on two trim pots the difference – pathetic, just pathetic
He says he adjusted one trimpot from 3.33 to 5A and the other one from 30V to 25V (for finer control). So – one timpot, just one trimpot.
The 5A version seems to be be based on the same circuit but may use another switching transistor, bigger inductor, bigger heatsink etc.? Cranking the pot up to 11 and running the device for a few seconds does not mean it can handle it safely for all load situations / longer time. More testing needed.
At least a bigger heatsink?
45 bucks for 180 degrees. Ballsy.
Thanks for sharing something so useful and interesting, that many in the HAD community can actually benefit from.
I needed a bench power supply anyway…
After I so this post, I looked around on Ebay and Amazon around Europe…
All sold out with this name, but after I searched just for Bench Power supply…
Tada…
It is all over the place! I found 6 re brands until now O_o *Click* 49 Euro incl. shipping :)
Thanks HaD for such a nice solution
True hacker makes his own bench supply. I made my own based on SN1534 design from this topic:
http://www.elektroda.pl/rtvforum/topic1464016.html
Sorry for polish, but one can read schematics in any language. It’s linear, true, but it’s stable and works like a charm…
There is one minor annoyance with this power supply – the voltage regulator part around P1-US2A-T3-T2-R13/R13 will maintain constant voltage between J5 and GND, not between J5 and J6 as one would expect. So, while it may work just fine for light loads, its output voltage arcoss J5/J6 will drop, though voltage between J5 and ground will remain perfectly stable.
There are solutions for this, like having cold end of P1 and R13 on J6 potential or summing voltage from P1 with error voltage, derived from voltage drop on R5.
On the other hand, I’m using similar simple DIY power supply for many years and it is by far the most used power supply in my lab.
I’ve found this board : http://www.banggood.com/0-30V-2mA-3A-Adjustable-DC-Regulated-Power-Supply-DIY-Kit-p-958308.html
Assembled it, it seems to work fine. Now I have to add amp/volt/watt meter, banana plugs, small heatsink with fan, replace pots with 10turn ones for much more precise control, add transformer and case. In the end I think it will cost me less than the one in the article and I’ll have nice linear supply. Some parts are from junk bin (transformer and heatsink), so price drops even more.
Not everyone starts out with the skills and/or tools to do that. I assume from the way that he talks (referring to tools he doesn’t have yet) that the guy in the video is fairly new to the hobby. Having access to an inexpensive but usable power supply that he didn’t have to construct from scratch probably saved him a lot of frustration and allowed him to gain the knowledge needed to someday build his own.
Don’t put people down just because they learned the hobby in a different way than you did. We’re all in this together.
+1
I agree. Even more: he IS a true hacker. He clearly is hacking this cheap power supply.
In my opinion, true hacking would involve running the PS at 30V 5A for at least 8 hours, to test if he hacked it or whacked it. See the comment by @jimmy at the top of comments section, that’s my experience also. Cheap Chinese electronics doesn’t tend to have components overspeced by 2.5x, if they say 3A they probably mean 1.5-2A constant, not 5A. And PS whose pots fail and output cap dry doesn’t have “you can trust me” written all over it.
@Buffalo (cause Hackaday doesn’t allow nesting comments deeper)
Well that would be good engineering, not necessarily something to do with hacking.
I’ve heard it’s quite common to make just one PCB for several versions of a device. In some cases the cheaper versions are the ones that fail more stringent tests. In some cases there is no difference, they just slap on a different sticker and toggle a switch / remove a resistor / change something to make it run under maximum performance.
But I agree you can’t know for sure until you’ve tested it.
“True hackers make ” sigh….
“TRUE hackers (like me) make (projects I approve of)”
“Dude.. I have a big soldeing iron. I mean.. Like.. BIG.”
Care to share a link to the one you bought? :)
These horrible power supplies embody all of what’s bad about Chinese products. And no thanks to the likes of Circuit Specialists for helping them.
Anyone familiar with repairing 3010DS bench power supplies? I own an axio met ax-3010ds bench psu, 0-30v, 0-10a. Unfortunately the device does not start anymore, the screen backlight flickers and some click-like-noises can be heard (although afaik there are no relays in there).
If anyone is familiar with its circuit – I noticed that the 226k resistor (R21) near the TNY277PN looks very burnt.. I can however measure it and it has 226ko.. while the psu works there is a 265v drop across it. I have also checked all the diodes and they seem just fine. There are no other signs of problems, not even “browned” green solder mask…
Although it is a cheap psu, I would like to fix it and keep on using it. I am not very experienced at fixing smps, but I`ll give it a try.
I’ve got two of those, the 5A version. Exact same problem. Glad I saw your blog, I suspected the pots were causing the problems, but never bothered to replace them. I finally did so today, I also replaced the 470 uF electrolytic capacitor in both units as you suggested and bingo, both units working fine again.