2016 is the year of the consumer 3D printer. Yes, the hype over 3D printing has died down since 2012. There were too many 3D printers at Maker Faire three years ago. Nevertheless, sales of 3D printers have never been stronger, the industry is growing, and the low-end machines are getting very, very good.
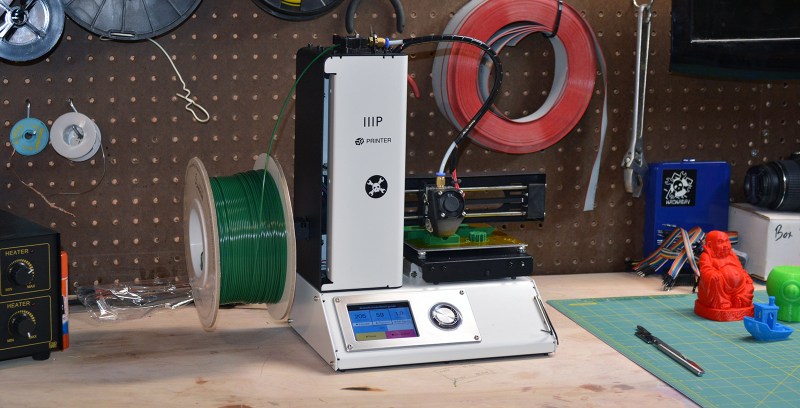
Printers are also getting cheap. At CES last January, Monoprice, the same company you buy Ethernet and HDMI cables from, introduced a line of 3D printers that would be released this year. While the $300 resin-based printer has been canned, Monoprice has released their MP Select Mini 3D printer for $200. This printer appeared on Monoprice late last month.
My curiosity was worth more than $200, so Hackaday readers get a review of the MP Select Mini 3D printer. The bottom line? There are some problems with this printer, but nothing that wouldn’t be found in printers that cost three times as much. This is a game-changing machine, and proof 2016 is the year of the entry-level consumer 3D printer.
Boring Specs
Monoprice’s MP Select Mini doesn’t require special filament, and it can use the standard Open Source 3D printing software. This is in stark contrast to the XYZPrinting da Vinci from 2014. The da Vinci uses chipped, DRMed filament, and a proprietary interface instead of standard G-code. The MP Select Mini doesn’t pull any of these tricks, and is a minor miracle for a $200 printer.
Like most of the name brand printers found at CES last January, this printer is a rebadge of something already being made somewhere in China. The most likely suspect for a manufacture is a company called Infitary. You can buy a printer nearly identical to the Monoprice MP Mini on AliExpress right now, and it doesn’t seem Monoprice added anything special to this printer.
Judging by the spec sheet, I’d guess Monoprice doesn’t even know what they have on their hands here. The real specs for this printer are actually better than what Monoprice has published. This printer is capable of a layer height much smaller than 100 microns.
Prints

Before showing off the prints the Monoprice MP Select Mini can produce, I must mention a simple fact: sample prints are not indicative of the quality of a printer. A 3D printer is just a CNC machine, and most of the work in turning an STL file into a real object is done by the slicer.
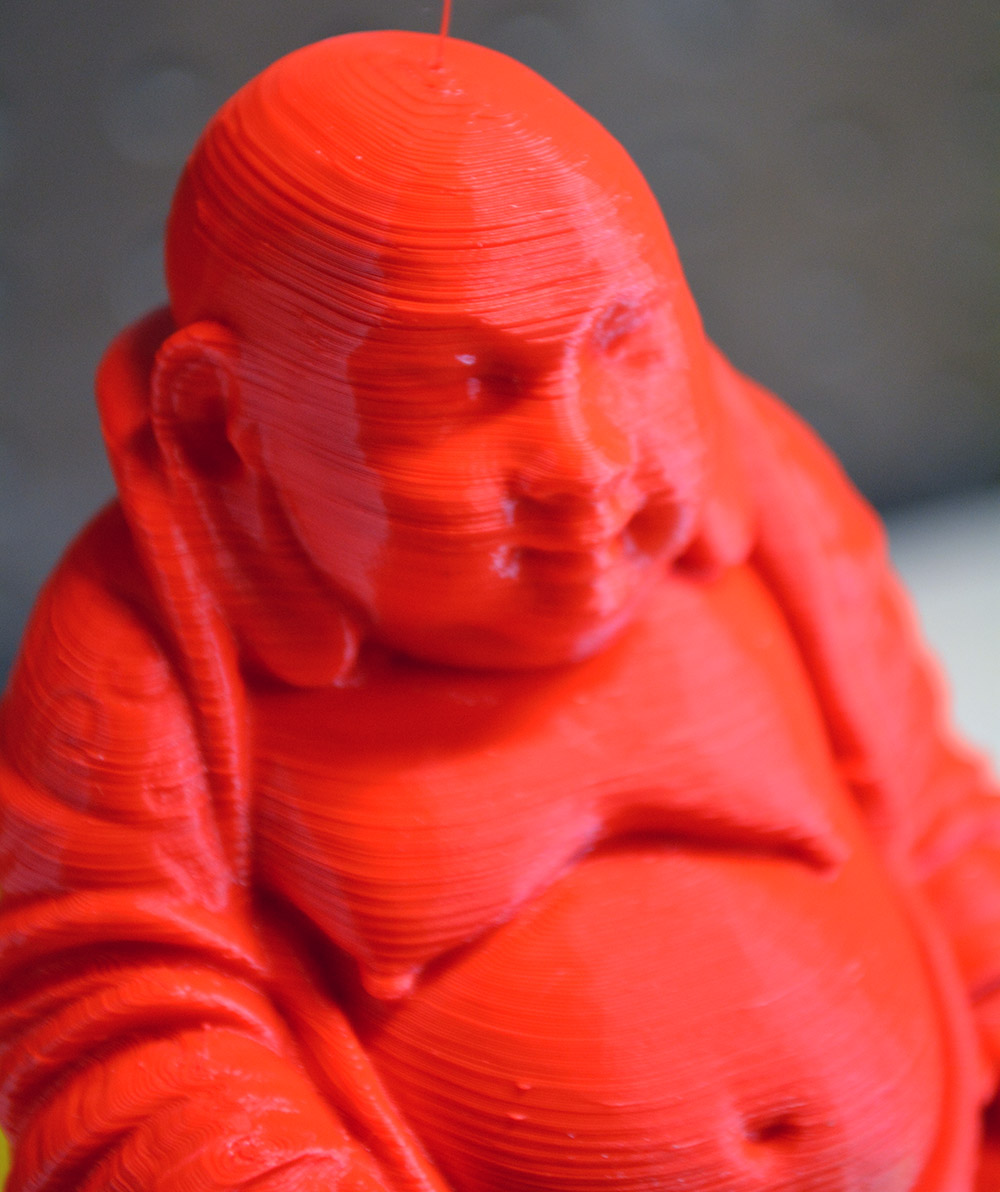
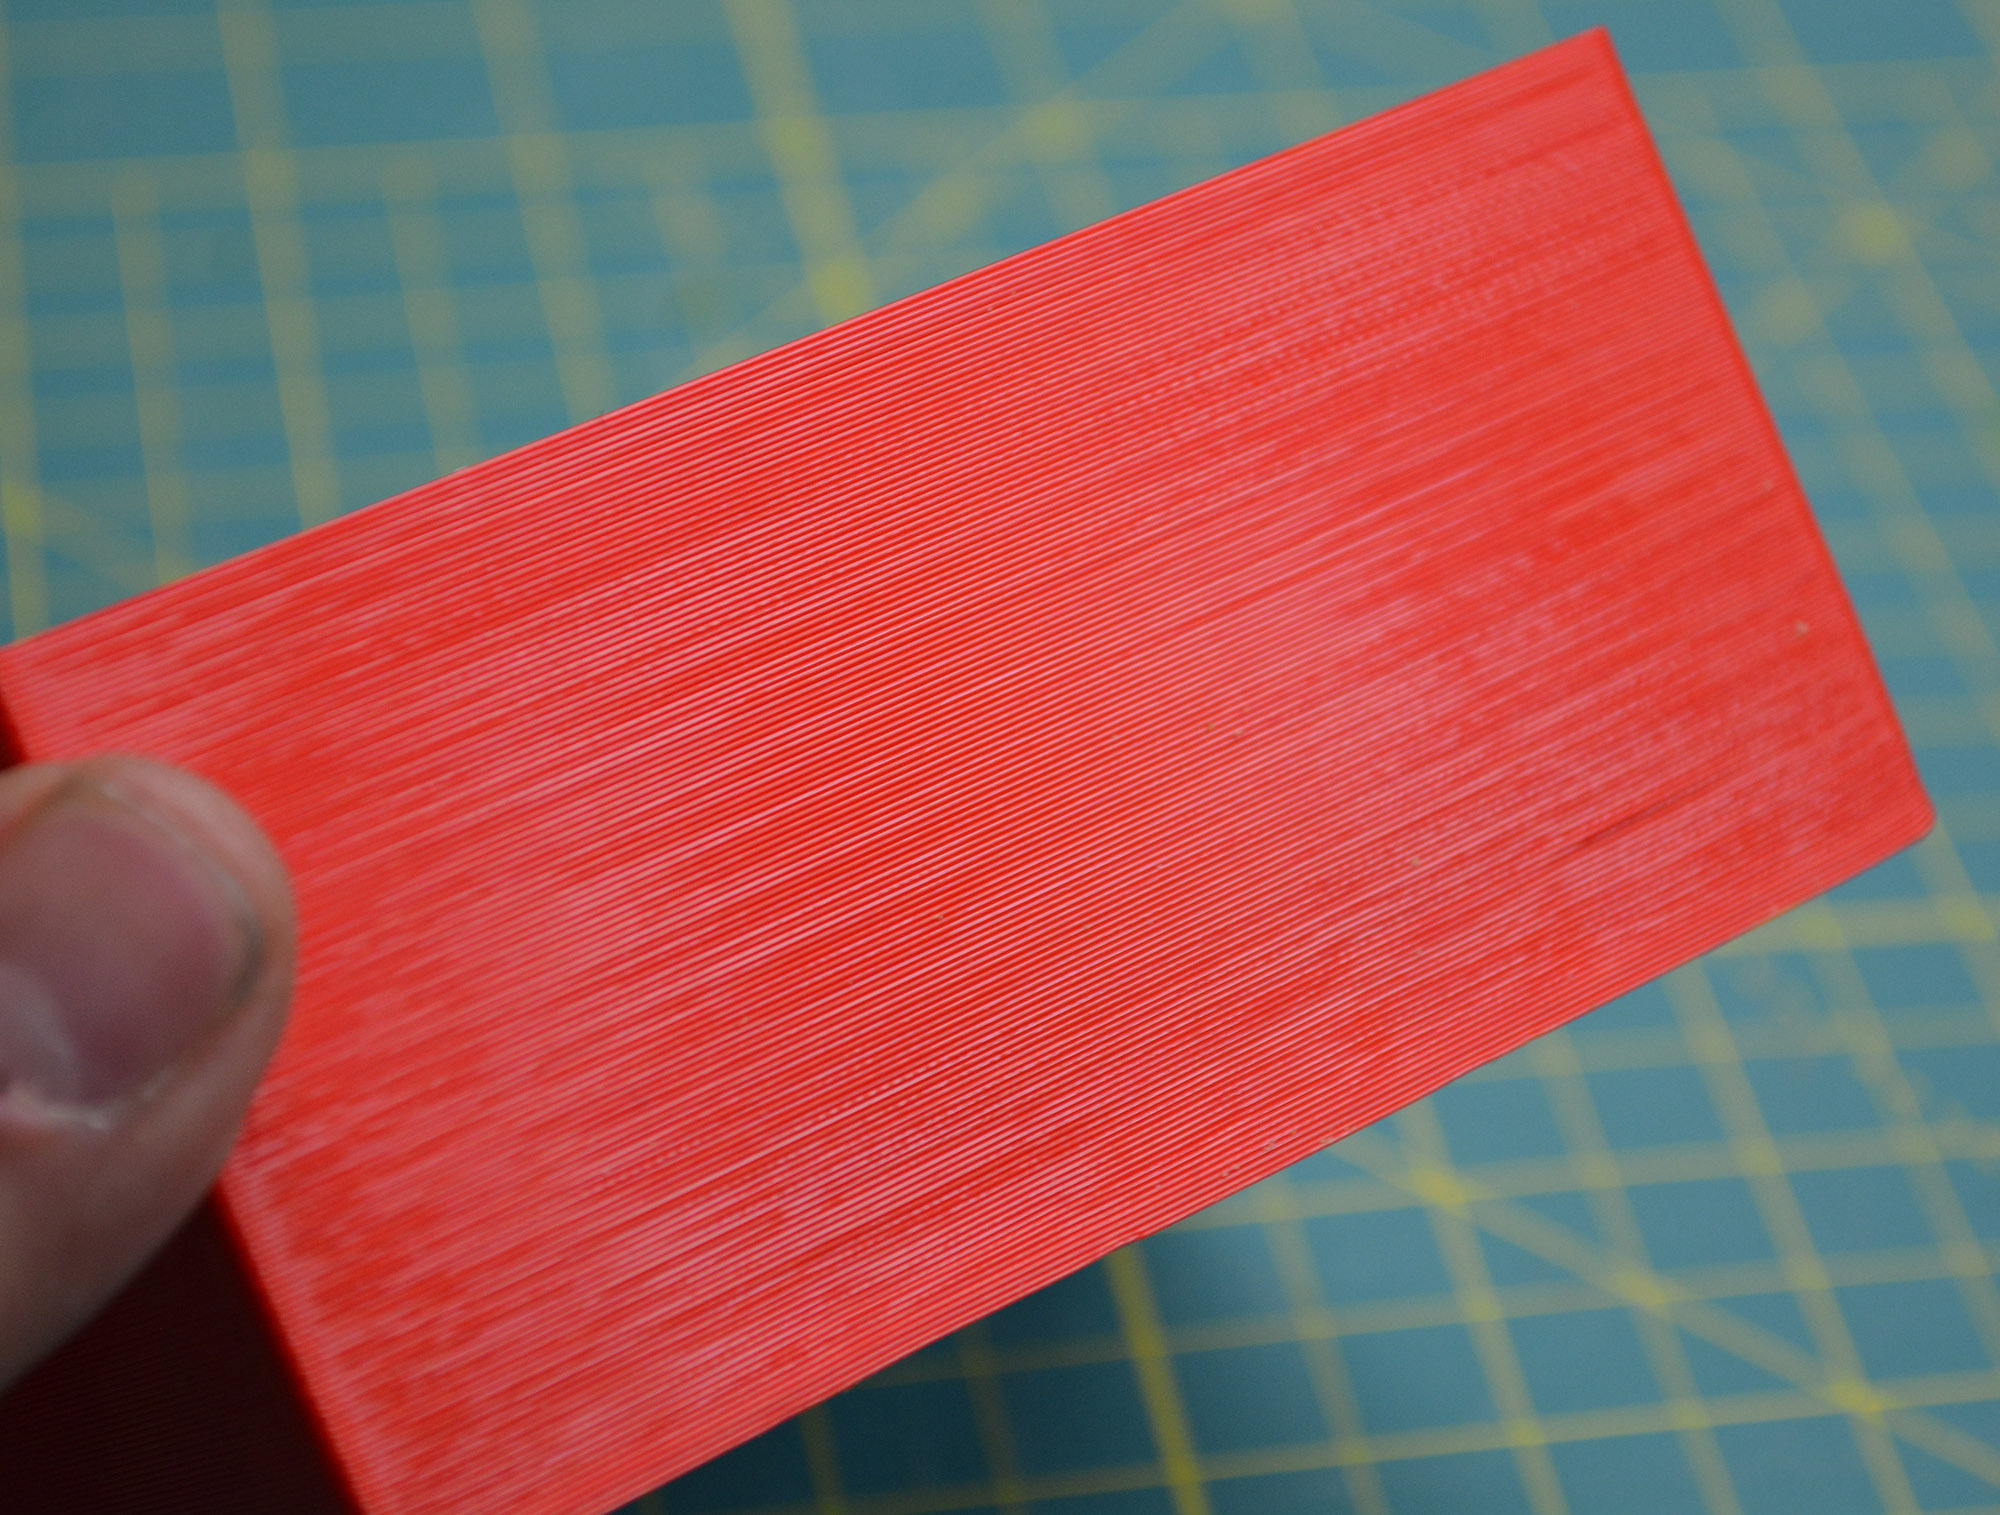
That said, there are a few things you can tell by looking at a few 3D print samples. Z axis wobble can be easily identified by looking at straight vertical walls. The ability of a printer to control the hotend temperature and use the fan can easily be seen in overhangs.
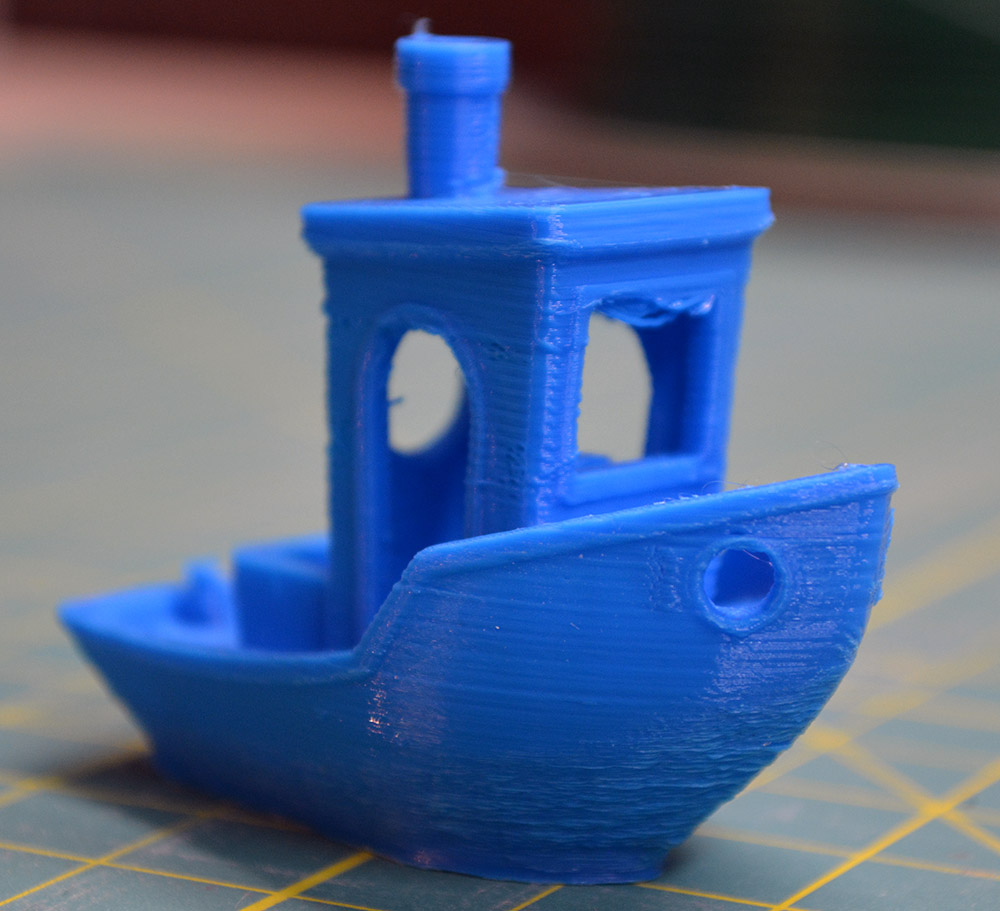
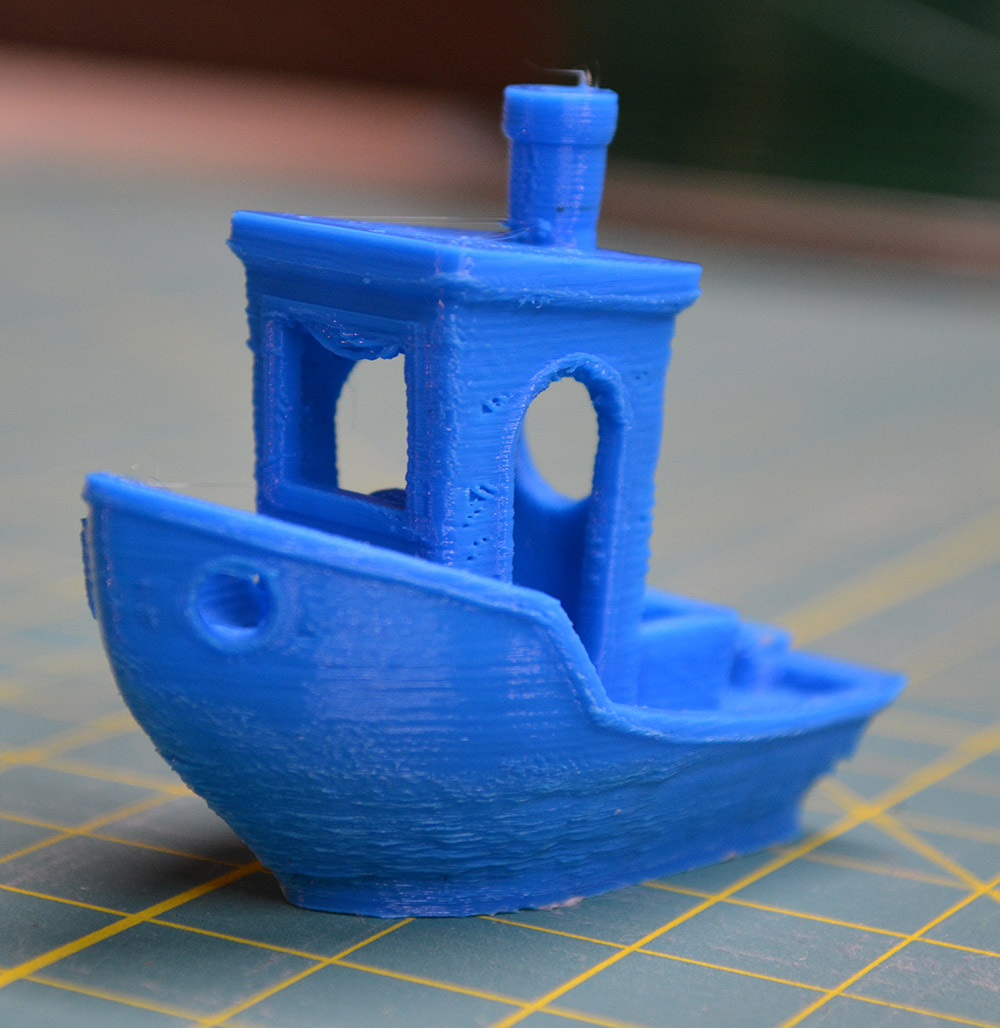
My first few prints were of Benchy, the tugboat 3D benchmarking tool. While not perfect, out of the box and with the recommended Cura settings, this printer produced a Benchy that is at least equal in quality from any other uncalibrated printer. With a little work in getting the right settings, I can see this printer producing Benchys that are at least equal to those produced by any other mid-range printer.
There is one glaring issue with the Monoprice MP Select Mini: the temperature control loop for the hotend is terrible. My printer has +/- 5 degree temperature swings over a period of several minutes, and this has been seen in other reviews of this model. The reason for this is an uncalibrated PID loop. Nearly every printer firmware has a PID autotune function that clears this problem right up. The firmware for this printer does not have a PID autotune function as far as I can tell.

Are the prints made on the MP Select Mini good? Yes, they can be. The MP Select Mini has a few problems, but none that won’t be easily fixed by the 3D printer community in a few months.
Teardown
This printer is built down to a price. The strange thing is, this fact really doesn’t show until you start taking it apart. The chassis is all metal, the X and Y axes are belt driven on 6 mm rods, the Z axis is leadscrew driven, and there’s really not much to write home about. The printer is built solidly, and I can easily foresee it standing up to a lot of abuse.


The Motors and Mechanics
The standard for all 3D printers, from the cheapest fleaBay specials to the high-end Lulzbots and Ultimakers, is stepper motors. If you have a 3D printer, chances are you own four or five NEMA 17 stepper motors. Are they the best solution? That’s arguable, but it’s the standard. The MP Select Mini bucks this trend with a circular, non-NEMA motor on the Z axis.
The Z axis is leadscrew driven with an M4 threaded rod. It’s weird, and the Z axis is tremendously slow. This, however, is a selling point Monoprice failed to mention. Because the Z axis lead screw’s thread pitch is so fine, this printer can produce objects with a very, very small layer height. [Prusa]’s calculator gives a very low theoretical minimum layer height for this setup. The minimum layer height is not 100 micron as the spec sheet says, but it can be taken as evidence Monoprice is underselling the capabilities of this printer. It does mean Z axis travel is very slow, but that really doesn’t matter.
The Electronics
Here is where the MP Mini Select shines. If you’re looking for the one game-changing feature of this printer, it’s the controller board.
Before I broke out the hex wrenches for the teardown, my only impression of the firmware and electronics came from watching the test prints being built. There was something very different about this machine: the acceleration. The acceleration ramp when travelling from one end of the bed to another is like nothing else I’ve ever seen on a 3D printer. It was smooth, precise, and almost beautiful to watch. I figured this was custom firmware. It was, but that’s only half the story.
The electronics board for this printer is a 32-bit ARM Cortex M3, a vast improvement over the 8-bit ATmegas found in almost every other 3D printer controller.


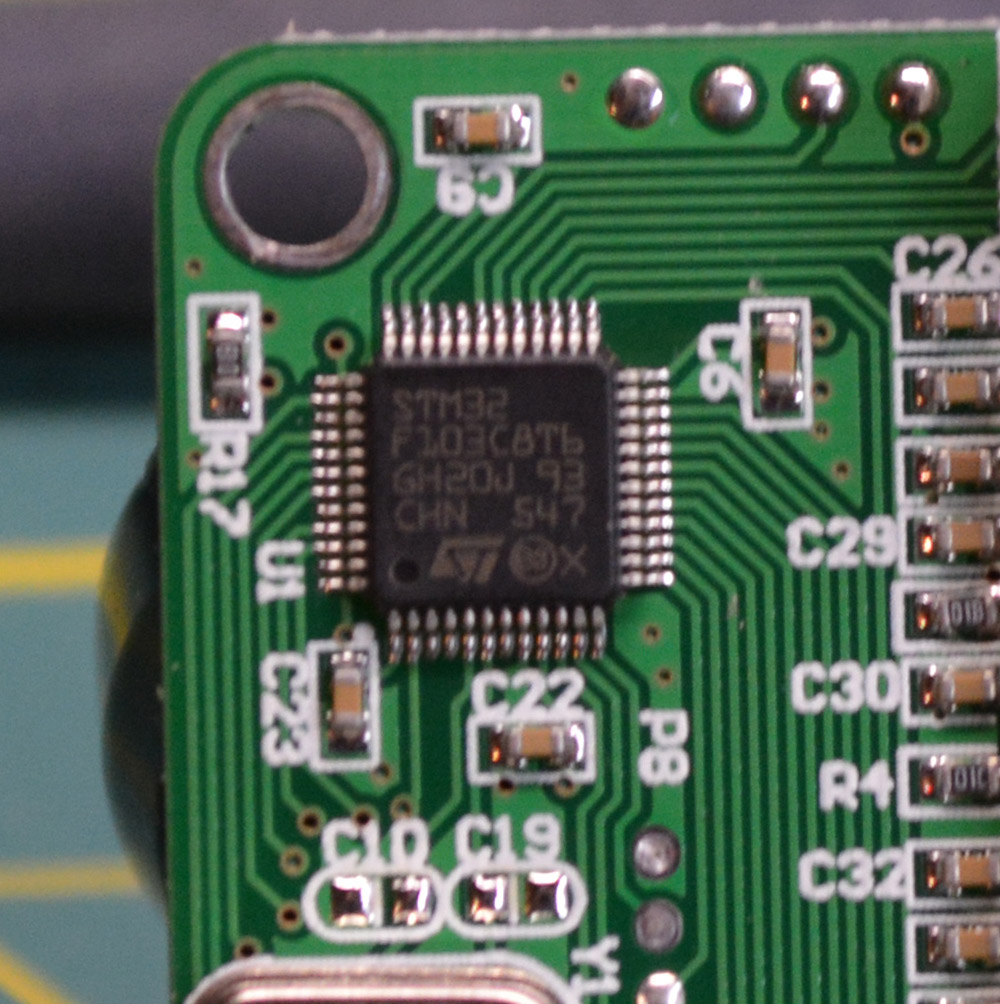
This printer is an exercise in how inexpensively you can produce a printer, and these efforts clearly show in the electronics board. There are only six chips on this board: four HH4988 motor drivers (I assume off-brand clones of the popular A4988 stepper motor drivers), a buck converter (most likely for the LCD), and the microcontroller, an STM32F103 microcontroller. Yes, 32-bit printing is finally here.
It is impossible for me to understate the importance of the ARM microcontroller in this printer. Until now, with the exception of the Smoothieboard, the vast majority of 3D printers have been built around ATMega microcontrollers. This is understandable given the historical context; the first RepRaps were developed around 2009 or thereabouts, and the Arduino was very big at the time. 3D printer controller boards were developed around these 8-bit microcontrollers, and development continues to this day.
Everybody recognizes that ARM microcontrollers are the future of 3D printer control boards. ARM micros are cheaper – the STM32F103 on this printer board is half the price of the ‘standard’ ATMega2560 or AT90USB found in every other printer controller. ARM chips are more powerful, allowing for smoother acceleration. ARM micros are just a better solution to the problem.
Despite these obvious realities, thousands of people have been working on 8-bit controller boards for the better part of a decade. There’s a lot of technical debt to pay off in the Open Source 3D printing world. This technical debt was just paid off by a random embedded dev in China. If you want to see the future of 3D printer controller boards, all you need to do is buy a $200 printer from China.
As far as the LCD and controls go, they’re exactly what you would expect. It’s a full color TFT, most likely the same model used in an old non-smartphone, with a single rotary button. I believe the LCD and button assembly connect to the printer board over SPI. The controls allow the user to load a file from the SD card, move the axes around, and set the temperature. It’s the bare minimum, but you don’t really need much more.
Heated Bed
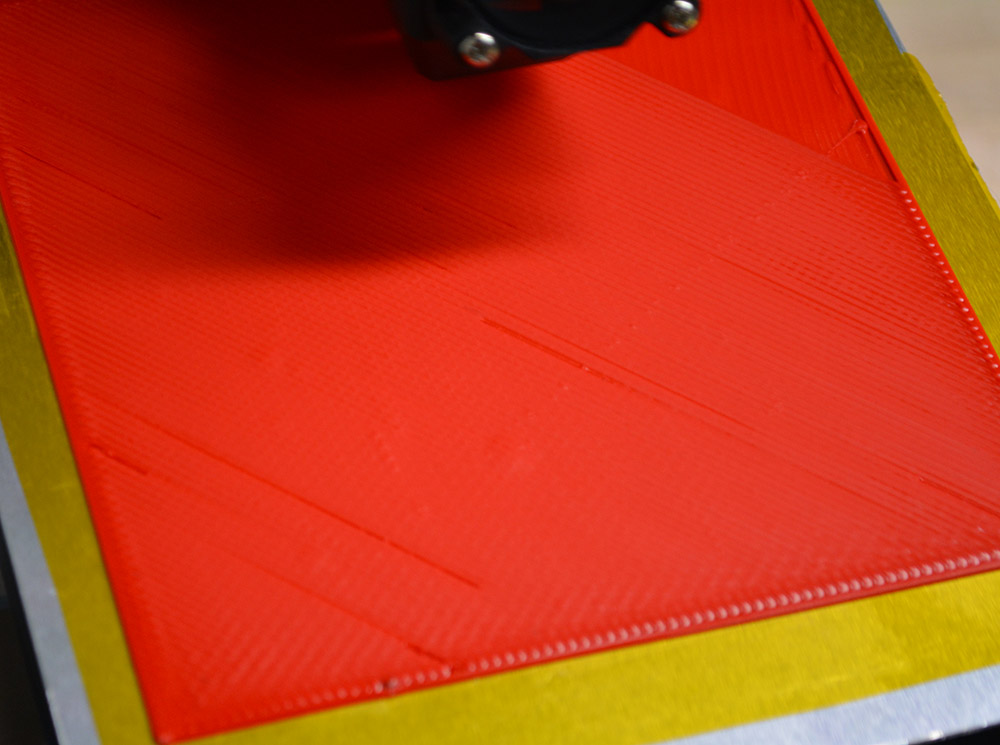
On most consumer 3D printers – those that have a heated bed, anyway – you’ll find a PCB heat bed screwed or clamped to an aluminum or glass plate. This is the standard. The MP Mini Select doesn’t have a separate build plate and PCB heater. Instead, a thin sheet of aluminum is bonded directly to a PCB heater.


While this makes for a much cheaper build – you don’t have to add an aluminum or glass sheet to the BOM, in addition to any fasteners – I am afraid it won’t be as robust as the standard separate aluminum/glass build plate and heater. That doesn’t mean it’s a bad solution, just that a bonded aluminum sheet won’t be able to take as much abuse without warping.
An innovative, low cost hotend
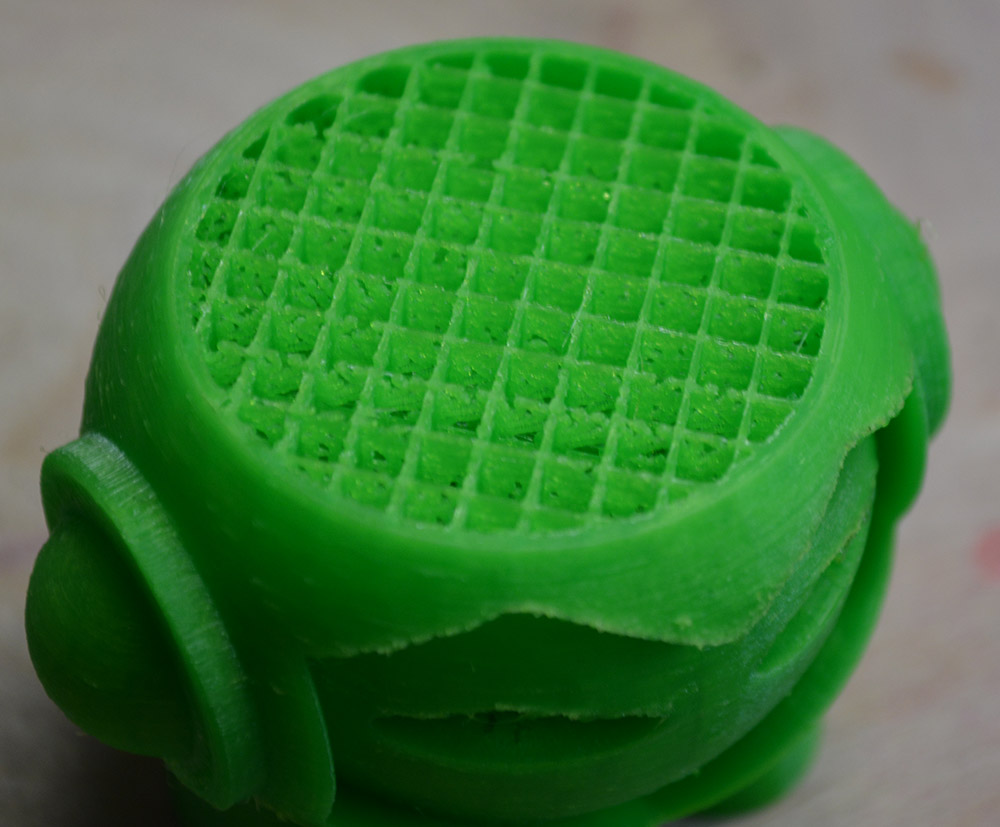
The theme of this printer is being built to a price, and nowhere is this more apparent than the hotend. To the manufacturer’s credit, this hotend does use a standard heater cartridge and replaceable thermistor. This is the future of hotends, and even though you can still buy hotends with nichrome heater cores, these are on their way out.


The hotend consists of a 0.4mm brass nozzle screwed into a heater block, and a heat break screwed onto an aluminum heatsink extrusion. This is possibly the simplest hotend in existence, but that doesn’t mean it’s skimping on features. I haven’t taken this hotend apart yet, but I suspect it is an all metal hotend. There’s simply no space in the heat break for a PTFE liner. That’s amazing for what is apparently the cheapest hotend you can buy and allows the MP Select Mini to print in exotic plastics.
I would not recommend printing in exotic plastics, though. There is one feature desperately missing from this hotend: a second fan to cool plastic squirting out of the nozzle. The MP Mini uses a single 20mm fan to blow air over both the hotend heat sink and right on to the molten plastic coming out of the nozzle. This is a bad design, and combined with the poor temperature control in the firmware, results in poor bridging capabilities for this printer.
These Are The Upgrades You’ll Want
Every 3D printer needs upgrades. Some, like the Lulzbot Taz 6, come with just about everything you could want, but ideally you’ll still want to stick a Raspberry Pi in there for headless, networked printing capabilities. Cheap eBay kits? You’ll want a better build plate, a new extruder, and maybe a better hotend. The MP Mini is fairly well equipped, but there are a few extras you’ll want.
A New Build Surface
As mentioned above, the one-piece heated bed for this printer is one of the most interesting designs I’ve ever seen. The print surface that comes with the MP Mini, though, is just a large sheet of masking tape. This will last you a few prints, but after that you’ll want something better.
For this review, I used a 6″ wide strip of Kapton and glue stick, but the current ‘best material for a build plate’ is a sheet of PEI or Ultem mounted to the build plate with a sheet of 3M 468MP adhesive transfer tape. You can get a 12″ x 12″ PEI sheet from Amazon for $16, and a 12″ x 12″ square of 468MP Transfer Tape for $17. That’s four PEI build surfaces for the MP Select for $37, and will be an amazing maintenance free build surface for PLA, ABS, and (reportedly) PET.
A Raspberry Pi / Octoprint Setup
There are reports the MP Mini is loud. Mine isn’t, but apparently results may vary. In any event, you’ll want to install your printer somewhere out of the way – a workshop, garage, or basement – and let it do its thing for several hours at a time.
While you can print from an SD card (and I have exclusively), that still means that you need to sneakernet files between a computer and the printer. Octoprint removes the need for this sneakernet, and allows for remote control of a printer over a network. If you plan on using this printer for more than just the occasional trinket, an Octoprint setup will be a huge benefit. The instructions are available on OctoPrint.org. You’ll want the Raspberry Pi that has been gathering dust for several years, a USB WiFi adapter, SD card, and a USB power supply.
A Hotend Adapter
Every hotend will die. Hotends are consumables. They last a while, though, and even after 100 hours of printing, there’s nothing to tell me the hotend on the MP Mini won’t last as long as any other hotend.
Unfortunately, there’s no source for direct replacements. If you want to replace the hotend on this printer, you’ll have to shell out another $200 for a new printer. Spending $200 on a new hotend is crazy, and any company that forces that on consumers will quickly go out of business.
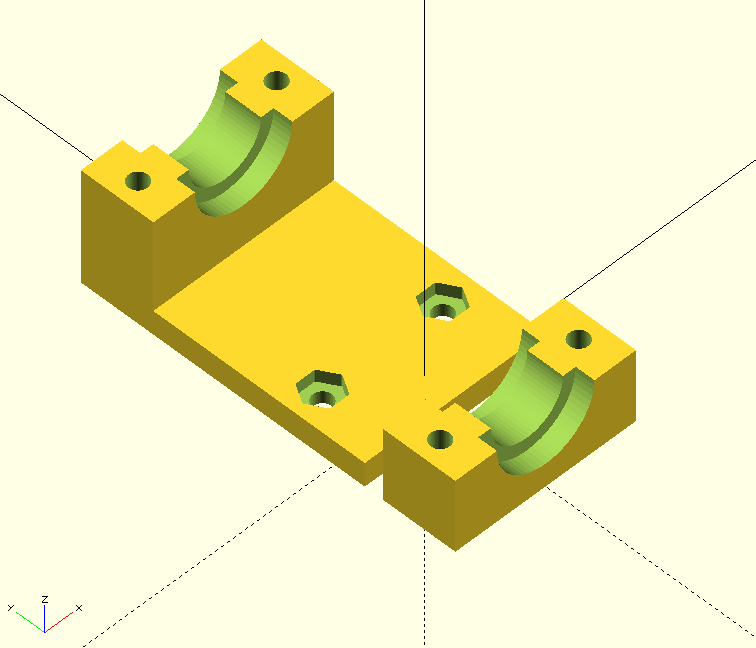
If you buy this printer, this should be the first thing you print. I whipped up an adapter in OpenSCAD that puts an E3D hotend on the MP Mini printer. It bolts directly onto the X carriage. Is it perfect? No, but if you print this adapter out, you’ll be able to print a better adapter out with your new hotend. Just print that and tape it to the back of your printer. You’ll thank me later.
Should You Buy This Printer?
There are problems with this printer. It is a closed source design, and replacement parts are impossible to find. The firmware doesn’t have handy features like Marlin’s autotuned PID values. The fan design for the hotend needs work. This printer uses a Bowden setup, so flexible filaments – Ninjaflex and Semiflex – are unusable. Trust me, I tried.
Printer Comparison
The Monoprice MP Select Mini is, by any account, a My First 3D Printer™, so let’s compare apples to apples. The class of printers that can be called a My First 3D Printer™ aren’t the Lulzbots, Ultimakers, or other machines that cost $1500 and up. ‘Beginner’ 3D printers are better defined by the SeeMeCNC Eris, the Printrbot Play and Metal Simple, the Deezmaker Bukito, the Maker’s Toolworks MiniMax, the da Vinci printer, and [Prusa]’s i3 Mk2.
The Monoprice MP Select Mini stands out in its price range. This machine is only $200, and you’re getting features you won’t find in a $600 Printrbot. This is a game-changing machine, and I would recommend this to anyone looking for their first 3D printer. Thanks to Monoprice, the entire market for entry-level consumer 3D printers has been upended. $200 is almost impulse purchase territory, and Monoprice is going to sell a lot of these machines.
Now we have some work to do
When the da Vinci printer was released two years ago, an immense amount of effort went into reverse engineering the chipped filament and reprogramming the control board to speak normal G-code. Now the same work must be done on this printer.
The control board for this printer must be reverse engineered and duplicated. The first person to do that will lay the foundation for the next generation of RepRap control electronics. I would highly recommend putting the reverse engineering efforts on Hackaday.io. Perhaps more importantly, a proper, Open Source 3D printer firmware must be ported to this printer. Right now, many of the shortcomings of this printer can be fixed through a firmware update. With open, improvable firmware, combined with its decent hardware, it could be outstanding.
Even without a rewrite of the Marlin firmware and a clone of this electronics board, it’s still a fantastic printer. It’s not perfect, but it’s good enough for the thousands of people who will end up with one of these on their workbenches.


Ive been through all of the previous “disabled comments”” Hackaday Peroids. Its time for another one, All I see as of late in comments anymore is trolls.
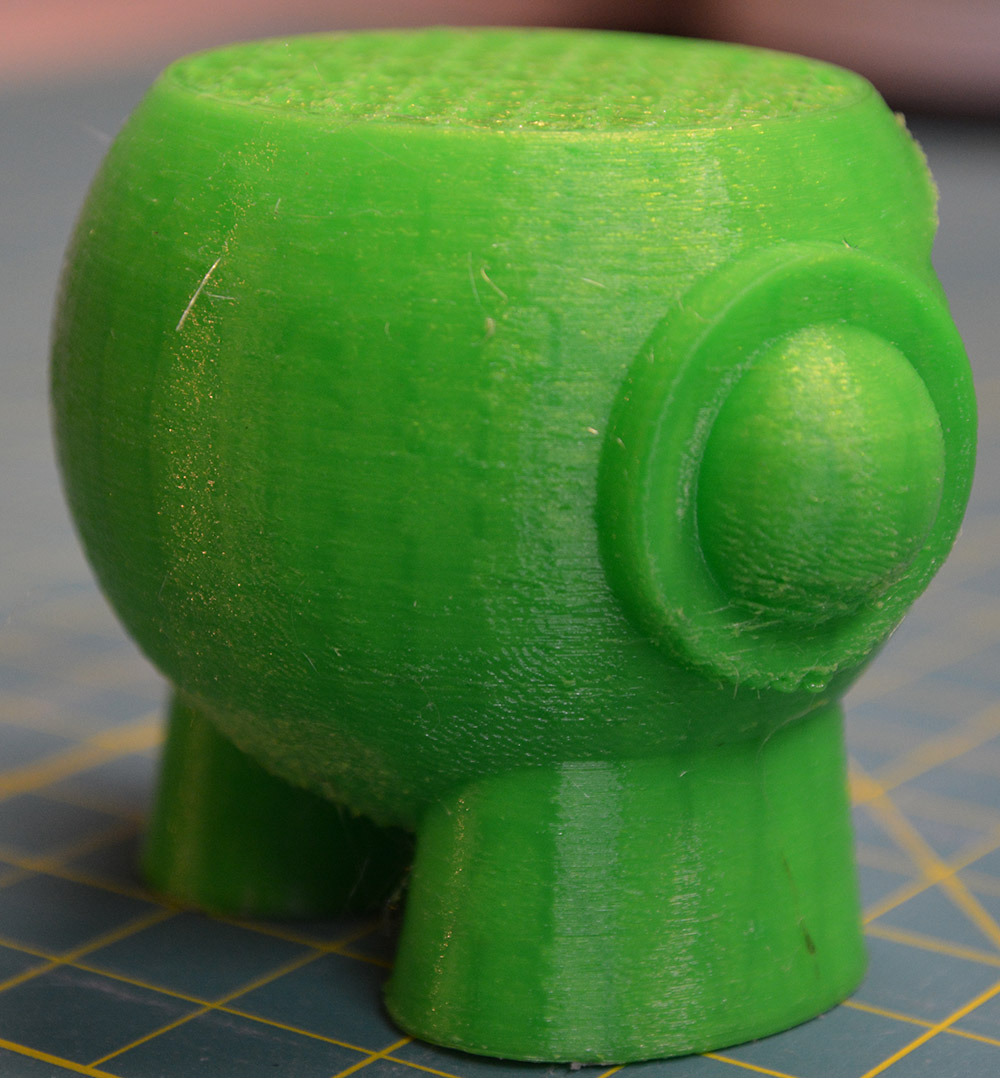
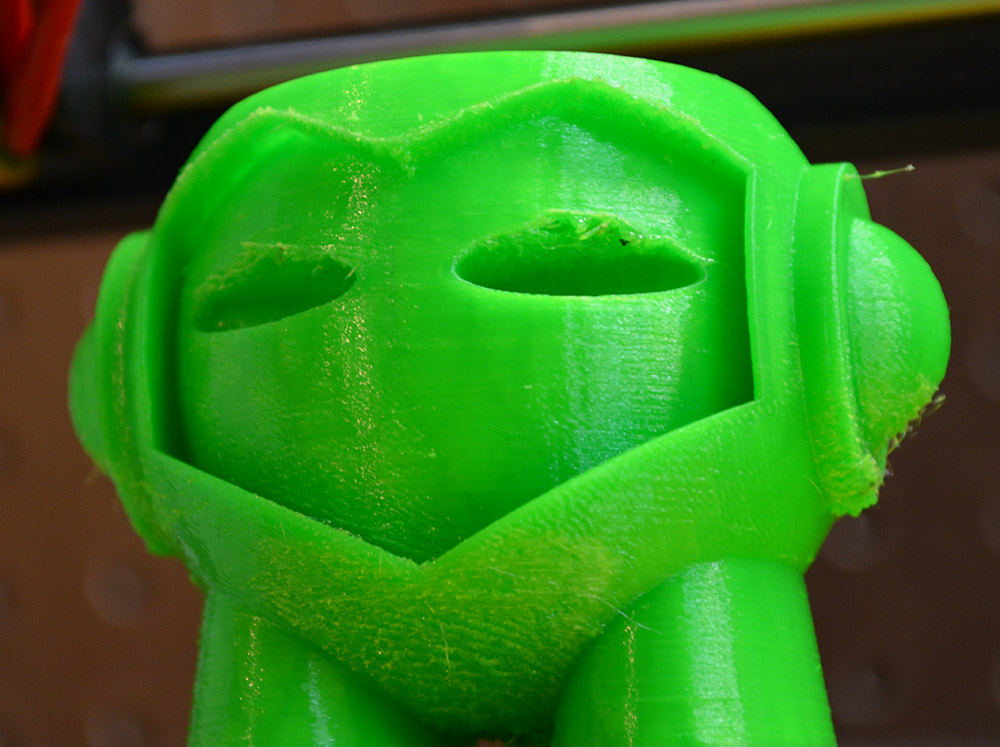
He’s not Buddha! That is Budai, who is the chinese god of luck (old mythology)
https://en.wikipedia.org/wiki/Budai
Whoever wrote this article is just simply an idiot when it comes to 3D priting and should stick to actually something they know.
Why? What is it that is wrong? I’m looking to print small miniatures for my slot car track because they are ultra expensive to buy. Would this work for those items like people, accessories like garage equipment and the like? This is an old Hackaday article so I’m wondering if this little printer would be a good fit for what I want to do. Please elaborate on why he’s an idiot. Thanks
https://www.facebook.com/groups/1717306548519045/ is a closed group. Congratulations.
Here’s a reverse engineering effort: https://hackaday.com/2017/06/20/reverse-engineering-the-monoprice-printer/
Great review, Thanks
ok, thank you very much, i like it