[Quinn Dunki] has brought yet another wayward import tool into her garage. This one, all covered in cosmoline and radiating formaldehyde fumes, is a horizontal bandsaw.
Now, many of us have all have some experience with this particular model of horizontal saw. It waits for us at our work’s machine shop, daring us to rely on it during crunch time. It lingers in the corner of our hackerspace’s metalworking area, permanently stuck in the vertical position; at least until someone finally removes that stripped screw. Either that or it’s been cannibalized for its motor, the castings moldering in a corner of the boneyard.
This article follows on the heels of [Quinn]’s other work, a treatise on the calibration of a drill press, and it outlines all the steps one has to take to bring one of these misunderstood tools into consistent and reliable operation. It starts with cultivating a healthy distrust of the factory’s assurances that this device is, “calibrated,” and needs, “no further attention.” It is not, and it does. Guides have to be percussively maintained out of the blade’s way. Screws have to be loosened and adjusted. It takes some effort to get the machine running right and compromises will have to be made.
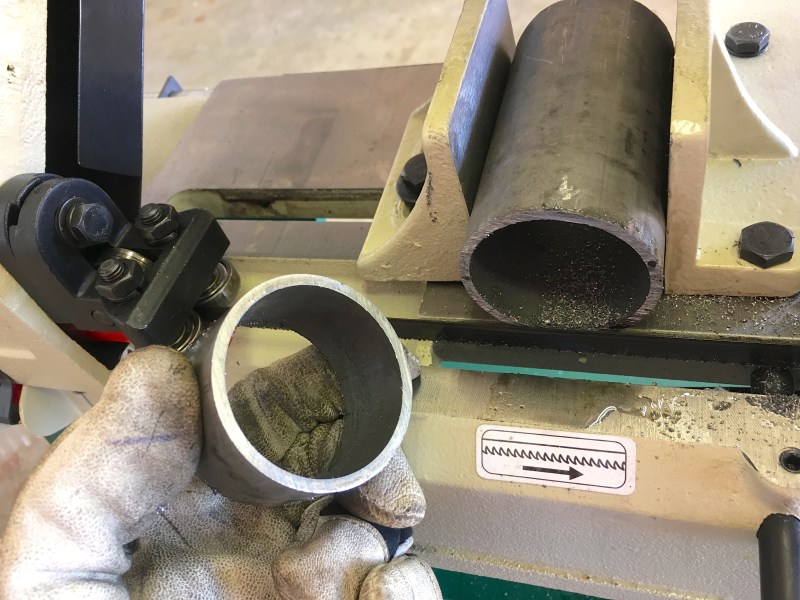
In the end though, with a high quality blade on, the machine performs quite well. Producing clean and quality cuts in a variety of materials. A welcome addition to the shop.


Average automated bandsaw: The error codes are just numbers that must be refrenced in the manual.
The manual doesn’t really help…
The blade assembly has to go all the way up in automatic mode with every cycle! :/
I bought the harbor freight version of this saw (same castings) in 2012 and love the thing. There are some good videos on youtube on how to dial it in and also ways to customize it. It’s the most used tool in my shop. Tightening the blade is kind of like tuning a guitar Once you have a tension that works out for you, pluck the blade (back side) and remember the tone. Also, you’ll want to release the tension of the blade between uses. Once I started doing that, my blades lasted much longer.
ditto, our HF version is a workhorse, switched the stock blade to a Bosch BS6412-24M and its been great for slicing 6061 a
The flutter method of tensioning is what most blade & saw makers recommend. Set the guides fully back & remove any zero clearance plates (upright saws only), set the tension at the appropriate stop on the dial (if applicable) the turn it on, loosen until the blade flutters then slowly tension until it stops fluttering then go an extra turn.
As mentioned above release tension after use, a set number of turns every time, if your saw doesn’t have a quick release, helps save time.
For metal saws it is different, on these little saws it is almost impossible to get the right amount of tension since the spec for a blade of this size is so high. Tightening it tight as you possibly can is still not even close to reaching the specified tension.
Less to do w. the intended material & more to do with the diameter of the drive wheel. For ~<8" saws you're absolutely right. I wonder if that's a limitation of the frame or the wheels.
Its actually based on the blade width and thickness. There are blade tensiometers that attach to the blade. Someone stuck one of these on a blade of these little saws and tried to get it to the recommended tension for a 1/2x.030 blade and it was pretty much impossible to get it tight enough with that little tensioning knob that is stock. I have seen where people have replaced the tensioner with a star handle to make life easier.
I love my 4×6 bandsaw, it has saved me a huge amount of time and effort. It is not a bad idea to open and check the gearbox. If there are any metal shavings, drain, wipe clean, and refill with the proper lubricant.
What is the proper lubricant?
140W Mineral Gear oil. http://www.mscdirect.com/product/details/93057545
Unless you can get 133.7 W of course.
or 1.21GW Oil
Anybody whose browser/device cuts the title off at “rizontal Bandsaw” is going to be disappointed when they click. :-D
I should bookmark this, got a “barely even a bandsaw really” type of tool imposter that I should smack around a bit with a 5lb calibration tool and use.
Lenox Diemaster II blades are the best. I have cut through all sorts of stuff with them, Starrett does just not hold up. Rule of thumb is you want three teeth in the material at all time. If you have less you need a finer blade otherwise you will loose teeth.
Keep the rear blade guide as close to the work as possible. You need this to keep the blade supported and cutting straight.
If the bandsaw has a brass/bronze drive gear you need to use “mineral” gear oil. Normal gear oil is not compatible with brass. It can make it wear out sooner.
I use a 14″ TCT cutting disk (120 tooth @ 3800 RPM) with a drop saw for aluminium and the same saw with abrasive disks for ferric metals. So, so much faster than this setup and leaves a nice smooth finish that I don’t even need to finish off with a file.
The poor choice with my setup is that the saw doesn’t have a break which is important with a TCT blade so I have hold it in the down position after a cut until is stops. That’s the next hack!
Tungsten Carbide-Tipped; for a minute I thought TCT was a brand!
Please be careful cutting aluminum with a chopsaw. Bad things can happen. Make sure the work is clamped tight and cut very very slowly.
I strongly recommend if the work is small to cut it with the slowsaw (horizontal bandsaw) rather than taking a chance of launching the piece out of the chopsaw.
I only cut extruded aluminium with the TCT blade so it cuts through like butter. About 1 second for the cut and 15 seconds for the spin down. It could cut much faster but there is no need. The blade size (14″), speed (3800 RPM) and number of teeth (120) mean that it’s cutting ability is far greater than what I am using it for. The base has a built in vice and I stand to one side so that I am not aligned with the blade I anyway. It’s still scary though. The whole thing leaps into the air a bit when it starts so I partially depress it before hitting the start.
I cut aluminum a lot with the chopsaw and the table saw and it can be done safely, but I have one very large hole punched in the wall behind the chopsaw from the day it all went wrong.
I never cut a piece where my fingers are closer than, say 6″ from the blade. If I have to cut a piece smaller I either do it on the slowsaw or I use a fixture. And when I fixture it like you I stand a long ways away from the saw.
One trick is you can cut on the slowsaw and then very carefully use the chopsaw to clean up the end.
I have one of these I bought from ENCO ~ 20years ago. The HF version looks as if it used an ENCO for the pattern (i.e. slightly smaller). The original blade guides were horrible so I fitted a gib to remove the slop (hacksaw, file and hand scraping!), trued up the blade angle and made a replacement from CRS for the wheel carrier. With the slop removed, it cuts absolutely true and can easily make uniform cuts where the drop is the thickness of a dime. I’ve made washers that way after drilling the center hole on the lathe. The handscraping took a lot of time, but was a useful education and the result more than made up for it. Of course, now I’d use my mill, but I didn’t have that then. The handwork I did made a huge difference in the saw performance.
I tighten the blade by ear and loosen it after use. I use bimetal blades. The one on the saw now has been on it a very long time. It’s missing a tooth from when I ran it too close to a weld in mild steel, but it just makes a “clunk” and keeps going. When cutting thin material like EMT, I just hold the arm while it cuts the thin section and let go when there are more teeth engaged.
If you need to cut weld metal, use an abrasive saw. In all fairness I did watch a welding class instructor section a weld with an ordinary chop saw using a carbide woodcutting blade. That was their standard procedure for checking for inclusions. Gave me the willies though, so I stood far away lest a tooth come out of the blade. I wish I’d calculated the cutting speed of the teeth, but I was so freaked out when he did it I didn’t think about it until later.
That $299 Grizzly G0622 looks physically identical to the $259 Harbor Freight 93762:
http://www.harborfreight.com/horizontal-vertical-metal-cutting-bandsaw-93762.html
The castings are made by the same company.
A lot of Grizzly stuff is basically the same as HF, just (supposedly) selected to higher quality control standards.
It’s not. I applied for a job there and heard some stories. They apply the hardware equivalent of a hot bug fix to whatever is wrong with the shipment from the last lowest bidder and push it out the door. I’ve found harbor frights stuff to be a bit more trustworthy.
AKA better marketing.
My 4×6 (Princess Auto version in Canada) is great, but I simply threw out the stock blade guides and machined myself a new set. Learn from my mistake: don’t completely dismantle the saw until you’ve cut the stock to make the new guides. Having to use a hacksaw to cut stock while your bandsaw just sits there helpless makes one feel rather silly…
More bandsaw hacks, you won’t believe #3!! http://www.mini-lathe.com/Bandsaw/Bandsaw.htm