The Precision Upon Which Civilizations Are Built

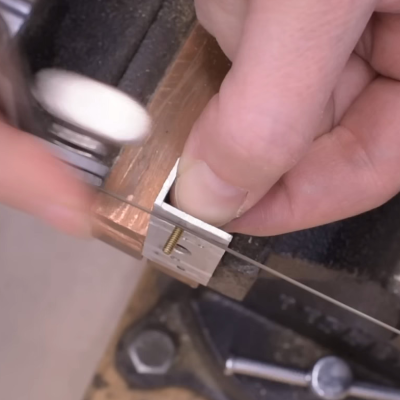
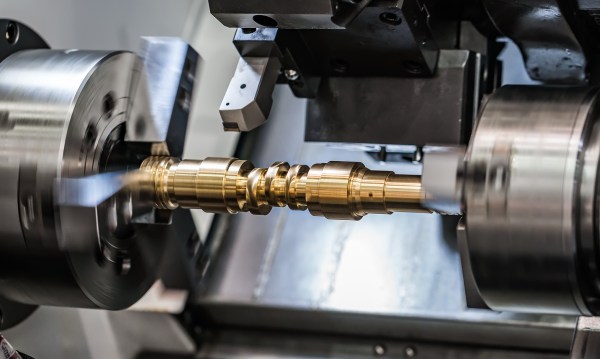
If you’re interested in making things (particularly metal things), you’re on a road that eventually leads to machine tools. Machine tools have a special place in history, because they are basically the difference between subsistence farming and modern civilization. A bold statement, I realize — but the ability to make very precise things is what gave us the industrial revolution, and everything that snowballed afterward. If you want to build a modern life filled with jet airplanes and inexpensive chocolate, start here.

Precision is more than just a desirable property. It’s a product. It has value, there is competition to create it, and our ability to create it as a species has improved over time. When your “precision product” is in the centimeter range, congratulations — you can make catapults and portcullises. Once you get into the millimeter range, guess what? You can make fine millwork in fancy houses, and indoor plumbing. Once you get sub-millimeter, now things get really interesting. It’s time for steam engines and automobiles. Once you get into the micrometer range, well, now we’re talking artificial heart valves and spaceships. Much like materials science, the ability to create precision is the unsung foundation and driving force of our standard of living.

Okay, so assuming I’ve sold you on the value of this product called “precision”, how do we make it? Machine tools are how humans currently get there, despite the dreams of the 3D printer crowd. Yes, drizzled plastic is great and the future is bright, but for right now, subtractive manufacturing is where it’s at when something has to be perfect.

Continue reading “The Precision Upon Which Civilizations Are Built”

New Wisdom On Old Practices

Getting into machining is hard. From high-speed seel versus carbide to “old US iron” versus “new Asian manufacture” to simply choosing which drill bits to buy, many hard decisions must be made before one even has a chance to gain experience. Fear not, [Quinn Dunki] has created “a roadmap for how to get involved in this hobby.

We saw [Quinn’s] first entry in her lathe series back in January, and now the series is complete! Starting with the definition of a machine tool and ending with the famous Clickspring scriber and a multi-material pen, [Quinn] leaves no stone unturned. [Quinn’s] style contrasts with the likes of [ThisOldTony], [AvE] or [Clickspring], as she makes sure to include the gory details of everything, citing her dissatisfaction with most YouTube machinists as motivation:

they’re all about the money shots of chips flying, but thin on the actual work of machining, which is mostly work-holding setups, changing bits and dies around, etc. That’s where all the knowledge is. The machine does the work once you spend 20 minutes setting it up properly for the operation. Everyone skips that part. I scour Tubalcain videos for details like the angle of the compound for a facing operation, or how to drill a deep hole with a short tail stock without the carriage getting in the way. Simple things like that get glossed over, but stump a beginner.

Of the series, our favorite part was “Grinding tool bits.” When combined with [ThisOldTony’s] Grinding HSS Tools, the two form an education in high-speed steel tool grinding fit for a hacker. Need more than high-speed steel? We’ve got you covered.

How To Have An Above Average Time With A Cheap Horizontal Bandsaw

[Quinn Dunki] has brought yet another wayward import tool into her garage. This one, all covered in cosmoline and radiating formaldehyde fumes, is a horizontal bandsaw.

Now, many of us have all have some experience with this particular model of horizontal saw. It waits for us at our work’s machine shop, daring us to rely on it during crunch time. It lingers in the corner of our hackerspace’s metalworking area, permanently stuck in the vertical position; at least until someone finally removes that stripped screw. Either that or it’s been cannibalized for its motor, the castings moldering in a corner of the boneyard.

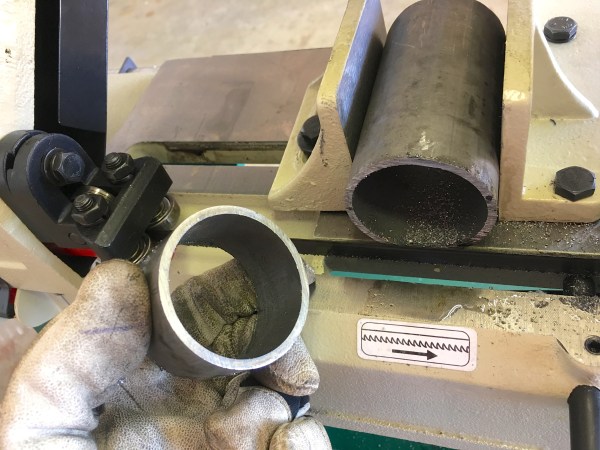
This article follows on the heels of [Quinn]’s other work, a treatise on the calibration of a drill press, and it outlines all the steps one has to take to bring one of these misunderstood tools into consistent and reliable operation. It starts with cultivating a healthy distrust of the factory’s assurances that this device is, “calibrated,” and needs, “no further attention.” It is not, and it does. Guides have to be percussively maintained out of the blade’s way. Screws have to be loosened and adjusted. It takes some effort to get the machine running right and compromises will have to be made.

In the end though, with a high quality blade on, the machine performs quite well. Producing clean and quality cuts in a variety of materials. A welcome addition to the shop.

Likely Everything You Need To Know Before Adopting A Drill Press

Oh sure, the thought of owning a happy whirring drill press of your very own is exciting, but have you really thought about it? It’s a big responsibility to welcome any tool into the home, even seemingly simple ones like a drill press. Lubricants, spindle runout, chuck mounts, tramming, and more [Quinn Dunki], of no small fame, helps us understand what it needs for happy intergration into its new workshop.

[Quin] covers her own drill press adventure from the first moments it was borne into her garage from the back of a truck to its final installation. She chose one of the affordable models from Grizzly, a Washington based company that does minimal cursory quality control on import machinery before passing on the cost to the consumer.

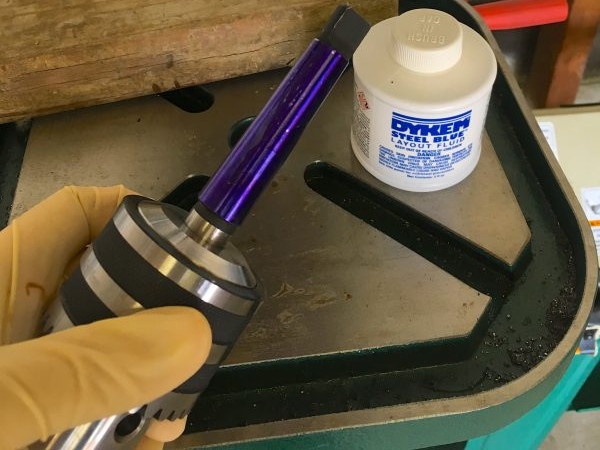
The first step after inspection and unpacking was to remove all the mysterious lubricants and protectants from the mill and replace them with quality alternatives. After the press is set-up she covers some problems that may be experience and their workarounds. For example, the Morse taper on the chuck had a few rough spots resulting in an incomplete fit. The chuck would work itself loose during heavier drilling operations. She works through the discovery and repair of this defect.

Full of useful tips like tramming the drill press and recommended maintenance, this is one of the best guides on this workshop staple that we’ve read.


Hackaday 10th Anniversary: Quinn Dunki And Veronica

In case you haven’t been reading Hackaday for the last few weeks, we just had an amazing 10th anniversary party in Pasadena this weekend, full of workshops, talks, and a party that reportedly went until four in the morning. One of the amazing hackers we invited to give a talk was [Quinn Dunki], creator of Veronica, the modern 6502 computer stuffed inside an old radio.

We first saw Veronica a few years ago, but [Quinn] figures she’s been building her computer for about five years now. She’s a software developer by trade that decided one day to dip her toes into the murky seas of hardware development and build a computer from the ground up. She chose the 6502 as the brains of her contraption, laid out everything on single-sided boards etched in a kitchen, and connected everything with a backplane. Right now it has a USB keyboard, (technically a PS/2 keyboard with a USB plug), NES controllers, a VGA display, and a monitor and Pong in ROM. [Quinn]’s goal was to build a computer that could program itself, and after five years, she’s accomplished that goal.

[Quinn] admits her software background was responsible for a few of her admittedly bad design choices; the VGA is generated by an ATMega microcontroller, working under the theory that if she could clock the micro fast enough, she could do VGA. She now believes an FPGA would have been a better choice for video output, but now that the video circuit is done, she probably won’t revisit that problem.

There is one thing missing from Veronica, and something that [Quinn] will be working on in the future: mass storage. Right now every program Veronica can run is either stored in ROM or entered via the keyboard. A hard drive is the next problem to solve, either with an SD card, or a Compact Flash or IDE hard drive.

Testing The Limits Of Home PCB Etching

[Quinn Dunki]’s Veronica, a homebrew computer based on the 6502 CPU, is coming along quite nicely. She’s just finished the input board that gives Veronica inputs for a keyboard and two old Nintendo gamepads. [Quinn] is building this computer all by her lonesome, including etching all the PCBs. She’s gotten very, very good at etching her own boards, but this input board did inspire a few facepalming moments.

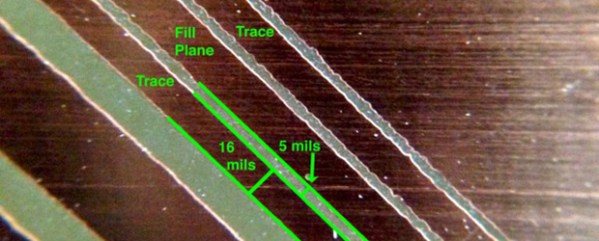
In an earlier post, [Quinn] went over her PCB etching capabilities. As demonstrated by the pic above, she’s able to print 16 mil traces with 5 mil separation. This is just about as good as you can get with homebrew PCBs, but it’s not without its problems.

[Quinn] is using a photographic process for her boards where two copies of a mask is printed on an acetate sheet, doubled up, and laid down on a pre-sensitized copper board. The requirement for two layers of toner was found by experience – with only one layer of toner blocking UV light, [Quinn] got some terrible pitting on her traces and ground planes.

Two photographic masks means the masks must be precisely aligned. This example shows what happens when the acetate sheets are ever so slightly misaligned. With a 5 mil gap between traces, [Quinn] needs to align the masks to within ±2.5 mils; difficult to do by eye, and very hard once you factor in flexing and clamping them down to the copper board.

Even when this process goes perfectly, [Quinn] is pushing the limits of a laser printer. When printing at 600 dpi, the pixels of the print are about 1.5 mils. While GIMP, printer drivers, and the printer itself have some fancy software to help with the interpolation, [Quinn] is still seeing ‘bumps’ on the edges of perfectly aligned parts. This is one of those things that really makes you step back and realize how amazing fabbing PCBs at home actually is.

With most of the hardware for Veronica out of the way, it’s just about time for [Quinn] to start programming her baby. We’re not expecting a full-blown operating system and compiler, but those NES gamepads are probably crying out for some use.

Veronica Gets A Pair Of Gamepads And A Bugged Chip

veronica

[Quinn Dunki]’s awesome 6502-based computer is coming right along, and she decided it’s time to add one of the most important features found in the 80s microcomputers she’s inspired by – gamepads.

There were two ways of implementing gamepads back in the 80s. The Apple II analog joysticks used a potentiometer for each joystick axis along with a 556 timer chip to convert the resistance of a pot into a digital value. Analog controls are awesome, but a lot of hardware is required. The other option is the Atari/Commodore joystick that uses buttons for each direction. Surprisingly, these joysticks are inordinately expensive on the vintage market but a similar hardware setup – NES gamepads – are common, dirt cheap, and extremely well documented.

[Quinn] wrote a few bits of 6502 assembly to read these Nintendo controllers with Veronica’s 6522 VIA with the help of an ATMega168, and then everything went to crap.

In testing her setup, she found that sometimes the data line from the controller would be out of sync with the clock line. For four months, [Quinn] struggled with this problem and came up with one of two possible problems: either her circuit was bad, or the 6522 chip in Veronica was bad. You can guess which option is correct, but you’ll probably be wrong.

The problem turned out to be the 6522. It turns out this chip has a bug when it’s used with an external clock. In 40 years of production this hasn’t been fixed, but luckily 6502 wizard [Garth Wilson] has a solution for this problem: just add a flip-flop and everything’s kosher. If only this bug were mentioned in the current datasheets…

Now Veronica has two NES controller inputs and the requisite circuitry to make everything work. Video evidence below.

Continue reading “Veronica Gets A Pair Of Gamepads And A Bugged Chip”