[jfessard] doesn’t have extra-sensory perception, but does have an ESP8266. The little board seems to pop up in every hack these days. Inspired by not wanting to get up from the bean-bag chair or leave the electronics-housing cabinet wide open to use an HDMI switcher, [jfessard] hacked together an Alexa-compatible projector control via the ESP8266!
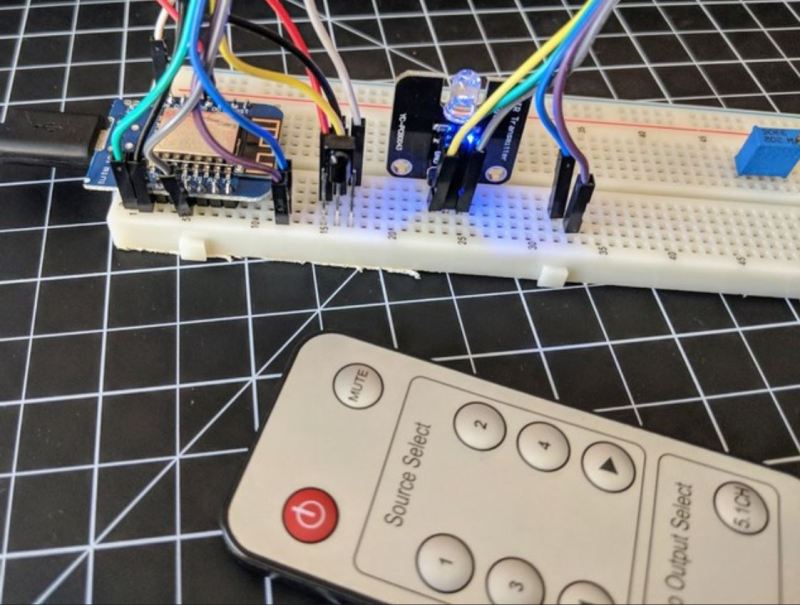
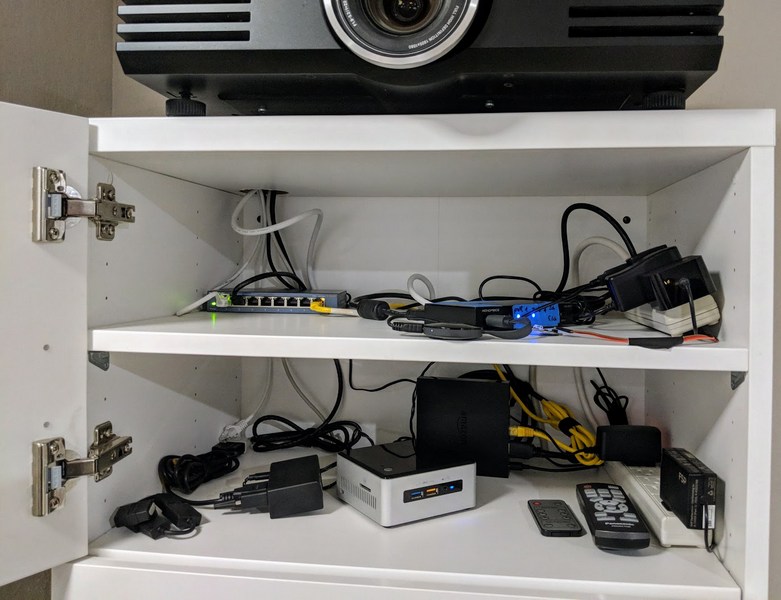
The core functionality here is the ability to turn the projector on and off, and to switch the HDMI source. [jfessard] connected the Panasonic PT-AE3000U projector to a Monoprice HDX-401TA 4×1 HDMI switcher. Tucked away in the cabinet below the projector, it is controlled using a IR LED transmitter breakout board sitting at the end of a fairly long set of jumper wire. The projector control itself is through a RS232 interface.
To make this easy to use with Amazon’s Alexa, [jfessard] turned to some libraries for the ESP8266 D1 Mini. The fauxmoesp library makes it look like a WeMo device, and the IRemoteESP8266 library made remote control code cloning a snap. One really frustrating part of this hack was the MAX232-style breakout board; getting a board to work when it’s labelled backwards takes a bit of head-scratching to figure out.
If the the projector ever gets too noisy, we suggest this hack that shushes the machine. For the moment, we’d rather take another look at this laser projector that mimics a cool ‘laser sky’ effect.


even without the wifi the 8266 is a great processor – many many time faster than an ardunio, with so much memory (relatively) it is easy to do complex things.. In fact, I think about 80% of my projects with the 8266 don’t use the wifi..
My HDMI/ESP hack was to open the HDMI switch itself and simulate the button presses. Bonus point – connect in to IR receiver for a “free” universal IR.
Hi,
That’s exactly what I wanted to do, did you publish your hack somewhere ? Thanks !
my “hack” was to connect an arduino mini pro with a rf transmitter to the projector usb port. it brings the projector screen down when powers up (doesnt have a trigger input) and sends the command to go up when looses the power (power monitoring through adc and a capacitor to gain time).
That’s pretty neat! I like how it’s a reverse of what I’ve done almost.
I also thought of adding the screen control to it simultaneously since it is RF and IR controlled but the screen isn’t really in the way I’ve been leaving it down.
How did you figure out the RF part? Or did you have a receiving side that emulated a button press?
First I had to buy a 433.92MHZ RF transmitter and receiver set. Then used the rc-switch (https://github.com/sui77/rc-switch) library to record the codes from the screen’s remote control and replay them.
The next step would be to generate those codes, but this protocol has two sincronization bits at the begining and the library doesnt support it at this time.
My projector hack was to replace the light cover open sensor (a microswitch with wiring that melts under the heat from the bulb) with a jumper wire and thus gain myself an otherwise fully working free projector.
Then buried a RPI zeroW inside of it running kodi with LIRC for input switching wired direct.