It might seem like a paradox that you want a dark field to see things with an expensive microscope. As [IMSAI Guy] explains, a dark field microscope doesn’t make the subject dark. It makes the area surrounding the subject dark. After selling his expensive microscope, he found he missed having the capability, so he decided to make one cheaply. You can see how he did it in the video, below.
Dark field microscopy gives better contrast and resolution by discarding light that shines directly through or reflects directly from a sample. The only light you see is any that scatters. If you think about a normal microscope, you can imagine a cone of light coming from the top or the bottom. The tip of the cone hits the sample and then spreads back out into another cone of light. What hits your eye –well, actually, the eyepiece — is all the light from that cone. In a dark field instrument, the illumination cone is hollow — the light is just a ring. That means any light the sample doesn’t scatter gets blocked by a stop in the objective. When there is no sample, there’s no unblocked light, so you see a “dark field.”
Light that either refracts through the sample (from below) or bounces off a feature (from the top) will wind up in the hollow area that passes through the objective and you’ll see the image. It may surprise you that you may already have a piece of dark field technology on your desk. Optical computer mice that can work on glass surfaces use this same technique. If you want to see some examples and a diagram of how it all works, we did a post on a similar lower tech mod. There’s also Wikipedia.
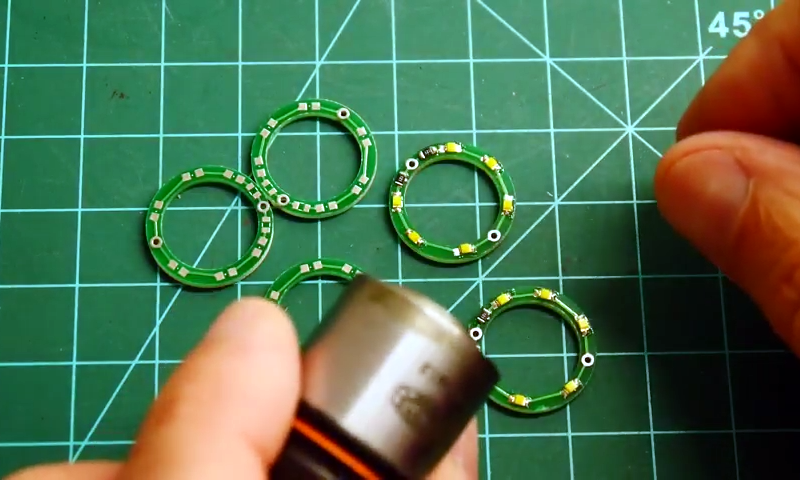
The secret to doing this cheaply was to get a used dark field objective with a little rust on the barrel and then modify them with a custom PC board to create an LED ring light. This is different from the usual illuminator which shines a light through a patch stop to block the inner light. In this case, the light is made into a ring shape by virtue of the arrangement of the LEDs.
For the rest of the microscope, a very cheap toy microscope gave its life and was adapted to hold the modified light-generating objectives. A few adapter pieces finished up the cheap dark field microscope. There are no eyepieces, but a camera sends the video to your computer.
We were disappointed there was no video from the microscope in that video, but if you look at the video, below, you can see the scope in action. That video, which shows a transistor tear down, is interesting in its own right. There’s also a video of a 40X image taken with the microscope.
We’ve seen LED microscope lighting before. If you don’t want to spend on the adapter tubes, you may be able to make some out of PVC.


Great Job! I don’t have the ability to make the printed circuit but will be thinking about a solution to do that. I wonder
what the difference between a dark field microscope and a metallurgic microscope is?
I used microscopes extensively in one of my previous jobs. As far as I know, a metallurgical scope simply illuminates from the top with light meant to be reflected instead of transmitted. Some can do both. All the ones I’ve used ar binocular or trinocular, but that may not be a determining factor.
By the way, best paper I know on Dark Field is at https://public.wsu.edu/~omoto/papers/darkfield.html — I like Figure 1, in particular. The Wikipedia one is “upside down” to my way of thinking.
Using dark field illumination from above, how does the visual image product differ from the classic arrangement of a dark field stop mounted on a condenser lens below the specimen? (the light path optics are so much simpler in the latter)
Dark field from below requires a transparent subject. since the light has to go thru it. otherwise the cones of light are similar, one from the top one from the bottom