
We know, we know. Getting PCBs professionally fabricated anymore is so cheap and easy that making them in-house is increasingly becoming something of a lost art. Like developing your own film. Or even using a camera that has film, for that matter. But when you’re in Brazil and it takes months for shipments to arrive like [Robson Couto] is, sometimes you’re better off sticking with the old ways.
 [Robson] writes in to tell us how he decided to buy a ~$150 CNC “engraver” kit from an import site, in hopes that it would allow him to prototype his designs without having to use breadboards all the time. The kit turned out to be decent, but with a series of modifications and a bit of trial and error, he’s improved the performance significantly and is now putting out some very nice looking boards.
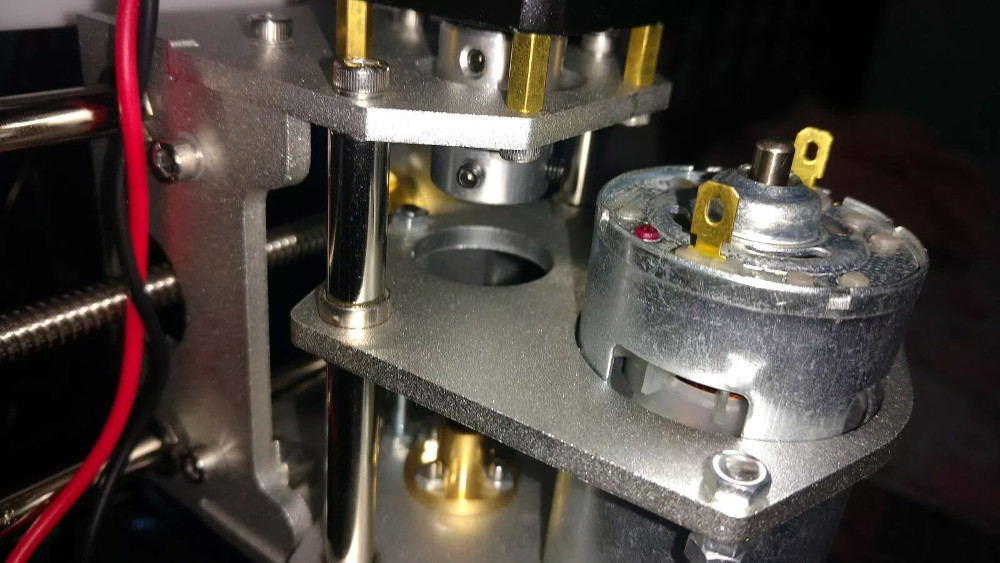
The primary hardware issues [Robson] ran into were in the Z axis, as some poor component selections made the stock configuration wobble a bit too much. He replaced some flimsy standoffs as well as swapping in some bushings he salvaged from dead inkjet printers, and the movement got a lot tighter.
Despite the fact that the version of Grbl flashed onto the engraver’s cloned Arduino Uno supports Z leveling, it’s not actually enabled out of the box. [Robson] just needed to add some extra wiring to use the spindle’s bit as a probe on the copper clad board. He also went ahead and updated to the latest version of Grbl, as the one which ships with the machine is fairly old.
He wraps up the post by going through his software workflow on GNU/Linux, which is useful information even if you’ve taken the completely DIY route for your PCB mill. If you’d like to know more about the ins and outs of milling your own boards, check out this excellent primer by [Adil Malik].


I like the material on how to use the different tools! The PCB mill in my hackerspace uses a horrible program to control and level the mill. bCNC looks much better, I will give it a try.
My initial thoughts were, it’s nice as a project but it’s only doing through-hole. Then at the very end of his blog post he puts up a picture of a very decent SMD footprint:
https://i1.wp.com/dragaosemchama.com/wp-content/uploads/2018/09/10.jpg?ssl=1
Nice.
this is the kind of thing ive been looking for. i could get rid of the gargantuan craigslist laser printer thats starting to fail and make pcbs without mucking around with chemicals and manual drilling that i always screw up on.
Island milling is great if you do RF or high power PCBs, but setting up pcb2gcode can be a pain.
bCNC does work well with grbl, and also for UV laser exposed dry-film processes ;-)
“Getting PCBs professionally fabricated anymore is so cheap and easy that making them in-house is increasingly becoming something of a lost art.”
I beg to differ.
OSHPark is hideously expensive for anything larger than a postage stamp, and has a 12 day turn, which is a long time to be twiddling your thumbs in the middle of a project. It’s about the same amount of time as you will wait to have boards fabbed in China at much lower cost, but with $20 added for shipping costs.
Ultimately, you probably aren’t getting out for less than about $45 and a week and a half no matter who you choose.
I can generally mill a board in 30-90 minutes and 50 cents in materials and get on with my project. Yeah, you’ve got to design around the limitations of the process , but it beats on price and time mightily. And let’s not forget that the ability to quickly iterate on the board when design errors are discovered is priceless.
I beg to differ:
-plated vias
-re-design time milled pcb–>fab pcb
-bga/6mill trace
-e-test
life is short
You are very right, the quality and professionally of a good fabricationproces is very much worth in the PCB. For my first alpha versions i always make the prototype on the mill or i etch it, depending on how precise i need to go. With etching, which is more work i can however reach around 10 mill consistently. When i go to Rev.01 or Rev A, i usually do a final run on the etch then i fix everything and do Rev.02 or Rev B on a professional factory. But it is just so much quicker to do prototype runs inhouse!
Milling probably has it’s place, as long as you work with huge THT components. As soon as component size and pitch go down, the soldermask, trace width/space, laser cut paste stencil and all the other advantages of professional PCB fabbing are well worth the cost and time.
My general advice to people who think a turn around time of 1 day on your design is necessary: Do more design reviews of your library, schematic and layouts before you materialize them in the real world. Quality before quantity.
If you don’t know what to do while you wait for the designs sent off to the PCB manufacturer to return, you clearly don’t have enough work queued up, or your deadlines and/or priorities were defined wrong somewhere.
As if they actually pay us…
Reply to Robert Mateja’s original comment:
* An hour soldering vias is a lot less than 12 days waiting for boards.
* I’m not sure what you are saying about redesign time. Same software. It wouldn’t be any different.
* I can’t really solder BGA components, so I can’t use them. Hell, most of the SMD components are terrible to work with… I only use them because they are cheaper or I have no choice.
* Arguably, the Othermill will handle 6 mil traces, but in reality anything less or equal to 10 is a problem.
* I’ve never heard of fab houses doing any testing, and I don’t see that as an option of OSHpark or PCBway. Who does this? I couldn’t even get my manufacturer to program the microcontrollers… wasn’t even an option.
It sounds like you are working for some big company with access to more detailed fabrication processes than indies like me.
Most PCB houses do electrical test. I don’t know how exhaustive this is – they usually say “100% electrical test”, which I’m guessing means continuity of all traces, but most PCB failures I’ve seen in industry have been shorts between traces (one of which was visible as an eyelash-shaped sliver of copper where there should be none), so I doubt that they test for trace-to-trace shorts.
Have a look at JLCPCB.com…the standard double sided with 1oz copper 10x10cm max is less then $20 for 5 of them…
A special offers @ $2 is available.
Plus, don’t buy 5 pcb, the price for 10 is usually more expensive by only some cents, if not the same price at all!
Usually shipping is more, though, and that is the big expense for the Chinese houses.
I order 5 when I only need 5 to save on materials. Often they ship 10 anyway if they all pass.
I agree that engraving is a much quicker way for prototyping or one-off builds but I don’t see it as a replacement for fabricated boards. It’s a good replacement for etching though. Especially when it comes to dual layer boards where layer alignment can be difficult when etching. Seeing the router drill hundreds of holes in no time is also a relief when you know how hard it is to drill a board that you just etched.
I’m using Eagle with the PCB-Gcode ULP to generate Gcode and then use Autoleveller (http://www.autoleveller.co.uk) and Mach4 for engraving. I think the results are excellent.
Of course there are several downsides compared to commercial PCBs.
You are limited to two layers. It’s not a problem for me because I never use more than two anyway.
Vias are difficult. No plated holes means you can’t use component holes as vias unless it’s a component that can be soldered on both sides. For regular vias I’m routing a piece of wire through the board and solder it on both layers.
Soldering can be messy without a solder mask.
No silk screen (I’m engraving text where there is room)
etc.
You’re blowing the costs way out of proportion. My past OSH park orders: $6.10, $26.50, $6.10, $18.90, $10.80. I don’t know what size boards you’re making, but these costs are totally reasonable. The expensive ones were 4 layers or added express shipping. I value my time at much more than $10 to make a board, and waiting a week for a quality board is a non-issue to me, even for business-related purchases. Rapidly iterating is solved by cutting and jumpering.
and milling pcbs will cost more than that in worn out bits and drills
My board is 4″x7″ and they want $140 before shipping and a 12 day turn.
It’s $25 from Elecrow, plus $20 for shipping and somehow takes about the same amount of time.
I value my time at much more than the week and a half it takes to get a board, so I mill them myself. I’ll order nice ones when I’m ready to go into production… and have a client to pay for them.
too bad this machine is now $200+ thanks to all the damn tariffs.
I’ve had decent results with the similarly crappy cnc 2418 mill using kicad/eagle –> flatcam –> Open CNC pilot.
Out of the box it uses the what looks to be the same 775 type spindle motor as the T8 mill the blog author is using, and this motor can be run at 9-10k rpm with a 36V supply – a worthwhile upgrade in my experience.
There is an ebay vendor (from Germany I think) called carbide-solutions who sells excellent 0.1mm v-tools for reasonable prices, working with these has been a much more pleasant experience than the ones that are all over Ali express etc.
I’m considering buying a cheap mill and can’t decide between the 2417 and 2418 which are pretty much the same price. Is one better than the other in some way?
I’ve just had a google for the 2417 & to be fair it looks like a better designed thing. The X & Z axes are going to be significantly more rigid. Only issue I can see is they’re selling it with a 12V supply & a smaller 555 type motor for the spindle. If you can mod it to fit a 42mm spindle in place of the 38mm one it should be alright.
this one is a little cheeper and it looks nicer too. keep suggesting < $200 cnc mills.
I had similar results with this mill using Universal GCode Sender. For SMD I found that backlash was a serious issue. Also, copper would tear and lift up from the board if pitch was too fine. In the author’s picture you can see some of this lifting happening on copper islands. This problem only gets worse when you apply heat and try to solder these pads, as sometimes they just flake off.
For leveling I ended up not using an auto leveler. I went cheap and used a couple of the bolts normally used to mount the controller board to the back of the machine to instead clamp my PCB to the cutting bed. Then I sent the spindle and tool to each corner of the PCB and adjusted the frame of the mill until I finally had it level. By no means is this machine a precision instrument.
It’d be cool to see how this mill would perform with Trinamics stepper drivers and a smaller diameter tool. You’d probably need a second micro to initialize those drivers since GRBL doesn’t leave much room for anything other than GRBL on the ATmega328 that comes with the controller board on these things.
I find it funny that so many say “it’s so cheap to get them done in China”. Well that depends on where you live, for those of you in the US that may well be the case but for the majority of us looking at cnc milling, it’s because it very quickly racks up in cost. The shipping is usually 4 times the pcb’s themselves so a one off is hugely expensive. I do agree that it isn’t a replacement for pro made boards but there is still a large home community that wants exactly this kind of machinery, hence why I’m building one myself. As a plus it’s hugely rewarding to build it too ;)
I understand the main benefit of using a milling machine is that you can also use it for drilling? That’s nice. Otherwise it does not seem to be really time-saving compared to the usual laser printer + laminator + etch, or anyprinter – uv-expose – etch. I also don’t hear it mentioned often, but breathing FR4 dust is probably not healthy. Can you leave the machine unattended? Because it’s also a bit loud.
Yes, the drilling is usually a separate G-Code file. I like to “pre-drill” holes with the V bit used for isolation milling in order to help guide the real drill bit later on since flexible drill bits can otherwise wander over the surface.
An advantage of milling is zero chemicals. I use Liquid Tin to finish, though that doesn’t seem to get used up as quickly as etchant.
I’ve read that FR2 (impregnated paper rather than fibreglass) is better for milling though isn’t as stiff or rated to as high a temperature.
I don’t leave the machine unattended unless I’ve run the same job or least same type of job before without issue. Yes, it’s loud since a high spindle speed is recommended.
Thanks for the answer.
Can you pre-drill the holes properly, and then do the isolation routing? So that the pads are better preserved (sometimes copper can delaminate).
The good news is that you can mix methods: you can use toner transfer resist to etch the traces, and a CNC router (aka, engraving machine) to drill the holes.
Or use the CNC to do the solder side and print out the silk layer on a 2D printer and stick it the component side. Printing the outline along with the silk and then cutting it to size helps with alignment.
I think this is what I would try if I had such machine. First drill the holes using CNC, then apply toner resist and finish the board. Not the other way around.
Technically it would even make electroplating possible, but last time I checked there are too many chemicals involved and it takes away from the simplicity and immediacy of homemade boards vs factory-made ones.