3D Print A PCB The Hard Way

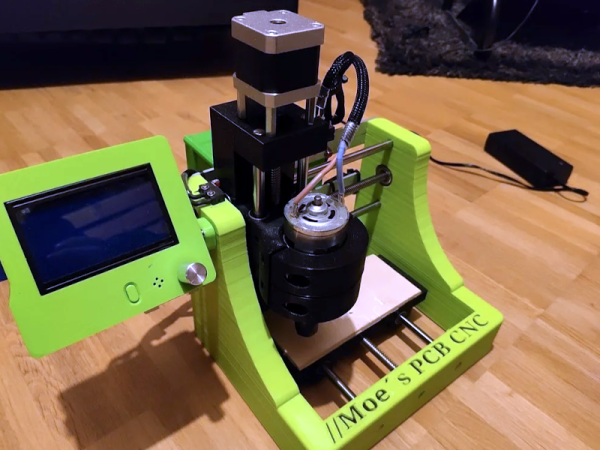
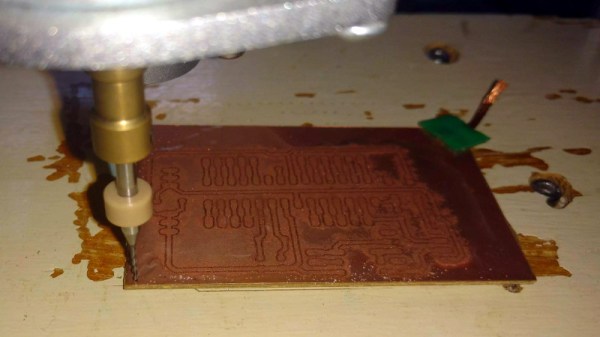
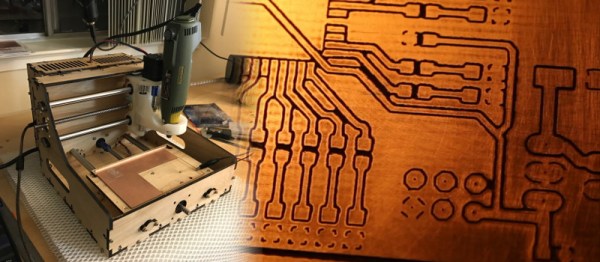
There’s an old joke about the physics student tasked with finding the height of a building using a barometer. She dropped the barometer from the roof and timed how long it took to hit the ground. Maybe that was a similar inspiration to [Moe_fpv_team’s] response to the challenge: use a 3D printer to create a PC board. The answer in that case? Print a CNC mill.

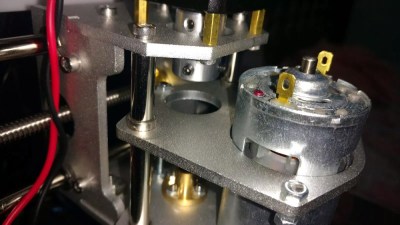
[Moe] had some leftover 3D printer parts. A $40 ER11 spindle gets control from the 3D printer software as a fan. The X, Y, and Z axis is pretty standard. The machine can’t mill metal, but it does handy on plywood and fiber board and should be sufficient to mill out a PCB from some copper clad board.

Continue reading “3D Print A PCB The Hard Way”

Hackaday Podcast 076: Grinding Compression Screws, Scratching PCBs, And Melting Foam

Hackaday editors Elliot Williams and Mike Szczys are enamored by this week’s fabrication hacks. There’s a PCB mill that isolates traces by scratching rather than cutting. You won’t believe how awesome this angle-cutter jig is at creating tapered augers for injection molding/extruding plastic. And you may not need an interactive way to cut foam, but the art from the cut pieces is more than a mere shadow of excellence. Plus we gab about a clever rotary encoder circuit, which IDE is the least frustrating, and the go-to tools for hard drive recovery.

Take a look at the links below if you want to follow along, and as always, tell us what you think about this episode in the comments!

Take a look at the links below if you want to follow along, and as always, tell us what you think about this episode in the comments!

Direct download (60 MB or so.)

Continue reading “Hackaday Podcast 076: Grinding Compression Screws, Scratching PCBs, And Melting Foam”

Bantam Tools PCB Mill Gets A Ferocious New Sequel

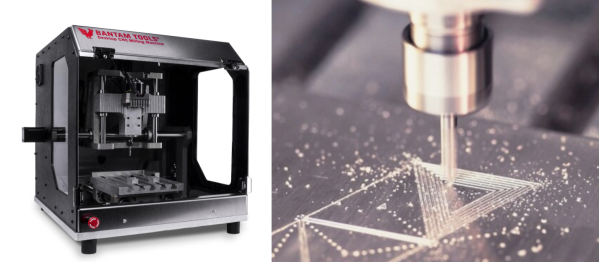
When the first Bantam Tools’ Milling Machine landed, it put PCB prototyping at the forefront with a smooth software and hardware pipeline for spinning out circuit boards in a manner of minutes. Now the folks at Bantam Tools are back, putting those insights into a new machine that makes cutting aluminum a first class feature. While machine details are still sparse from their announcement page, knowing that Bantam Tools has spent a few years turning classrooms of students into hardware prototypes reassures us that we’re in good hands. Now let’s spill some beans on this beast. Continue reading “Bantam Tools PCB Mill Gets A Ferocious New Sequel”

Desktop PCB Mill Review

[Carl] wanted to prototype his circuits quickly using printed circuit boards. He picked up a Bantam Tools Desktop PCB Mill and made a video about the results. His first attempt wasn’t perfect, as you could notice under the microscope. A few adjustments, though, and the result was pretty good.

Be warned, this mill is pretty expensive — anywhere from $2,500 to $3,000. The company claims it is a better choice than a conventional cheap mill because it uses a 26,000 RPM spindle and has high-resolution steppers. Because of its low backlash and high accuracy and repeatability, the company claims it can easily mill boards with 6 mil traces.

Continue reading “Desktop PCB Mill Review”

Desk-Sized CNC Engraver Does The Job

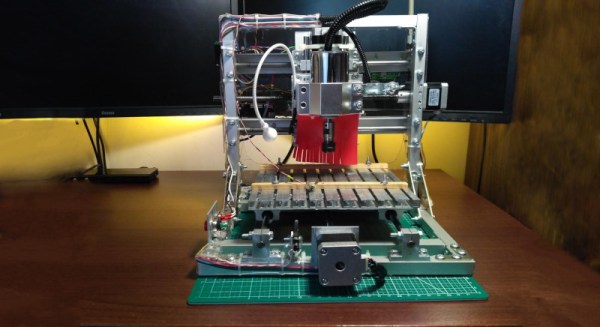
CNC machine tools are highly useful for when you want to take a CAD design and make real parts as quickly and as easily as possible. Typically, they’re employed in large-scale industrial settings, but CNC machines come in all shapes and sizes. It’s possible to build a useful machine that’s just right to sit on your desk, as [More Than User] demonstrates.

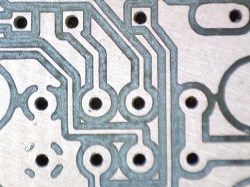
The holes pictured were made with a 0.5mm tool, showing off the precision and accuracy of the machine.

The build consists of an aluminium-framed CNC engraver, designed primarily for the production of PCBs. However, it can also handle plastic jobs, and aluminium if run slowly enough. Like most garage CNC projects, it runs with a combination of stepper motors and an Arduino. The cutting area is 16 cm x 16cm – more than enough for most hobby PCBs.

There are plenty of interesting details, such as the T-slot bed made from U-section steel bolted together, and the simple probe made from a microswitch. Perhaps most impressive though is the tight precision of the cuts. This is particularly important for PCB work, where otherwise minor issues could cause short or open circuits and make the resulting parts useless.

It’s a project that we’re sure will come in handy for [More Than User]’s future projects, and there’s nothing quite like making your own tools. If you’re new to CNC as a whole, consider picking up some design tips before you get started.

Turning A Cheap Engraver Into A Decent PCB Mill

We know, we know. Getting PCBs professionally fabricated anymore is so cheap and easy that making them in-house is increasingly becoming something of a lost art. Like developing your own film. Or even using a camera that has film, for that matter. But when you’re in Brazil and it takes months for shipments to arrive like [Robson Couto] is, sometimes you’re better off sticking with the old ways.

[Robson] writes in to tell us how he decided to buy a ~$150 CNC “engraver” kit from an import site, in hopes that it would allow him to prototype his designs without having to use breadboards all the time. The kit turned out to be decent, but with a series of modifications and a bit of trial and error, he’s improved the performance significantly and is now putting out some very nice looking boards.

The primary hardware issues [Robson] ran into were in the Z axis, as some poor component selections made the stock configuration wobble a bit too much. He replaced some flimsy standoffs as well as swapping in some bushings he salvaged from dead inkjet printers, and the movement got a lot tighter.

Despite the fact that the version of Grbl flashed onto the engraver’s cloned Arduino Uno supports Z leveling, it’s not actually enabled out of the box. [Robson] just needed to add some extra wiring to use the spindle’s bit as a probe on the copper clad board. He also went ahead and updated to the latest version of Grbl, as the one which ships with the machine is fairly old.

He wraps up the post by going through his software workflow on GNU/Linux, which is useful information even if you’ve taken the completely DIY route for your PCB mill. If you’d like to know more about the ins and outs of milling your own boards, check out this excellent primer by [Adil Malik].

Continue reading “Turning A Cheap Engraver Into A Decent PCB Mill”

Home Built PCB Mill Reportedly Doesn’t Suck

It’s 2017, and getting a PCB professionally made is cheaper and easier than ever. However, unless you’re lucky enough to be in Shenzhen, you might find it difficult to get them quickly, due to the vagaries of international shipping. Whether you want to iterate quickly on designs, or just have the convenience of speed, it can be useful to be able to make your own PCBs at home. [Timo Birnschein] had just such a desire and set about building a PCB mill that doesn’t suck.

It might sound obvious, but it bears thinking about — if you know you’re incapable of building a good PCB mill in a reasonable period of time, you might save yourself a lot of pain and lost weekends by just ordering PCBs elsewhere. [Timo] was fairly confident however that the build would be able to churn out some usable boards, however, and got to work.

The build is meant to be accessible to the average hacker who wants one. The laser cut & 3D printed parts are readily available these days thanks to online services that can manufacture for those who don’t have the machines at home. [Timo] uses a rotary multitool for a spindle, a common choice for a budget CNC build.

With the hardware complete, [Timo] has spent time working on optimising the software side of things. Through careful optimisation of the G-Code, [Timo] has been able to improve performance and reduce stress on the tooling. It’s not enough to just build a good mill — you’ve got to have your G-Code squared away as well.

Overall, the results speak for themselves. The boards don’t suck; the mill can do traces down to 8 mil, and even drill the holes. We’d love to have one on the workbench when busting out some quick prototypes. For another take on the home-built PCB mill, why not check out this snap-together version?