We’ll admit it: sometimes we overthink things. We imagine some of you are the same way; there seems to be something in the hacker mentality that drives us to occasionally over-engineer ideas to the point of unrecognizability. There’s nothing inherently wrong with this, but sometimes it does keep us from seeing easier solutions.
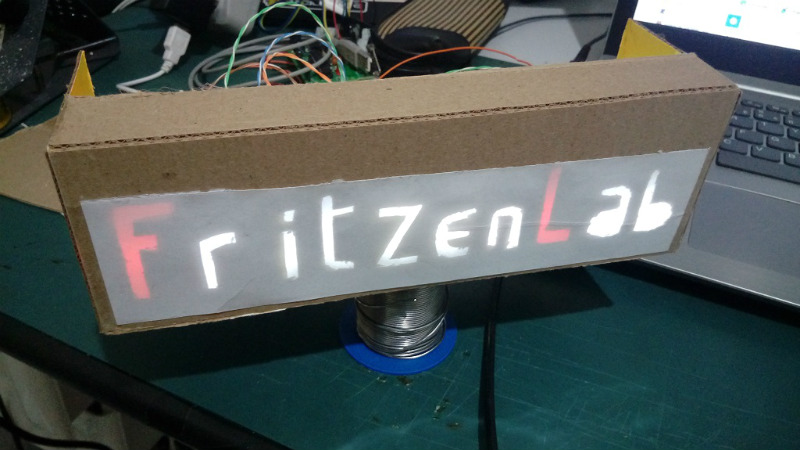
 For example, the very slick looking personalized LED sign (Google Translate) that [Clovis Fritzen] recently wrote in to share with us. If we were tasked with creating something like this there would certainly have been a 3D printer and likely a CNC involved before all was said and done, and a few days later we’d still be working out the bugs in our OpenSCAD code. But his approach is very different. Fantastically simple and constructed largely from household items, this is a good project to keep the Junior Hackers entertained on a rainy weekend.
The first step of the process is to draw out the characters you want onto a piece of cardboard, and then carefully cut it out. If you’re worried that you’re not particularly artistic, this step will go a bit better if you print out the design and tape the paper over the cardboard to serve as a template. Once you’ve got your design cut out, you glue or tape a piece of standard printer paper over it. This is the face of the display; it just needs to be lit from behind.
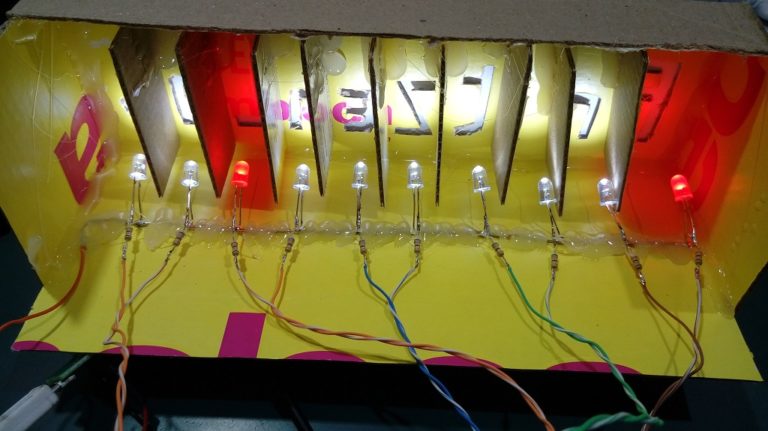
 If you wanted to make a sign that was just a single color and didn’t have individually addressable elements, then it would be enough to illuminate the whole cutout with a single light source. But where’s the appeal in that? As [Clovis] shows, you can get much better results by constructing a segmented box, with one LED in each cell. By wiring each LED to a pin on an Arduino or other microcontroller, you’ll have control over the color and brightness of each section of the sign.
Of course, if you’re not big on the whole cardboard aesthetic, you could even recreate this design with the aforementioned CNC and 3D printer. [Clovis] shows how the basic concept works, and that it can be scaled pretty easily depending on the kind of materials you have access to.


I like my big non electric 7 segment display much better. It is more of a real sign. It can take the elements and it is large. It also has the coolness factor of looking high tech while being super low tech. The charity that I donated it to gets a lot of comments about their new electric sign. A few of them were really impressed when they saw what it really was.
https://hackaday.io/project/161215-largemechanical-hand-activated-7-segment-display
my take on big 7-segment displays is to do it with addressable led strips (apa104, ws2812, or clones)
requires very few wires, can be run from 5V as the micro, and no extra circuitry is required.
on the other hand the plastic pipe version is totally cool, you can even do it with coloured electrical tape – but then it’s really a ghetto version.
Non-electric?! Y’ain’t from around here, is ya?
Wow, it looks unexpectedly good!
That font matches perfectly with the general look of the billboard and with the text.
The style seems familiar. Is that a known font, from a game or a movie maybe?
It´s the “Cardboard Cutter” font. It looks familiar because you can CC it yourself
One can get a nice finish on cardboard by using regular household wall paint. Just don’t overload the brush, and brush it kinda dry for the first coat. Great for things that won’t get much handling. May even look better than ridgy 3d prints.