We love LEGO here at Hackaday, but did you know that LEGO spun off a parallel product line made for architectural models called Modulex?
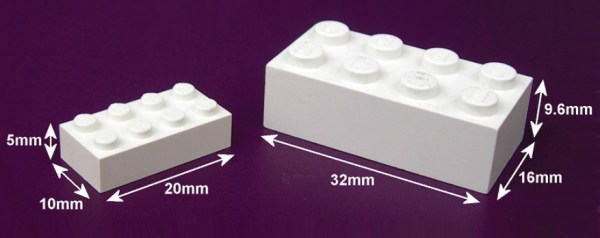
[Peter Dibble] takes us on a deep dive through the history of Modulex, starting with Godtfred Kirk Christiansen needing a better way to model actual buildings after trying to design a house in LEGO. The LEGO brick’s 5:5:6 ratio proved challenging for modeling full-sized projects, so Modulex was conceived around a 1:1:1 ratio 5 mm cube. This change means Modulex is not compatible with LEGO System bricks.
As architectural styles morphed through the mid-20th Century, designs based around blocky shapes became passe, and Modulex pivoted to targeting factory and city planning customers. Products later branched out to include wall charts and Plancopy photocopy-able planners along with reconfigurable signage. Modulex (now ASI) still goes on as one of the biggest signage companies in the world, but discontinued the bricks in 2004. An attempt was made to revive Modulex bricks in 2015, but LEGO Group bought the company that had the rights to the bricks and has no intention of producing Modulex.
If you’ve recently braved the pandemic long enough to make a trip to a big box retailer, you may have spotted a few massive e-paper price tags affixed to large items like appliances. These seven inch displays were likely designed to be used in e-readers such as the Kindle, but through some surplus deal, are now shouting out clearance savings on last year’s washing machine. After checking out a particularly good price for a Samsung refrigerator at the local Home Depot, [YodaLogic] got to wondering if they could be bent to the hacker’s will.
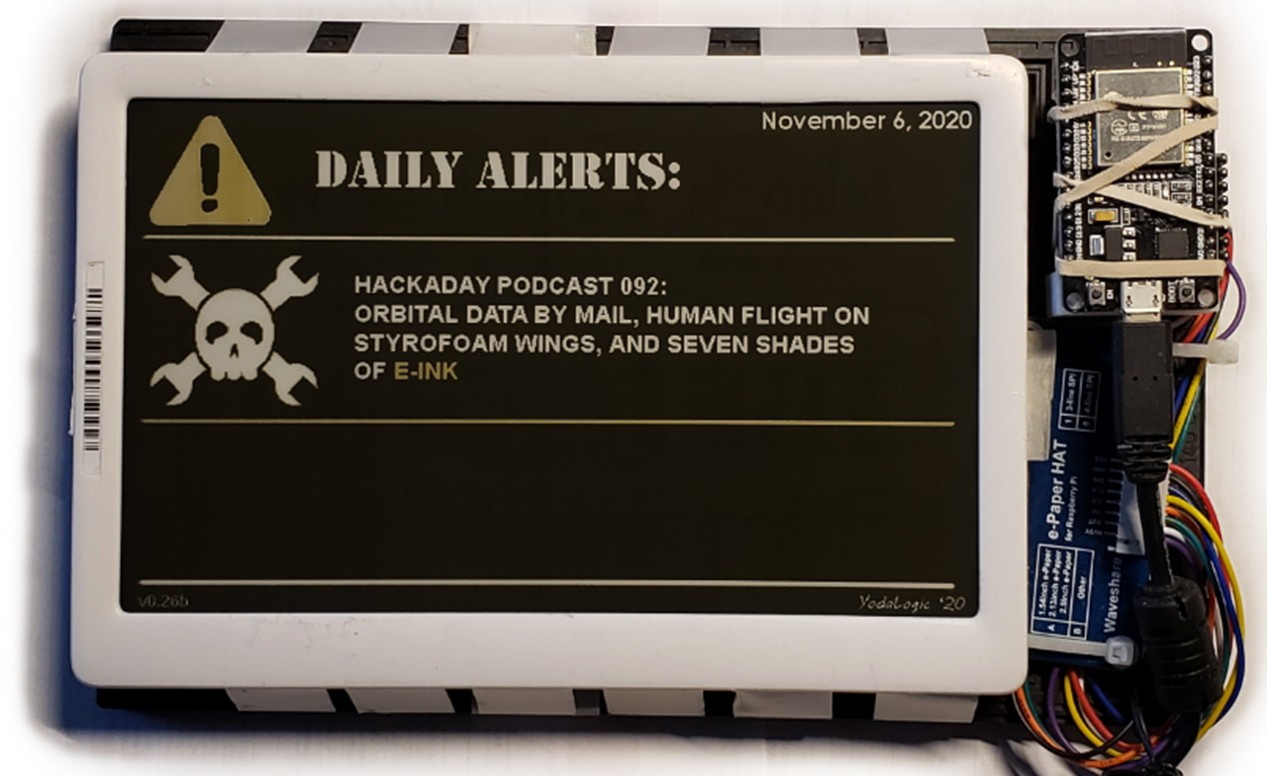
Now to be clear, [YodaLogic] didn’t steal any of these tags. It turns out you can pick them up on eBay for less than $15 a pop, or at least that’s what they cost before this article went out. It’s an exceptionally good price when you realize that these displays are actually capable of color…albeit only two. Apparently when the retailer orders the so-called “Chroma 74” tags, they can pick between either yellow or red as the secondary color. While not quite as exciting as a full-color display, it certainly sets them apart from most of the e-paper panels we’ve seen used in DIY projects thus far.
The panel gets mighty close to the HaD color scheme
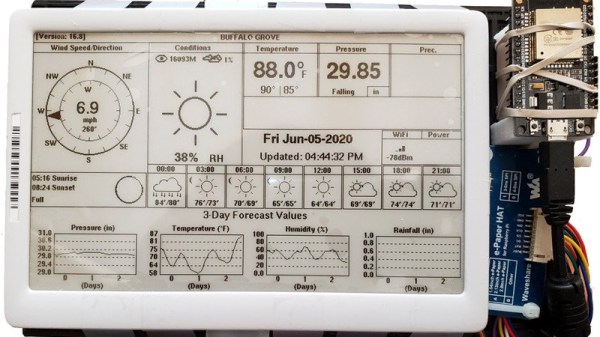
We’d like to tell you that [YodaLogic] cracked one of these things open and was able to wire it right up to a Pi or microcontroller, but the truth is a bit more complicated. Connecting the Chroma 74’s panel to the control board intended for a similar Waveshare 7.5 inch display didn’t seem to do anything. After some poking and prodding, it became clear that the WFD0750BF19 e-paper panel used in the Chroma needed a custom software profile to bring it to life. Unfortunately, there doesn’t seem to be a datasheet available for this particular panel.
By combining what could be gleaned from the datasheets of similar displays with a bit of experimentation, [YodaLogic] came up with a configuration profile that mostly works. It doesn’t seem like the yellow is as vibrant as it should be, and a refresh can take as long as 20 seconds, but it’s certainly a start. Perhaps the code can be tightened up with some input from the community, or even better, maybe somebody out there knows where we can get our hands on the datasheet for this panel.
Most of the projects we feature on Hackaday are built for personal use; designed to meet the needs of the person creating them. If it works for somebody else, then all the better. But occasionally we may find ourselves designing hardware for a paying customer, and as this video from [Proto G] shows, that sometimes means taking the long way around.
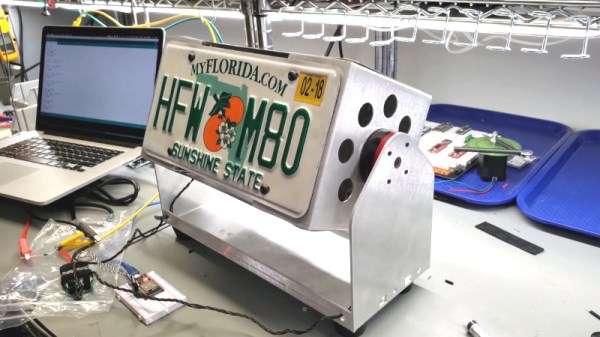
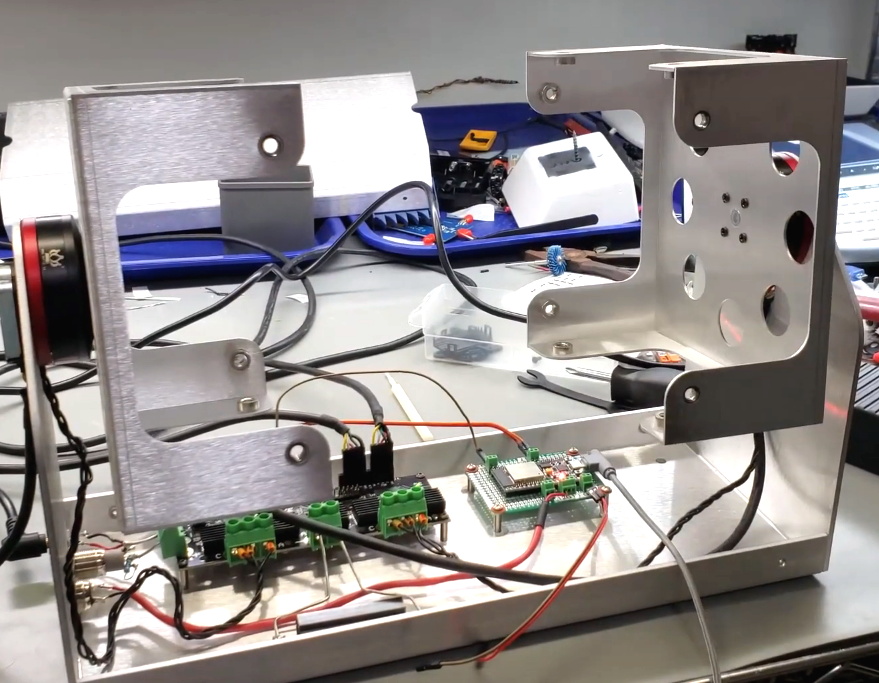
The initial task he was given seemed simple enough: build a display that could spin four license plates around, and make it so the speed could be adjusted. So [Proto G] knocked a frame out of some sheet metal, and used an ESP32 to drive two RC-style electronic speed controllers (ESCs) connected to a couple of “pancake” brushless gimbal motors. Since there was no need to accurately position the license plates, it was just a matter of writing some code that would spin the motors in an aesthetically pleasing way.
Unfortunately, the customer then altered the deal. Now they wanted a stand that could stop on each license plate and linger for a bit before moving to the next one. Unfortunately, that meant the ESCs weren’t up to the task. They got dumped in favor of an ODrive motor controller, and encoders were added to the shafts so the ESP32 could keep track of the display’s position. [Proto G] says he still had to work out some kinks, such as how to keep the two motors synchronized and reduce backlash when the spinner stopped on a particular plate, but in the end we think the results look fantastic. Now if only we had some license plates we needed rotisseried…
If [Proto G] knew he needed precise positioning control from the start, he would have approached the project differently and saved himself a lot of time. But such is life when you’re working on contract.
We’ll admit it: sometimes we overthink things. We imagine some of you are the same way; there seems to be something in the hacker mentality that drives us to occasionally over-engineer ideas to the point of unrecognizability. There’s nothing inherently wrong with this, but sometimes it does keep us from seeing easier solutions.
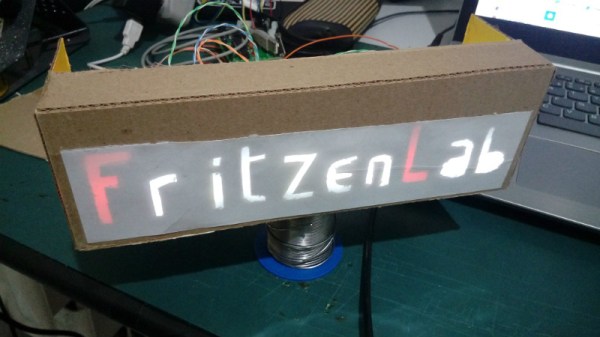
For example, the very slick looking personalized LED sign (Google Translate) that [Clovis Fritzen] recently wrote in to share with us. If we were tasked with creating something like this there would certainly have been a 3D printer and likely a CNC involved before all was said and done, and a few days later we’d still be working out the bugs in our OpenSCAD code. But his approach is very different. Fantastically simple and constructed largely from household items, this is a good project to keep the Junior Hackers entertained on a rainy weekend.
The first step of the process is to draw out the characters you want onto a piece of cardboard, and then carefully cut it out. If you’re worried that you’re not particularly artistic, this step will go a bit better if you print out the design and tape the paper over the cardboard to serve as a template. Once you’ve got your design cut out, you glue or tape a piece of standard printer paper over it. This is the face of the display; it just needs to be lit from behind.
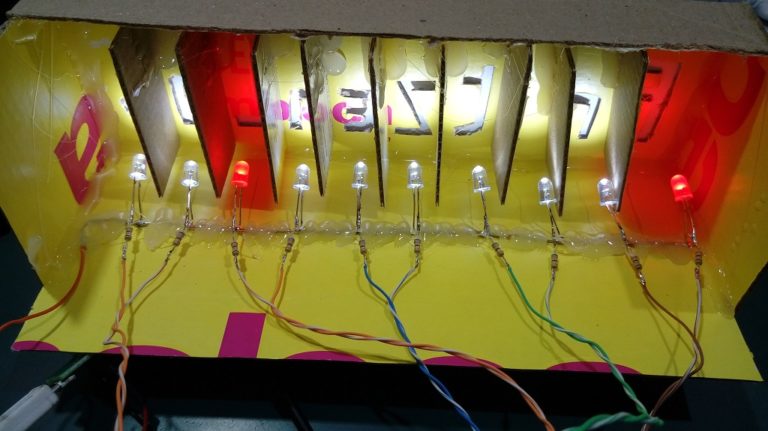
If you wanted to make a sign that was just a single color and didn’t have individually addressable elements, then it would be enough to illuminate the whole cutout with a single light source. But where’s the appeal in that? As [Clovis] shows, you can get much better results by constructing a segmented box, with one LED in each cell. By wiring each LED to a pin on an Arduino or other microcontroller, you’ll have control over the color and brightness of each section of the sign.
I am something of an Inkscape fan. If you’re not familiar with the application, it’s like an Open Source version of Adobe Illustrator. Back when I was a production artist I’d been an Illustrator master ninja but it’s been four years and my skills are rusty. Plus, Inkscape is just enough different in terms of menus and capabilities that I had a hard time adapting.
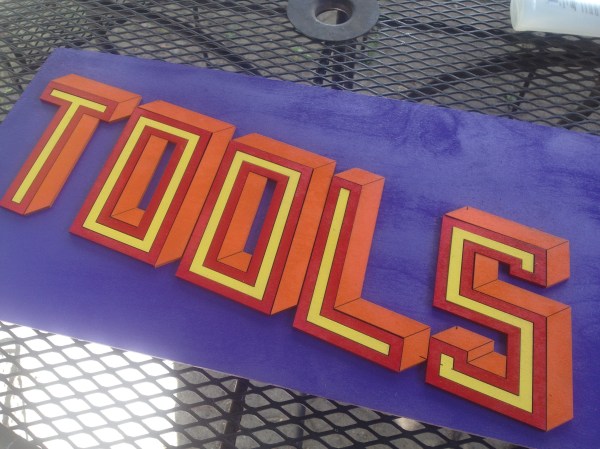
So I created some wooden lettering with the help of Inkscape and a laser cutter, and I’m going to show you how I did it. If you’re interested in following along with this project, you can find it on Hackaday.io.
While playing around with Inkscape, I noticed you can create a variety of grids, including axonometric grids. This term refers to the horizon lines in an orthographic projection. In other words, it helps make things look 3D by providing perspective lines.