In the 1930s, as an alternative to celluloid, some Japanese companies printed films on paper (kami firumu), often in color and with synchronized 78 rpm record soundtracks. Unfortunately, between the small number produced, varying paper quality, and the destruction of World War II, few of these still survive. To keep more of these from being lost forever, a team at Bucknell University has been working on a digitization project, overcoming several technical challenges in the process.
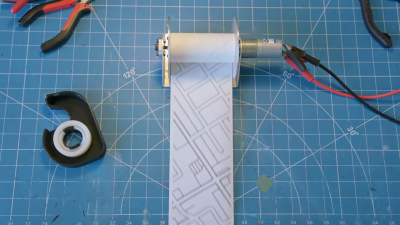
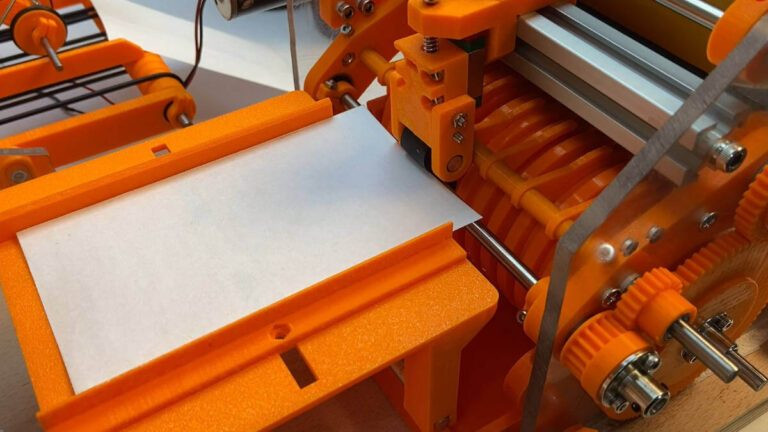
The biggest challenge was the varying physical layout of the film. These films were printed in short strips, then glued together by hand, creating minor irregularities every few feet; the width of the film varied enough to throw off most film scanners; even the indexing holes were in inconsistent places, sometimes at the top or bottom of the fame, and above or below the frame border. The team’s solution was the Kyōrinrin scanner, named for a Japanese guardian spirit of lost papers. It uses two spools to run the lightly-tensioned film in front of a Blackmagic cinematic camera, taking a video of the continuously-moving film. To avoid damaging the film, the scanner contacts it in as few places as possible.
After taking the video, the team used a program they had written to recognize and extract still images of the individual frames, then aligned the frames and combined them into a watchable film. The team’s presented the digitized films at a number of locations, but if you’d like to see a quick sample, several of them are available on YouTube (one of which is embedded below).
This piece’s tipster pointed out some similarities to another recent article on another form of paper-based image encoding. If you don’t need to work with paper, we’ve also seen ways to scan film more accurately.