Printing customized Christmas cards is a trivial matter today: choose a photo, apply a stock background or border, add the desired text, and click a few buttons. Your colorful cards arrive in a few days. It may be the easiest way, but it’s definitely no where near as cool as the process [linotype] used this season. (Editor’s note: skip the Imgur link and go straight for the source!)
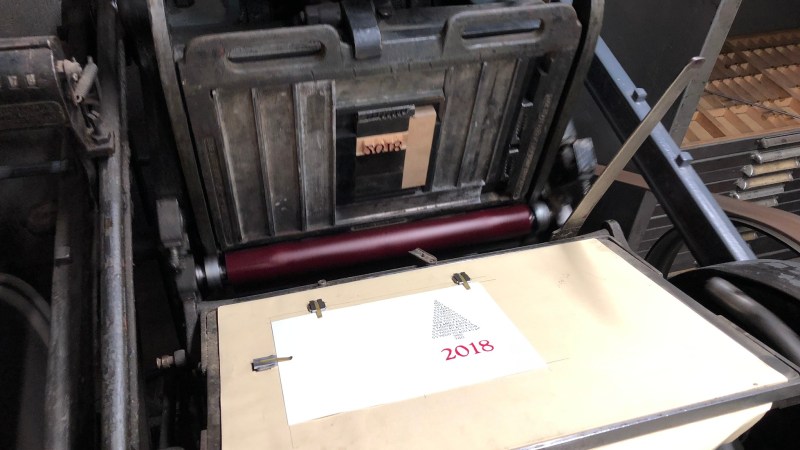
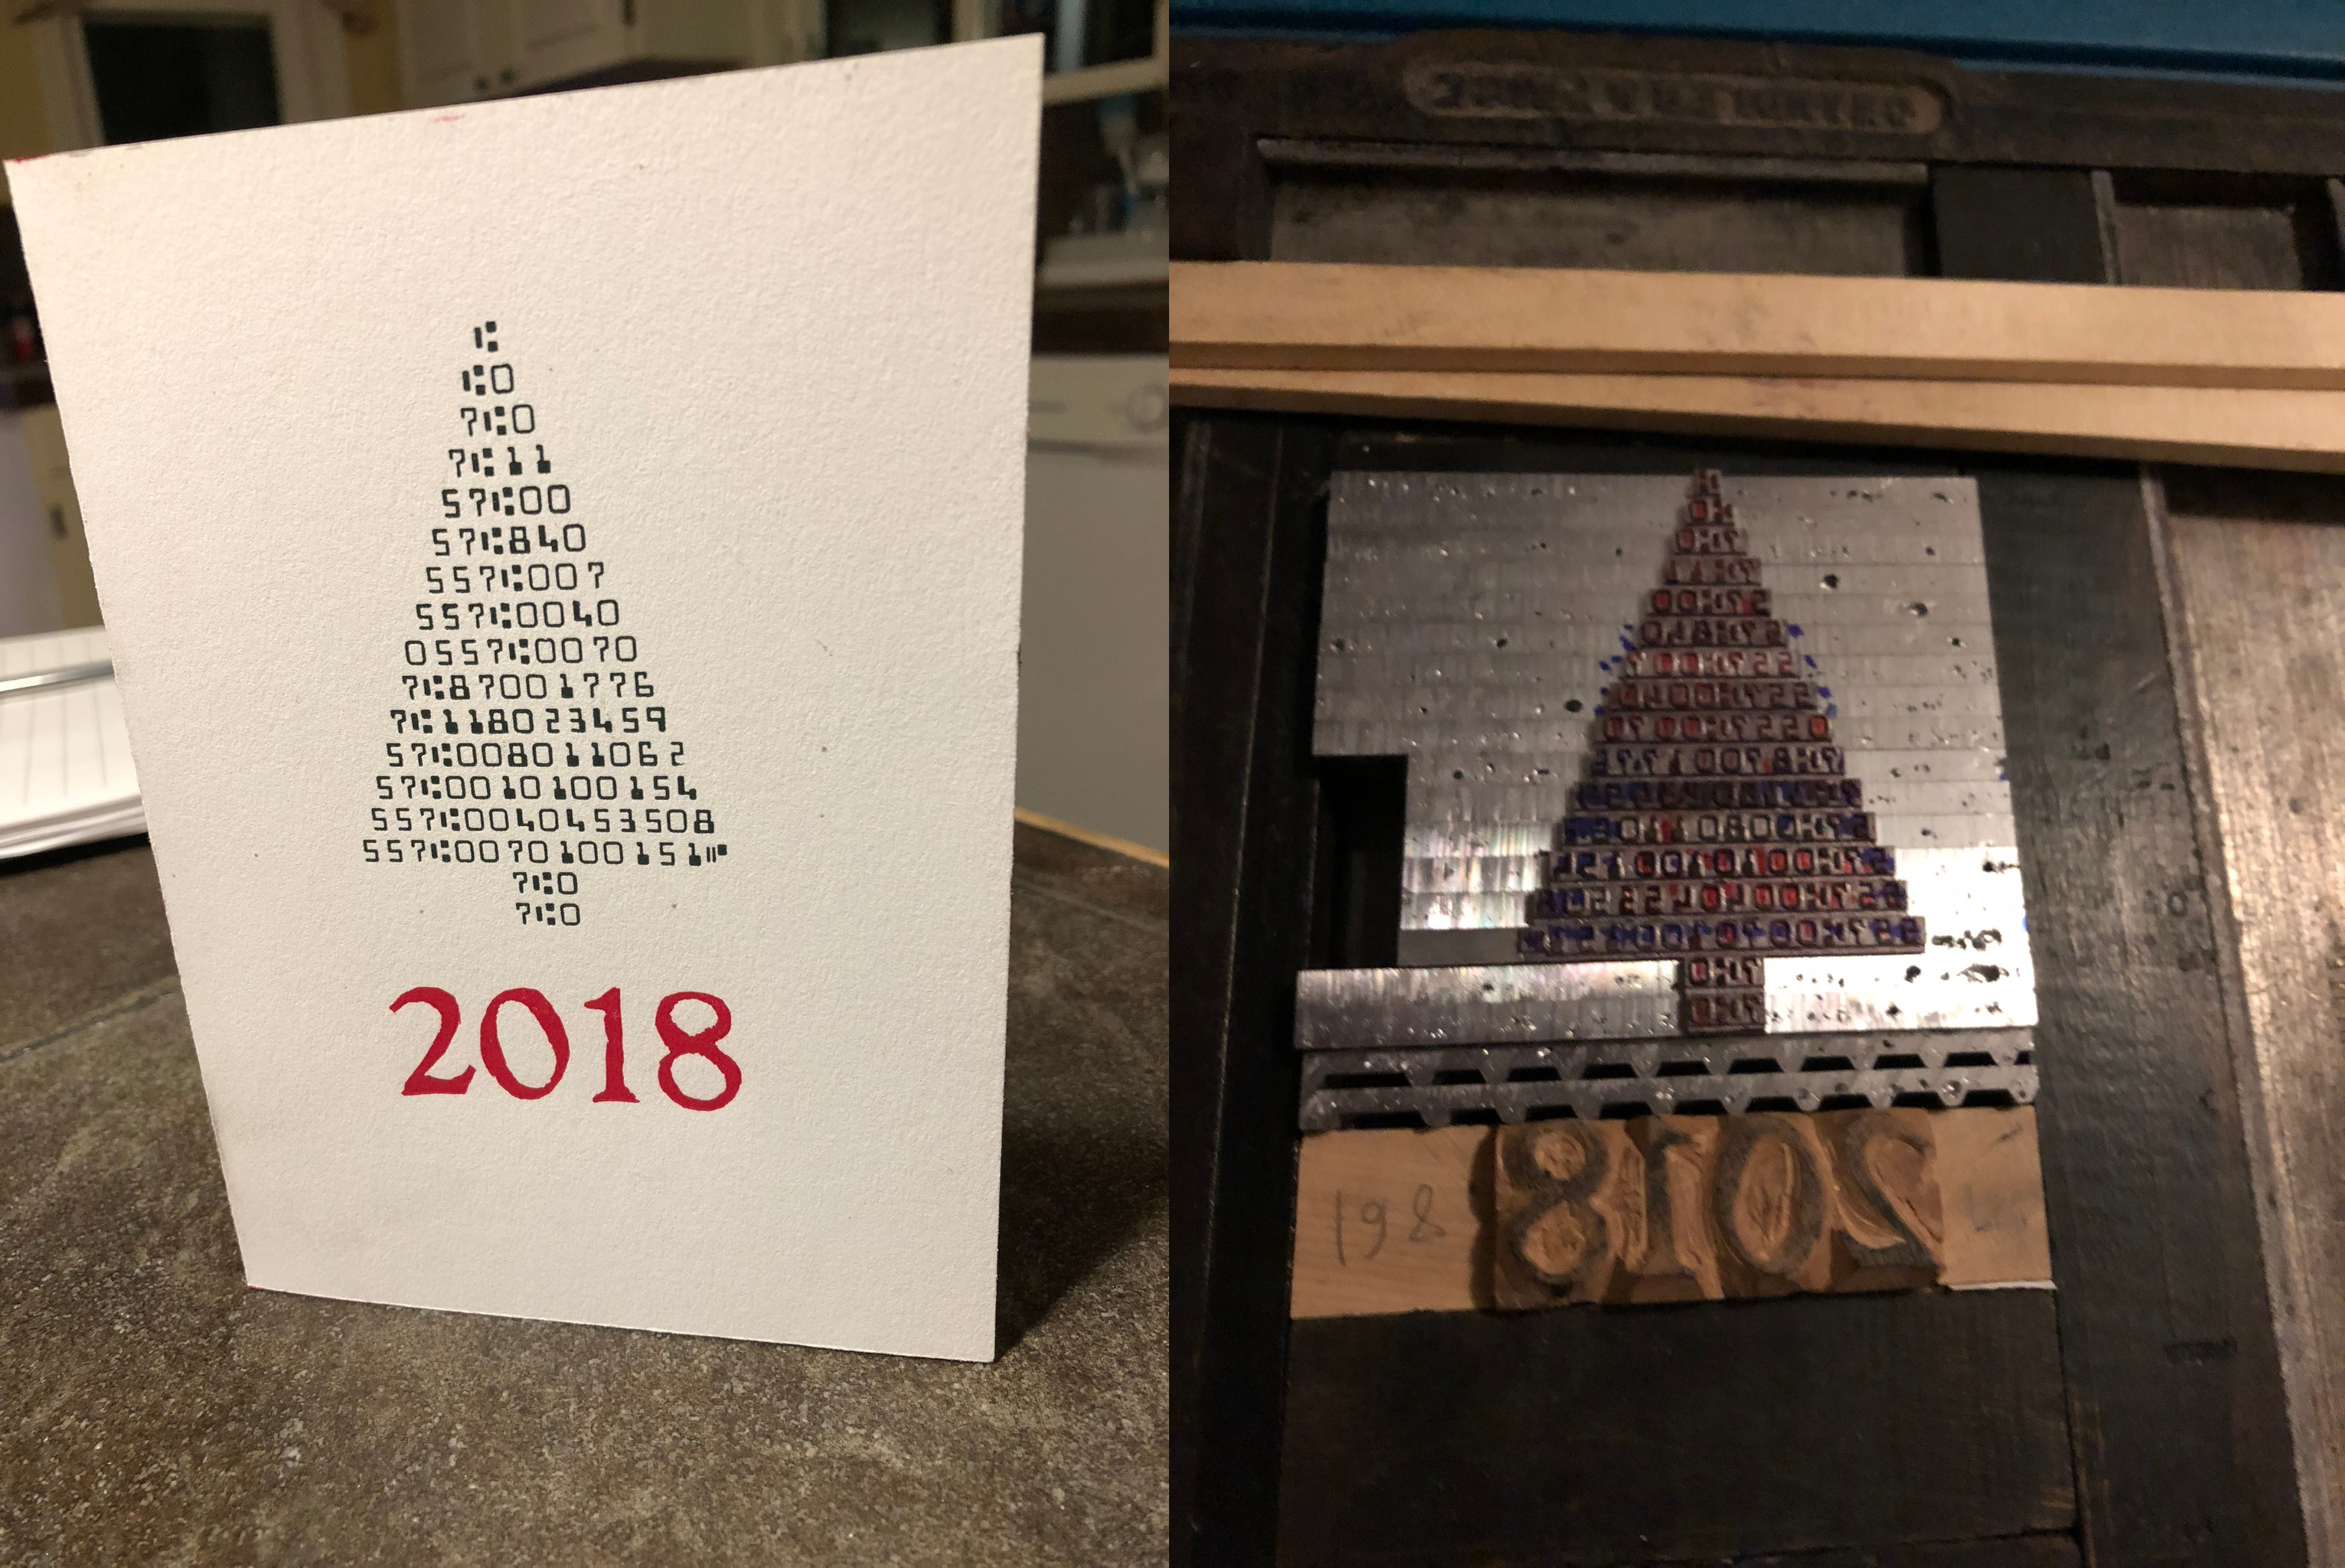
The first task was to create some large type for the year. [linotype] laser printed “2018” then used an iron to transfer toner to the end of a piece of scrap maple flooring. Carving the numbers in relief yielded ready-to-go type, since the ironing process took care of the necessary mirroring step. The wood block was then cut to “type high” (0.918 inches; who knew?) using a compositor’s table saw – with scales graduated in picas, of course.
Maybe the slickest part of this hack is the tree print. [linotype] had previously bought a bunch of old Linotype slugs with the intention of melting them down for re-use, but this project offered the opportunity for a more direct approach. After trimming type off the edges of successively narrower sections of slugs, the neat outline of a tree emerged. The re-purposed slugs had originally been cast to print bank account numbers using the E13B font, adding to the charm of the finished cards. This font was designed for printing in magnetic ink so that 1D magnetic scanners could automatically read the numbers, and the distinctive shape of the characters creates the look of a decorated tree in the print.
The resulting card, printed in Pepper Red and Forest Green, has a perfect, simple look we all can enjoy virtually, even if we can’t see one in person.
If you’ve never seen [linotype’s] namesake, a Linotype machine, in person either, you can at least read about their history and efforts to save one machine in particular.


A modern *kerspace can do SO MUCH with type and printing.
Printing folks are *boggled* by the absurdly expensive photopolymer plates that we now think of as a resin 3d print.
Oh, and regular FDM makes neat plates too, for short runs before the plastic deforms.
Of course any 2.5d mill / router / engraver thingy can make plates.
And if you have a jointer/planer, you can make all sorts of blocking and furniture that help hold type in place in the frame.
OP here, the reglets and the still-wood-coloured furniture came out of my own wood shop. I’m a bit of a traditionalist, I do this printing stuff to get away from my tech job, so going the 3D printing route, or even the photopolymer route feels a bit like cheating. But I would like to get a CNC router going to make my own wood type/wood cuts.
The downside is that the recipients wont appreciate the craftsmanship that went into creating these cards, and just assume they were picked up at the local supermarket or mall.
0.918″ is clearly the British-American system. There are other systems in existence that vary in height.
So, was magnetic ink used for printing the numbers on the tree?