3D Printed Printing Plates Made Using Modern Tools

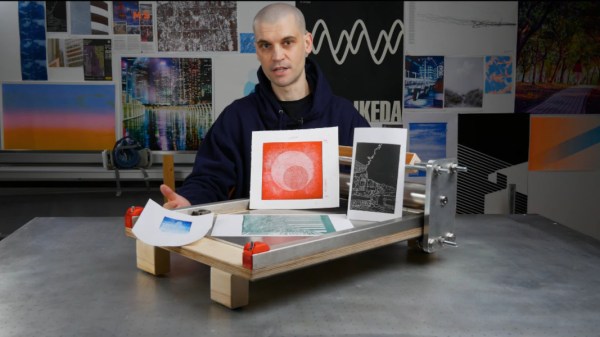
It’s widely accepted that the invention of the printing press by Gutenberg in the 15th Century was the event that essentially enabled the development of the modern world, allowing access to knowledge beyond anything that came before, even if the Chinese got in on the bookmaking act some 500 years previously. Fast-forward a few centuries more and we’ve got the ability to design electronics from our arm chairs, we can print 3D objects from a machine on the coffee table, and 3D modeling can be done by your kids on a tablet computer. What a time to be alive! So we think it’s perfectly fine that [Kris Slyka] has gone full circle and used all these tools to make printing plates for a small press, in order to produce cards for her Etsy business.

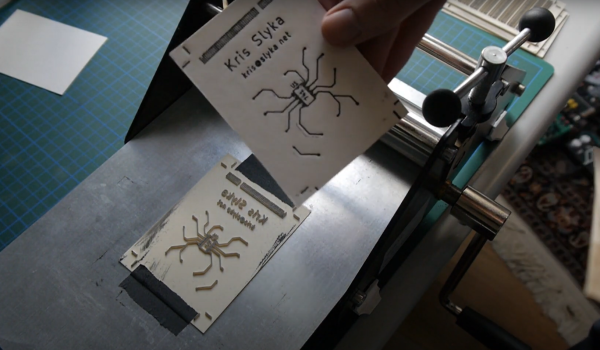
Now before you scoff, yes she admits quite quickly that KiCAD wasn’t the best choice for designing the images to print, since she needed to do a lot of post-processing in Inkscape, she could have just dropped the first step and started in Inkscape anyway. You live and learn. Once the desired image was fully vectorised, it was popped into OpenSCAD in order to extrude it into 3D, thickening the contact to the base to improve the strength a little.

[Kris] demonstrates using the registration marks to align the front and rear side plates, and even (mostly) manages adding a second colour infill for a bit more pizzazz. The results look a little bit wonky and imperfect, exactly what you want for something supposed to be handmade. We think it’s a nice result, even if designing it in KiCAD was a bit bonkers.

For those interested in the OpenSCAD code, have a butchers at this gist. This project is not the first 3D-printed printing press we’ve covered, checkout the Hi-Bred for an example, and here’s the Open Press Project if you’re still interested.

Continue reading “3D Printed Printing Plates Made Using Modern Tools”

Proofing Press Proves DIY Is A-OK

Back in the day when most people read the news on wood pulp, newspaper outfits would run off a test print on a small proofing press. This gave them a chance to check for typos before printing off thousands of newspapers on the real press.

These presses can be used for more than letterpress proofing, as [Paul] proves with this DIY version (YouTube, embedded below). They are simple machines that use a heavy roller on bearings to provide uniform pressure, so they’ll work for lino-cut printmaking and aquatint etchings, too.

The roller is the most important bit and is easily the most expensive part of a build like this one. [Paul]’s was fashioned by a UK machinist that he found through ebay. The total cost was £220 (~$300 USD), which is well below the thousand-pound mark where commercial machine prices start.

[Paul] made the base and handle out of plywood and CNC’d the side panels out of aluminium. These side panels contain bearings that hold the roller’s ends in place. As the roller moves back and forth, it slides along on another set of bearings the underside of the press. These bearings ride thin metal rails on the underside of the press so they don’t wear grooves into the wood over time.

[Paul]’s press looks fantastic and looks like it does a great job with everything he throws at it. Some uses require raising up the surface to be printed on to get a good transfer, so [Paul] might make it adjustable in the z-direction at some point in the future. Check out the build and walk-through video after the break.

If [Paul] looks familiar, it’s because we featured his equally impressive large-format book press last spring.

Continue reading “Proofing Press Proves DIY Is A-OK”

Printing Christmas Cards The Hard Way

Printing customized Christmas cards is a trivial matter today: choose a photo, apply a stock background or border, add the desired text, and click a few buttons. Your colorful cards arrive in a few days. It may be the easiest way, but it’s definitely no where near as cool as the process [linotype] used this season. (Editor’s note: skip the Imgur link and go straight for the source!)

The first task was to create some large type for the year. [linotype] laser printed “2018” then used an iron to transfer toner to the end of a piece of scrap maple flooring. Carving the numbers in relief yielded ready-to-go type, since the ironing process took care of the necessary mirroring step. The wood block was then cut to “type high” (0.918 inches; who knew?) using a compositor’s table saw – with scales graduated in picas, of course.

Continue reading “Printing Christmas Cards The Hard Way”