
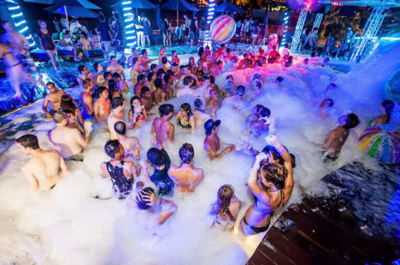
Imagine a tub overflowing with bubble bath, except it’s a club dancefloor and music is pumping all night. This is what is known as a “foam party” — a wild and exciting concept that nonetheless many are yet to experience. The concept exploded in popularity in Ibiza in the 1990s, and foam parties are regularly held at nightclubs and festivals the world over.
Foam is generated with the obviously-named foam machine, and these can be readily purchased or hired for anyone wishing to host such an event. However, that’s not the hacker way. If you’re a little ingenious and take heed of the safety precautions, here’s how you can do it yourself.
How Do Foam Machines Work?
If you’ve ever blown bubbles, you’ll be familiar with the basic theory. Create a soap film across an opening, and then blow air through, and it’s possible to form a bubble.
Foam is created the same way — it’s just millions and billions of tiny bubbles all stacked together. To generate a foam, we essentially need to blow loads of tiny bubbles all at the same time. Instead of a single bubble wand formed out of a loop of wire and dipped in soap, we need to create something much smaller, thousands of times in parallel. It’s the FPGA of bubble blowing.
The starting point is to use a fabric membrane, which will act as the surface upon which the bubbles are generated. This membrane is then soaked in soapy water. At this point, the fabric becomes a matrix of tiny holes covered in a soapy film. By then passing air through this fabric, thousands of bubbles are generated all at once, coalescing into a foam. Keep the air flowing, and keep the fabric wet, and buddy – you’ve got yourself a foam machine!
A Practical Approach
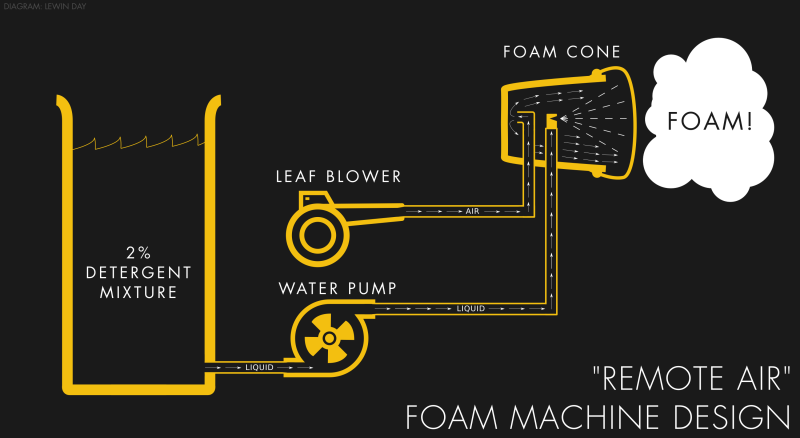
A foam machine can be cheap to build, or remarkably expensive, depending greatly on the materials and hardware you already have to hand. The main components required are a foam cone, a pump, a tank, and an air supply. This guide is just one way to produce a foam machine, with an aim towards using cheap and readily available components. If you’ve got money to throw at the build, or lots of great gear lying around, there are other paths to take, but this should get you started in the right direction.
The tank is a simple consideration — it’s a vessel to hold your soapy water mixture. For a party of around 30 guests, with a 4x4m dance floor, 250 liters should be plenty. Basically any vessel can be used, from barrels to garbage bins. However, given that people will be dancing all up in your foam, cleanliness is paramount. Using a new, clean tank is best – using an old 44 gallon oil drum will probably give all your friends contact dermatitis and ruin the night.


We used a plastic barrel that formerly contained food-grade ethanol for wine production, and washed it several times before use. This was lightweight, cheap, and top was easy to cut off so we could drop the pump in. For foam fluid, most DIY builds recommend a 2% mixture of soapy water. This author found success by mixing 5 litres of dishwashing liquid with 250 liters of water. It’s crucial to hit a minimum concentration here; much time was lost wondering why the machine wouldn’t generate foam, until the realization came our mixture was a factor of 10 too dilute.
The water pump has the job of delivering soapy water from the tank to the foam cone, with enough pressure to nicely atomise it through the spray nozzles. Any pump capable of delivering 10 liters per minute with a few meters of head should be suitable, but finding something appropriately specified can be difficult for the uninitiated.
After an abortive experiment with a drain pump from a washing machine, we decided to go to splurge $70 on the cheapest high-flow submersible pump we could find. With a maximum flowrate of 233 liters per minute, its performance was overkill for the application. However, when working to time and budget limits, it pays to overspec once rather than underspec twice. Being a submersible pump, it also simplified our plumbing. Rather than having to worry about priming the pump and installing fittings and hoses to the tank, we were simply able to just drop the pump in and switch it on. Given that cheap, high-flow submersible pumps are readily available from most big hardware chains, they’re a safe bet and will get the job done.
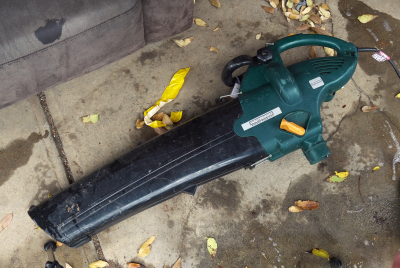
The air supply is where options become more diverse. For this application, the desire is for a large quantity of relatively slow moving air, which is best for creating bubbles. Your choice here will also influence your foam cone design. The best option is to choose a large industrial extractor fan, of the type often seen used on engine dynos. These consist of a powerful fan mounted in a cylindrical housing, and often it’s possible to attach the foam cone membrane and sprinkler heads directly on the front, reducing complexity. However, these fans are quite expensive, even on the second hand market. An alternative cheaper option can be to use a leaf blower or blower vac. For our build, we were able to source two second hand blower vacs from a pawn shop for $5 each. Set to their vacuum setting, it was easy to attach a pipe to duct the air to the foam cones. While they don’t deliver as much air, and thus as much foam, as a big ventilation fan, for the price they’re a great way to build a functional foam machine. Oh, and they’re noisy as all heck, too. Not that it matters to the punters, though – turn the stereo up, keep the beer flowing, and they won’t bat an eyelid.

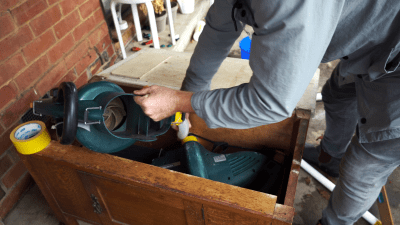
The foam cone is the star of the show; this is where all the action happens. The fabric membrane is stretched across an opening, through which air is blown. The foam cone also contains spray nozzles through which soapy water is sprayed onto the membrane to keep it wet and ready to produce bubbles.
A simple way to construct a foam cone is to stretch an old cotton T-shirt across the opening of a bucket, and zip tie it in place. Holes can then be drilled to allow a water line into the bucket and a spray nozzle to be fitted, as well as a large tube inlet for the air supply. Both these holes should be sealed well, to make sure all the air coming into the foam cone is going out through the membrane. Any holes will reduce the amount of air being used to make foam.
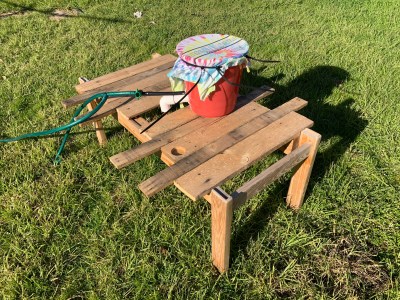
Incidentally, it’s actually not super important to aim the spray nozzle at the membrane. In a properly sealed foam cone, any water coming in will have nowhere else to go but out the membrane anyway, so the air rushing in will tend to carry it there one way or another. In our design, we install the air hose in the side of the bucket, passing it through a 90-degree bend to blow towards the base. This forces the airflow to turn through 180 degrees to reach the outlet, slowing it down and helping the flow develop to the full diameter of the bucket. This is important as the flow from our leaf blowers is a small fast jet; for good foam production, we desire a slower, broader stream of air. We then fit a small irrigation sprinkler nozzle to the end of a water hose fed by the pump, and feed that in the side too. The bucket is then sealed up with tape and super glue, and the foam cone is ready to go.
Hook all these parts up, and you’ve got a functioning foam machine!
Safety Considerations
Safety is a big factor when working with a foam machine. In any rig that combines water and electricity, precautions must be taken to avoid risk of electrocution; consequences can be tragic if this is not paid due consideration.
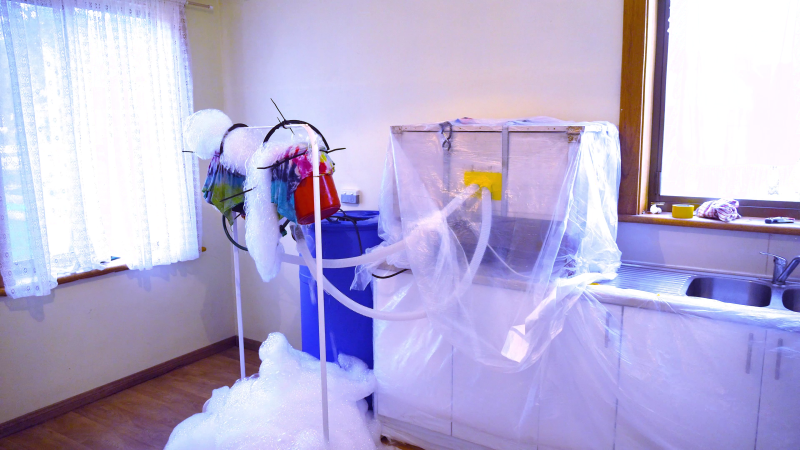
The foam machine should be built in such a way that electrical parts and cabling do not come into contact with water or foam. This should be true both in normal operation, and in the event of leaks or faults. Murphy’s Law tells us that what goes wrong, will go wrong, and thus the machine should be designed to be safe even in the event of failures. In our design, by using a properly rated submersible pump, the water delivery system can be considered electrically safe. Air from the leaf blowers is also delivered to the foam cone by pipes, keeping them well away from the water and foam. The leaf blowers were also raised well above the floor, ensuring they would remain dry as the foam level increased. The room chosen for the foam party was a kitchen, which contained no floor level electrical outlets which could inadvertently be switched on and cause a hazard. All outlets in the room were at height and the foam was kept well below this level to avoid electrical contact with fluid.
Safety is also about operating procedures. During our party, the foam machine was only operated under strict supervision, for limited periods of time. This meant that if there was a leak or a fire, someone was on hand at all times, ready to shut down the machine. Multiple individuals were briefed on what to do in the event of a fire or other malfunction. This included familiarizing the group with the location of fire extinguishers and the house’s electrical switchboard in case it became unsafe to approach the machine to shut it down.
The trick is to take the proper precautions in order to do dangerous things safely.
No, No, No, No, Yes!
Whenever you’re building a project involving water, it’s highly likely you’re going to get leaks. We faced hoses slipping off barbs, holes in our water lines, and even the tank simply siphoning out because the pump lacked a stop valve. This led us to improve the design over time, fitting taps at several places in our lines to allow us to shut things off quickly in the event of a leak. This meant that, over the course of a rambunctious party, we only spilled 50 liters of fluid when our hoses completely burst at the halfway mark. This also allows the flow rate to the foam cones to be tuned to help maximise foam production and avoid any overflow problems.
This writer would love to spend a year researching the fluid mechanics and engineering factors involved in producing the best possible foams; if you’ve got tips, be sure to share them in the comments.
On a project like this, never underestimate the value of bringing others on board to help. Having people around to fetch tools and offer different perspectives can make troubleshooting much faster. People can also bring different skills to the table. Our project became far more robust thanks to the help of an experienced farmhand, who was able to show me how to better fit our pipes to the barbed fittings through the use of a kettle. Plus, foam is always more fun with friends!
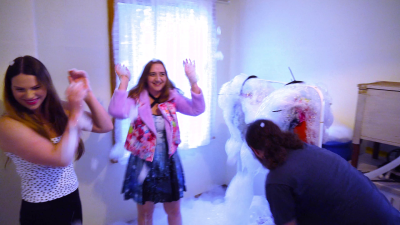
Overall, it’s easy for the experienced hacker to whip up a foam machine and throw an epic party, and we can experimentally verify that the addition of suds makes any dancefloor 300% more popular. Good luck, and when you pull off that sweet, foamy build — you know who to call. Happy hacking!


I’m in
You can build a smaller version of this, add a second airstream path to sheer off the foam, and you got your self a snow machine! Adding a little alcohol to the mix makes the foam last a lot longer.
I used the same leaf blower too. ;) 3D printed a venturini and a co-axial air accelerator via the Coanda effect. Open source but currently set to private. I’ll be putting it up before Christmas.
Yes please.
I thought you added glycerin, wouldn’t alcohol make the foam collapse, kinda like it does to the party goers?
I don’t know how or why it works. I just duplicated what I found in the commercial equivalent product used in snow machines. For this application, I would probably forgo the alcohol, but it is an interesting effect. The foam is stiffer and lasts longer with it.
Well oil beef hooked, you learn something new every day, thanks for the tip.
“is stiffer and lasts longer”
That has to be about the only time you can say alcohol has THAT effect! ;)
Lol. Glad I’m not the only one with a sorry mind.
Very interesting – what manner of alcohol, and how much did you use?
The cheapest. :) I used rubbing alcohol and it worked the best at a 5:1 water to alcohol ratio. It still has a noticeable effect at lesser concentrations though. I settled on 2 gal of water, 1 quart of alcohol, and 1-2 cups of Mister Bubble.
make sure not to use detergent with enzymes in it. really irritates the skin
Mr Bubble bubble bath works great. You need a little more of it than detergent though. To make it last a lot longer, add equal parts of alcohol.
I’m glad your not one of my tenants Lewin !
Looks awesome I need to build one
I did this years ago, and have a few tips:
Don’t do this on the grass or near trees. The foam will kill both.
Having a way to re-circulate the soap solution helped me
I used reticulated foam with a spray head and blew air through it and the excess dripped back into the trash can reservoir.
I suspect the cloth method will work better than mine!
It’s interesting you say that! In testing, I had significant amounts of foam on the lawn and near plants and it did no damage. The dish detergent had no effect.
You must have used the green detergent….
Another use for foam machines, with some automation, is insulation in a double wall green house. A UK guy made one to boost his season, and it could also be used as shade on hot days.
Link please. I’d like to see the details.
The geek house I was a part of did this a couple times. There are multiple plans out there for purchase that create machines of varying ability. We managed our outdoor party with three machines and filled about 300 sqft of space with foam to about 5 feet of height. The parties were neither the wildest nor tamest parties thrown there. They were a lot of fun, though.
The first such party I can think of:
https://www.youtube.com/watch?v=SMCoT5NM3Xw
I floated something like this in a kiddy pool with Johnson’s Baby Shampoo in it, and the foam was amazingly dense.
bubble bath liquid added to a spa bath can fill a room in no time.
These guys know how it’s do it https://youtu.be/lK8IIRZ4Q80
Imagine how little learning would happen if they had systems like this in schools. Kids would set off the system all the time just for the absolute blast of a distraction. ….might slow down an active shooter too….custodians would HATE it. :-)
Couldn’t you set up a motorized cloth belt with one end in the barrel of detergent solution and have it pass over a big nozzle for the air? No pump needed, and if you used the right type of blower, maybe a lot quieter.