A friend of ours here at Hackaday has an audacious design in the works that we hope will one day become a prototype that we can feature here. That day may be a little while coming though, because it has somewhere close to a thousand of the smaller SMD components in multiple repeated blocks on a modestly sized board, and his quote from a Chinese board house for assembly is eye-watering. He lacks a pick-and-place machine of his own, and unsurprisingly the idea of doing the job by hand is a little daunting.
We can certainly feel his pain, for in the past we’ve been there. The job described in the linked article had a similar number of components with much more variety and on a much larger board, but still took two experienced engineers all day and into the night to populate. The solder paste had started to spread by the end, morphing from clearly defined blocks to an indistinct mush often covering more than one pad. Our eyes meanwhile were somewhat fatigued by the experience, and it’s not something any sane person would wish to repeat.
Mulling over our friend’s board and comparing it with the experience related above, are we on the edge of what is possible with hand pick-and-place, or should we be working at the next level? Board assembly is a finely judged matter of economics at a commercial level, but when at a one-off personal construction level the option of paying for assembly just isn’t there, is there a practical limit to the scale of the task? Where do you, our readers, draw the line? We’d love to hear your views.
Meanwhile our friend’s audacious project is still shrouded in a bit of secrecy, but we’ll continue to encourage him to show it to the world. It’s not often that you look at a circuit diagram and think “I wish I’d thought of that!”, but from what we’ve seen this fits the category. If he pulls it off then we’ll bring you the result.
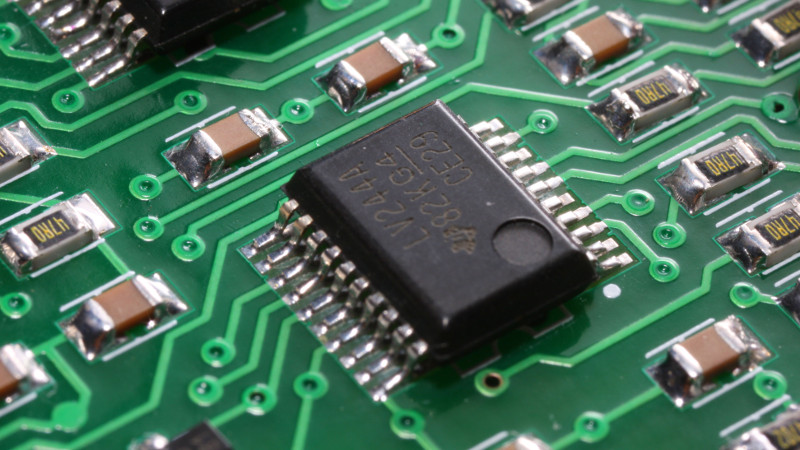
PCB image, Andrew Magill (CC BY 2.0).


Left out the opportunity to plug JLCPCB’s reasonably cheap, new assembly service. They have their limits, but it could be a good thing. 👌
Only a A$0.0022 per joint and a A$10.21 engineering fee, so about A$14.61, pretty cheap instead of 5.5 hours at 1 component per 20 seconds.
Plus they are really good at supporting makers, he could probably get it for a link in the description.
I gave up at 360 parts on one side and brought a chineese pick and place machine without a vision system. Never looked back.
I’ll still hand populate the side of the board with 18 components. But the top side is a dream.
How many CPH (chips per hour) are you getting ?
And did owning your own pick and place change how you design boards, reusing the same components as many times as possible, to lower the number of reels required ?
How accurate is the machine on placing the components if it’s essentially running in open loop feedback?
Chinese machine, USA support: http://rcspnp.com/products
Loctite’s room temp storage solder paste changes everything! Paste stays in place and parts can even be place the next day.
Woah that sounds great. Do you have a link to a particular favorite variety?
He is probably referring to GC 10:
https://www.digikey.com/product-detail/en/loctite/1993881/1000-133-ND/5182353
Ooooh, I didn’t know about that! Ordering! Thanks.
I have maybe a lower patience threshold than others for pick and place and itty-bitty SMD components (both eyestrain and paste spreading and because the odds of me screwing a board up to the not-worth-fixing point increase as SMD part count goes up).
One thing that’s worked for me is to break a design into separately populatable modules that can be stacked, plugged, or even soldered together when populated to make it easier to break the chore up and troubleshoot each module in isolation if needed.
There are some limits to this, however, as high current paths, RF and other high-speed signals, etc. don’t take kindly to longer traces and extra connectors but where practical it makes populating prototype boards easier but wouldn’t be much help in this situation.
Did i read that correctly, a thousand components and the commensurate many more traces ? I think that’s just a tad beyond the normal DIY PCB maker.
When you’re doing pro level work, expect pro level costs.
The PCB fab I use offers assembly for about $20 setup and $0.05/pin, meaning a dime per resistor. I can either charge that much extra for my boards or look at how many hours it takes me to do it by hand. The result is that for short runs (the board I’m using to gauge this has 1 IC and 14 passives) of under 20 boards I do it by hand, and when someone orders more than 20 boards at one go, I have it assembled. (Since I’ve already paid the setup, that makes it cheaper.) I’ve found that it more than doubles the turnaround time, and your estimate for time should be significantly higher than the quoted time if it’s the first run, because somehow there are always problems, like “That part isn’t available from Digikey: what part would you like substituted?” and I find a substitute part and the next day “oh this other part also isn’t available” and each iteration of that resets the supposed four-day turn time, and I’ve had this exact problem through work with $100,000 orders through multiple US-based fab houses so it isn’t just me using one bad cheap Chinese fab, which is to say: don’t believe the lead times. If you have a tight deadline you do some boards by hand and have the rest done through the fab so you won’t be hung out to dry if something goes wrong.
I’ve even sent boards to a very local, quite high-priced pcb fab purely because I know the owner and several of the operators personally, because they always get stuff done on time. I’ll get three pcb’s done through them, and the bulk of the order done through some fab for 1/10 the per-piece price.
As for actual physical assembly, I’ve done solder paste, and I find it faster to place all the parts by hand and then solder them all using an iron and solder wire. Maybe that’s just because I’ve been doing this for 20 years, but I regularly assemble test boards for work that have 400 passives and a dozen actives, and hand place and solder has worked well for us. (In part it’s because soldermask stencils are hard to justify for 400mm round boards when we’re only building 4 of them.)
The limit I found for small batch production was the shipping cost for the framed stencil. If it’s worth buying the stencil then it seems to be worth sticking on a pnp. The setup time and configuration of a desktop pnp is surprisingly fast.
At around one for me.
Seems like a good case for a LitePlacer. If a board house charges $100 for assembly buying their kit for $1875 will be paid for within 19 boards :-)
Or spend a bit more and get a fully automatic machine. Charmhigh has a deserved cult following.
Liteplacer is based on tech from 10 years ago. It also uses a funny controller board that requires JSON?? The cameras shipped do not even support MJPG streaming, so you can’t used both at once on your PC. Stay away from it completely! Build your own
I am doing a lot of hand assembly and truthfully after all these years placing 0603 components… 200 parts is the absolute maximum for a day because then concentration drops quickly and human errors start showing up. Especially when majority of the components are at different values.
This is why I am now restoring one old Pick and Place machine from Fritsch to do my bidding. Have to rebuild, redesign and reprogram from scratch. Estimated 6 months project.
This seems like a perfect opportunity to either borrow a buddy’s PnP, or get the whole local hackerspace to chip in on the price, and locate it there. (neither are always possible, I understand)
I usually use the rule “30 seconds per components placed on average” to figure out how long it’s going to take me.
This includes looking at the schematic for the value, looking at the PCB design for the placement, and then looking at the PCB to find the placement, and grabbing the correct value.
I’ve since bought a placement machine with vision, but setting it up to get it to work reliably is also very time consuming. My problem with this machine is mainly to get it to move one component forward on the component string reliably.
So for me, I would have to run quite a few PCBs to justify investing time to set the machine up properly for a batch.
“Open loop feedback” is an oxymoron. A machine is either open loop or has feedback, it can’t be both simultaneously.
Just read “open loop” as “without any”. After all, it’s useful to say what it is lacking.
I had some boards made last year and the assembly price was astonishingly low. In fact they could source and place the parts for less than I could buy them for. (This was PCBAStore.com)
But one option that I have considered is a semi-automatic pick-and-place where the machine tells me what component and value to drop in the pick-up area then the machine does the orient and place.
I have an old Roland pen-plotter which looks like it could be a useful P&P with a little work.
You can also make a jig: CNC or laser cut small holes in an acrylic sheet. Put another sheet under it, and put parts into the holes. Once finished, paste up the PCB and put it upside-down on the jig. Flip whole pack, remove top sheet first by sliding (to avoid parts sticking to it), then remove the sheet with holes, and hope that all parts remain in correct places.
It’s a lot faster to place parts into holes than manually onto the board directly. Especially if you only have a few types of components, like in a led matrix or similar.
Disclaimer: I’ve only tried this so far with small 0805 PCB, not sure how well it will scale to smaller parts.
Wouldn’t some kind of one purpose placing jig make a sense? Like 3D printed jig with indentations for all the components and small canal for vacuum suction. Fill the indentation with components turn on suction, put on place where you applied paste and turn off suction. Not exactly pick & place, but it cut down on the manual labor with tweezers.
Also alignment could be an issue, so pre-drilled holes for jig alignment would be helpful in this scenario. If you add foot pedal for vacuum operation and some holding arm for the jig while you populate it, it could be quite fast, semi-automatic workflow for repetitive component placement.
Or better yet, another foot pedal for operating a mechanism that rotates the jig in place. This way you populate jig, start vacuum with one foot, align manually board, place with another foot, stop vacuum, rotate back. Rinse and repeat.
3D printer, vacuum machine, and arduino + driver + servo could be found in reasonably stocked workshop.
Ask more fabs, if the cost was eye watering you are doing something wrong ot the fab is.
Me, scrolling through the day’s hacks: “Hey, wait a minute.. isn’t that my picture?” :)
Woot woot!
When I build small [6-12 unit] batches of PCB, I have a simple process:
1) Print out layouts of the boards at several times size, with the parts values shown.
2) Use multi-color highlighters to highlight the parts locations for 5 parts values per board on each sheet.
3) solder ‘dot’s on one pad of a 2 or 3 lead part and diagonal pads of an IC for the entire board[s]
4) use a flux pen to ‘write’ over the entire board[s]
5) for each part, remove that many from the reel/strip.
6) using tweezers in my [non-dominant hand], place each ‘right side up’ part on the board,
and solder the one/two pins with an iron in my dominant hand.
7) touch the ‘upside down’ parts with a stick note to turn them right side up
8) finish placing the parts as in step 6
9) do steps 6-8 for the other board[s] with the same part
[the next boards get faster in locating the same part’s position]
10) repeat for the next part [I may do several parts on the same board in a row,
if they are different enough – one type of resistor, one type of cap, etc.
11) when all parts are tack soldered on the board[s], eyeball inspect for correct
parts placement, then solder the pins on the board[s].
tack soldering allows easy re-positioning / replacement of wrong parts.
10) go on to the next
addendum:
#7 [stick] = sticky/post-it note
I manage 5 – 10 seconds per resistor / cap this way
I ran way past the limits of hand assembly on my project (the Neon816, seen on hackaday before).
I built the first one by hand, and even that was painful. The board has a BGA, a TQFP with a power pad, and a couple hundred individual components. It must have taken me a dozen hours or so to build the board.
I figured I was only ever going to build one, but there was a lot more interest than I expected. I looked at having them populated, but the board complexity is so high that assembly was going to be very expensive, with a pretty large minimum batch size. And if I’d made any mistakes on the board, I’d end up with a lot of useless boards. It turns out that I made a huge mistake which would have resulted in about a 50% yield, so I’m really glad I didn’t get a batch built.
So I bought a Charmhigh machine. It can stuff a board in 4 minutes. I’ve since built a couple dozen of them. Not sure if I’ll ever justify the price of owning the machine, but I love having it.
What is the name or a link for your PCB fab?
Not a good answer for this particular job, but for ‘one-off’ PCBs about the size of a sheet of paper or less I do it the 3-step way…
1) Take it to the microscope-on-a-boom and resign myself to putting a little solder blob on one pad of each part – which pad depends on my favorite hand to hold solder iron with and silkscreen orientation ( so when I place/solder the parts to that pad I’m reading numbers that are right-side-up) , usually the right-most and top-most pads. That way, if I screw up, it’s only one pad to hit with the iron to fix. :-)
2) Place – part in left-hand tweezers, solder iron in the right.
3) Put on the tunes, day-dream and touch solder to every pad that doesn’t have solder on it.
In the last 4 years I picked and placed manually all the SMDs for all of my projects. I’ve been involved in over 1000 projects small & medium. Since 2 months I’ve stopped the manual work and I finally purchased an automatic machine from https://neodenusa.com. I can’t believe I’ve done so much manual work for such a long time. Using an automatic system it’s basically heaven.