We’ve all encountered the odd plastic part that is broken and unobtainable. Sure, 3D printers can print big replacement parts, but sometimes you just need to rebuild a very specific piece. [AkBkukU] shows off a technique for doing just that using a process you could almost call manual 3D printing. We’ve seen baking soda used to cure cyanoacrylate glue before, but this technique uses it to build layers of glue that are apparently quite solid.
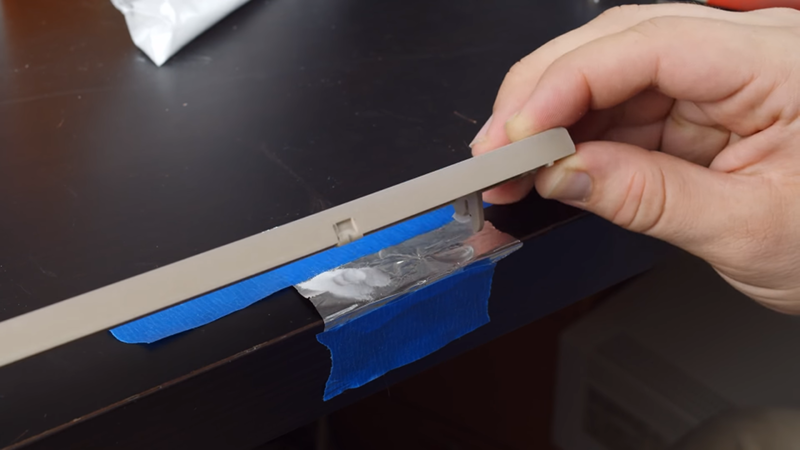
There’s quite a bit of nuance in the video below, but the basic idea is to put a pile of soda on one side of a piece of tin foil and a glob of glue. You dip the part in glue and then into the soda. Each time you get a little thicker layer of glue.
Afterward, you’ll have to file and otherwise shape the new part, but the fact that it can survive being filed should tell you something. We were reminded of how some people use epoxy to form repair parts and then machine them to the exact shape needed. At the very end of the video he builds up layers on a part he can’t dip. Did it work? Watch it and see.
In addition to the manual 3D printing technique, he demonstrates using baking soda to cure repairs on a knurled knob from an old clock radio. That’s a bit more conventional, but if you haven’t seen it done before, it is nearly miraculous.
Glue is amazing. We’ve seen hot glue do injection molding. There are many more types out there, too.


Wow!
“banking soda”
If you are not in the possession of a 3D pen, this is a very nice solution. I used this with fine sand for micro RC planes a lot in the past. I guess if I knew baking soda method I could have saved some grams in weight.
But, if you have a 3D pen, you can used that much better to fix plastic parts! Just “3D print” them onto the base part and file to the right shape. Make sure the base has the right temperature and is the same plastic type to ensure proper cohesion. (adhesion is of different materials, cohesion is of the same material)
Ah, but you could have also gone with the great classic recipe to fill in broken balsa parts: CA glue and toilet paper. A more modern and probably stronger alternative would be to use CA glue and those disposable “cleaning cloths” that are similar in texture to paper but actually built up of syntetic fibers.
Baking soda…
I’ve got super-glue and a plastic powder bag sold together as a repair kit, so this trick is not so new.
Saw this video a few weeks ago and have been fixing broken plastic stuff left right and centre. TV remote with broken tabs? Kitchen scrap bucket lid hinge? Cassette Player with buttons so worn they no longer actuate the mechanism? All fixed. It is a bit messy though and requires a bit of trial and error to find the right material to shape the liquid glue before adding the baking soda depending on the item.
Why not use epoxy putty that stuff is made for such things
That can be harder to work with for smaller items and details, this looks like a nice option for when the epoxy putty won’t bond or is too coarse for the application.
Folks who find and restore IBM Selectric typewriters (there’s quite a community) find that one plastic gear tends to fail. An enterprising gentleman carefully reproduced the gear as a 3D print in aluminum. He removes the metal clutch from the center of the failed plastic gear, and presses it into the more robust aluminum one. Problem solved, and in a way the hopefully prevents future problems.
Wonder if form molds would work with this? Not sure what you could use to be the release agent though.
Just use a silicon mold
https://www.youtube.com/watch?v=NA2XJ7PTT3M
This is a common technique by builders of plastic scale models. But, some have found that it can turn to brown goo over time. See this thread: https://www.tapatalk.com/groups/hyperscale/brown-goo-from-ca-baking-powder-t509349.html#p2682114 Also, you’ll notice it’s very brittle.
Super glue and talcum powder works just as well and allows more cure time.
I was thinking talc would be better. Thats why its used in Auto and Builders Bog. Because is essentially crushed rock and is very stable. An organic substance known to react with so many things like moisture, would not be my first choice.
Very impressive, I was not aware of this trick. Very crafty and McGuiverish, I love it!
There’s products available at the hobby shop made for this purpose which are fairly cheap but better suited if you want a permanent or more consistent fix. I learned of it in the mid-70s when before gap filling CA was available. It was call Micro-balloons, I think.
Most of the commenters seem to have missed the point of the baking soda. It is not just a filler it; reacts chemicallywith the CA glue to cure it instanlly..