Hacking Broken Plastic Parts Without A 3D Printer

We’ve all encountered the odd plastic part that is broken and unobtainable. Sure, 3D printers can print big replacement parts, but sometimes you just need to rebuild a very specific piece. [AkBkukU] shows off a technique for doing just that using a process you could almost call manual 3D printing. We’ve seen baking soda used to cure cyanoacrylate glue before, but this technique uses it to build layers of glue that are apparently quite solid.

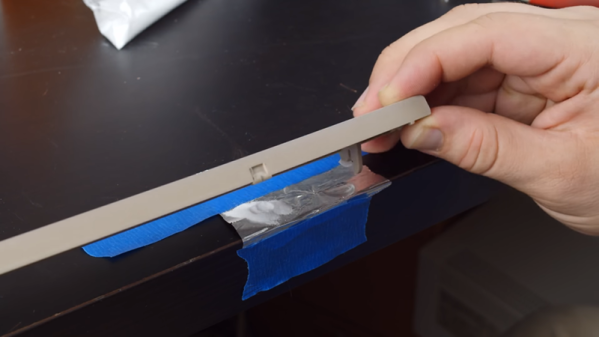
There’s quite a bit of nuance in the video below, but the basic idea is to put a pile of soda on one side of a piece of tin foil and a glob of glue. You dip the part in glue and then into the soda. Each time you get a little thicker layer of glue.

Afterward, you’ll have to file and otherwise shape the new part, but the fact that it can survive being filed should tell you something. We were reminded of how some people use epoxy to form repair parts and then machine them to the exact shape needed. At the very end of the video he builds up layers on a part he can’t dip. Did it work? Watch it and see.

In addition to the manual 3D printing technique, he demonstrates using baking soda to cure repairs on a knurled knob from an old clock radio. That’s a bit more conventional, but if you haven’t seen it done before, it is nearly miraculous.

Glue is amazing. We’ve seen hot glue do injection molding. There are many more types out there, too.

Continue reading “Hacking Broken Plastic Parts Without A 3D Printer”

What The Scale? Mouse Teardown Throws Up A Few Surprises

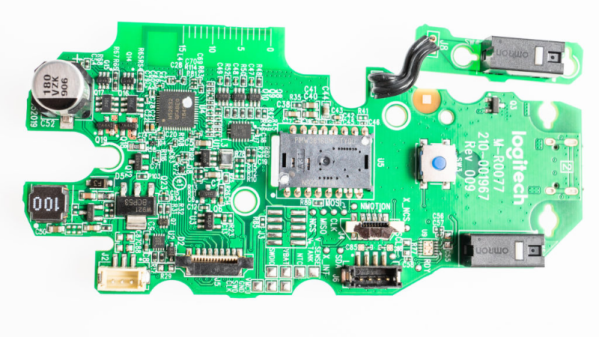
[Eric Weinhoffer] and his colleagues did a great comparative tear down of the MX Master 3 and the MX Master 2S mice from Logitech. Tear down’s are great fun and often end up teaching us a lot. Looking at the insides of a product can tell us a great deal about how to solve certain problems, or avoid pitfalls. Opening up two versions of the same product provides an even greater wealth of useful information on how product design evolves based on lessons learned from the earlier versions. Logitech is no greenhorn when it comes to Mice design, so the MX Master 2S was already almost perfect. But looking at the Master MX 3 shows where the earlier version fell short of expectations and how it could be improved upon.

These mice have intelligent scroll wheels, which can rotate in either “detente” or “freewheel” modes. Detente allows slower, precise scrolling, while freewheeling allows rapid scrolling. The two mice models have completely different, and interesting, methods of achieving these actions. The older version has a rubber-coated wheel and uses a motor, which turns a cam. This forces a detent ball onto the inside of the wheel for detent mode and releases it for free mode. Once the rubber wears off, the mouse is pretty much headed for the dumpster. The new metal wheel does away with the rubber coating as well as the noisy, slow, and prone to wear-and-tear motor assembly. The actuation is now done using a bi-stable electromagnet. A 25 V pulse magnetizes the coil which sits inside the wheel and it pulls on little metal teeth on the inside rim of the wheel. This gives a noiseless detente feel, without any physical contact. A second 25 V spike de-magnetizes the coil, allowing the scroll wheel to spin freely.

[Eric] points out several incremental changes in design which have resulted in improved ergonomics. He also uncovers a few nuggets of useful information. The use of interchangeable mold inserts help make molds last longer while still offering the flexibility to make changes in the molded part. It’s interesting to see special components being used for withstanding vibration and high-G forces. Some of these insights can be useful for those moving from prototyping to production. There’s one puzzling feature on the new PCB that [Eric] cannot figure out. There is a 15 mm scale screen-printed over the blue tooth antenna. If you have an answer on its purpose, let us know in the comments below.

If you are left-handed (which makes 10% of us), you’re out of luck with these right-handed mice and might like to sign one of the several online petitions demanding lefty versions.

Hackaday Links Column Banner

Hackaday Links: October 13, 2019

Trouble in the Golden State this week, as parts of California were subjected to planned blackouts. Intended to prevent a repeat of last year’s deadly wildfires, which were tied in part to defective electrical distribution equipment, the blackouts could plunge millions in the counties surrounding Sacramento into the dark for days. Schools have canceled classes, the few stores that are open are taking cash only, and hospitals are running on generators. It seems a drastic move for PG&E, the utility that promptly went into bankruptcy after being blamed for last year’s fires, but it has the support of the governor, so the plan is likely to continue as long as the winds do. One group is not likely to complain, though;  California amateur radio operators must be enjoying a greatly decreased noise floor in the blackout areas, thanks to the loss of millions of switch-mode power supplies and their RF noise.

Good news, bad news for Fusion 360 users. Autodesk, the company behind the popular and remarkably capable CAD/CAM/CAE package, has announced changes to its licensing scheme, which went into effect this week. Users no longer have to pay for the “Ultimate” license tier to get goodies like 5-axis machining and generative design tools, as all capabilities are now included in the single paid version of Fusion 360. That’s good because plenty of users were unwilling to bump their $310 annual “Standard” license fee up to $1535 to get those features, but it’s bad because now the annual rate goes to $495. In a nice nod to the current userbase, those currently on the Standard license, as well as early adopters, will get to keep the $310 annual rate as long as they renew, and The $495 pricing tier went into effect in November of 2018, while anyone still on the $310 annual price was grandfathered in (and will remain to be). At that time there was still a $1535 tier called Ultimate, whose price will now be going away but the features remain in the $495 tier which is now the only pricing option for Fusion 360. Ultimate users will see a $1040 price drop. As for the current base of freeloaders like yours truly, fear not: Fusion 360 is still free for personal, non-commercial use. No generative design or tech support for us, though. (Editor’s Note: This paragraph was updated on 10/14/2019 to clarify the tier changes after Autodesk reached out to Hackaday via email.)

You might have had a bad day at the bench, but was it as bad as Román’s? He tipped us off to his nightmare of running into defective Wemos D1 boards – a lot of them. The 50 boards were to satisfy an order of data loggers for a customer, but all the boards seemed caught in an endless reboot loop when plugged into a USB port for programming. He changed PCs, changed cables, but nothing worked to stop the cycle except for one thing: touching the metal case of the module. His write up goes through all the dead-ends he went down to fix the problem, which ended up being a capacitor between the antenna and ground. Was it supposed to be there? Who knows, because once that cap was removed, the boards worked fine. Hats off to Román for troubleshooting this and sharing the results with us.

Ever since giving up their “Don’t be evil” schtick, Google seems to have really embraced the alternative. Now they’re in trouble for targeting the homeless in their quest for facial recognition data. The “volunteer research studies” consisted of playing what Google contractors were trained to describe as a “mini-game” on a modified smartphone, which captured video of the player’s face. Participants were compensated with $5 Starbucks gift cards but were not told that video was being captured, and if asked, contractors were allegedly trained to lie about that. Contractors were also allegedly trained to seek out people with dark skin, ostensibly to improve facial recognition algorithms that notoriously have a hard time with darker complexions. To be fair, the homeless were not exclusively targeted; college students were also given gift cards in exchange for their facial data.

For most of us, 3D-printing is a hobby, or at least in service of other hobbies. Few of us make a living at it, but professionals who do are often a great source of tips and tricks. One such pro is industrial designer Eric Strebel, who recently posted a video of his 3D-printing pro-tips. A lot of it is concerned with post-processing prints, like using a cake decorator’s spatula to pry prints off the bed, or the use of card scrapers and dental chisels to clean up prints. But the money tip from this video is the rolling cart he made for his Ultimaker. With the printer on top and storage below, it’s a great way to free up some bench space.

And finally, have you ever wondered how we hackers will rebuild society once the apocalypse hits and mutant zombie biker gangs roam the Earth? If so, then you need to check out Collapse OS, the operating system for an uncertain future. Designed to be as self-contained as possible, Collapse OS is intended to run on “field expedient” computers, cobbled together from whatever e-waste can be scrounged, as long as it includes a Z80 microprocessor. The OS has been tested on an RC2014 and a Sega Master System so far, but keep an eye out for TRS-80s, Kaypros, and the odd TI-84 graphing calculator as you pick through the remains of civilization.

Shapeshifter – An Open Source Drum Machine

With microcontrollers growing ever more powerful each new generation, things that were mere pipedreams before are now readily possible. The Shapeshifter drum machine is a perfect example.

Shapeshifter’s design is open-source, with everything available on Github for the curious musical tinkerers out there. The device is built around a PCB with only through-hole components, making assembly easy for even the least experienced enthusiasts out there. A Teensy 3.6 is then slotted into the socket on the board, providing 180MHz of grunt to run the show. It’s an excellent choice, as the Teensy platform has a huge range of libraries which make it simple to work with audio.

Being open-source, not only is it a cinch to make your own, but there’s plenty of room to remix the design to your personal tastes. There’s even a breadboarding area and the capability to add an expansion card for even more possibilities. Some users have even gone so far as to add displays and filter mods to really open things up.

We love a good drum machine at Hackaday, from the Amstrad-based to pocket-sized wonders. If you’ve got a build of your own, be sure to drop it in the tips line.

Nixie Clock Failure Analysis, [Dalibor Farný] Style

We’ve become sadly accustomed to consumer devices that seem to give up the ghost right after the warranty period expires. And even when we get “lucky” and the device fails while it’s still covered, chances are that there will be no attempt to repair it; the unit will be replaced with a new one, and the failed one will get pitched in the e-waste bin.

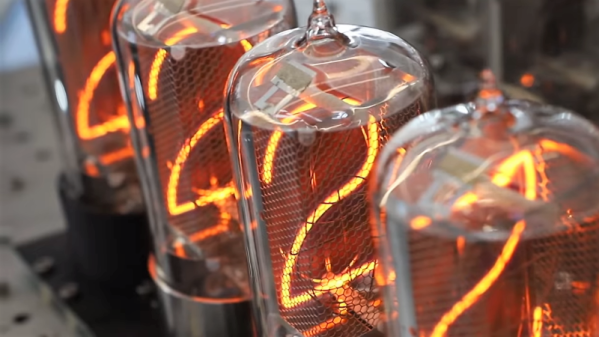
Not every manufacturer takes this approach, however. When premium quality is the keystone of your brand, you need to take field failures seriously. [Dalibor Farný], maker of high-end Nixie tubes and the sleek, sophisticated clocks they plug into, realizes this, and a new video goes into depth about the process he uses to diagnose issues and prevent them in the future.

One clock with a digit stuck off was traced to via failure by barrel fatigue, or the board material cracking inside the via hole and breaking the plated-through copper. This prompted a board redesign to increase the diameter of all the vias, eliminating that failure mode. Another clock had a digit stuck on, which ended up being a short to ground caused by pin misalignment; when the tube was plugged in, the pins slipped and scraped some solder off the socket and onto the ground plane of the board. That resulted in another redesign that not only fixed the problem by eliminating the ground plane on the upper side of the board, but also improved the aesthetics of the board dramatically.

As with all things [Dalibor], the video is a feast for the eyes with the warm orange glow in the polished glass and chrome tubes contrasting with the bead-blasted aluminum chassis. If you haven’t watched the “making of” video yet, you’ve got to check that out too.

Continue reading “Nixie Clock Failure Analysis, [Dalibor Farný] Style”

Prusa Unveils New Mini 3D Printer, Shakes Up The Competition

For the last couple of years, consumer desktop 3D printer choices in the under $1,000 USD range have fallen into two broad categories: everything bellow $500 USD, and the latest Prusa i3. There are plenty of respectable printers made by companies such as Monoprice and Creality to choose from on that lower end of the scale. It wasn’t a luxury everyone could justify, but if you had the budget to swing the $749 for Prusa’s i3 kit, the choice became obvious.

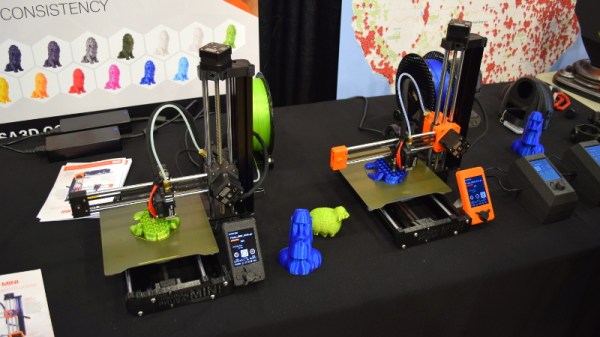
Of course, that was before the Prusa Mini. Available as a kit for just $349, it’s far and away the cheapest printer that Prusa Research has ever offered. But this isn’t just some rebranded hardware, and it doesn’t compromise on the ideals that have made the company’s flagship machine the de facto open source FDM printer. For less than half the cost of the i3 MK3S, you’re not only getting most of the larger printer’s best features and Prusa’s renowned customer support, but even capabilities that presumably won’t make it to the i3 line until the MK4 is released.

Josef Průša was on hand to officially unveil his latest printer at the 2019 East Coast Reprap Festival, where I got the chance to get up close and personal with the diminutive machine. While it might be awhile before we can do a full review on the Mini, it’s safe to say that this small printer is going to have a big impact on the entry-level market.

Continue reading “Prusa Unveils New Mini 3D Printer, Shakes Up The Competition”

Not All 7-Segment Displays Are Electronic

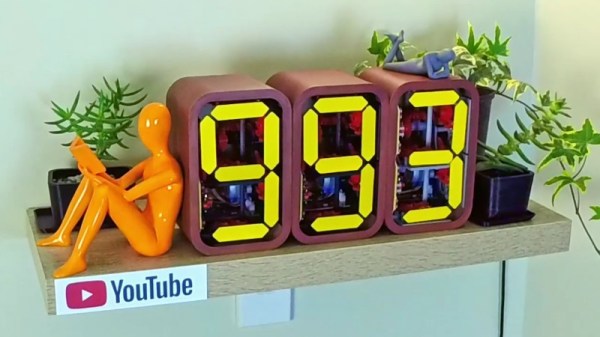
There are a variety of means by which numbers can be displayed from an electronic circuit, and probably the most ubiquitous remains the seven-segment display. Take seven LEDs, lamps, LCDs, VFD segments or mechanical flip-dot style units in the familiar rectangular figure eight, and your microcontroller or similar can display numbers. There are a variety of different interfaces, but at most all that is needed is a level shifter and a driver.

Sometimes though we encounter a completely novel 7-segment display, and such is the case with [Fhuable]’s all mechanical single digit display. It bears a superficial resemblance to a flipdot display, but instead of a magnetic actuator, it instead uses a complex system of gears and cams to flip the segments sequentially from the turning of a small crank. It appears to be the same mechanism he’s used in his subscription counter project whose video we’ve placed below the break, and it is truly a thing of beauty. We’re not entirely certain how useful it would be as a general-purpose display in its current form, however, we can see it being adapted with relative ease. A clock might, for example, be an eye-catching project.

Most displays that make it here have some electrical components, so it’s unusual to see an entirely mechanical one. But that’s not necessarily always the case.

Continue reading “Not All 7-Segment Displays Are Electronic”