Right now, you can get a diode laser engraver on eBay for around $100 USD. That sounds like a deal, but it’ll probably use some arcane proprietary software, won’t be terribly accurate, and the laser itself will almost certainly be fully exposed. Of course there’s no shortage of DIY builds which improve upon this situation greatly, but unfortunately the documentation and instructions to replicate them yourself often leave a lot to be desired.
To get a safe and accurate laser platform into the hands of hackers everywhere, we need more well documented open source designs that are actually built with community in mind. Projects like the Engravinator from [Adam Haile]. This isn’t a one-off design with documentation thrown together after the fact, it’s a fully open hardware engraver with a concise assembly guide that’s built from 3D printed parts and readily available components. You’re free to source and print the parts yourself or, eventually, purchase everything as a kit.
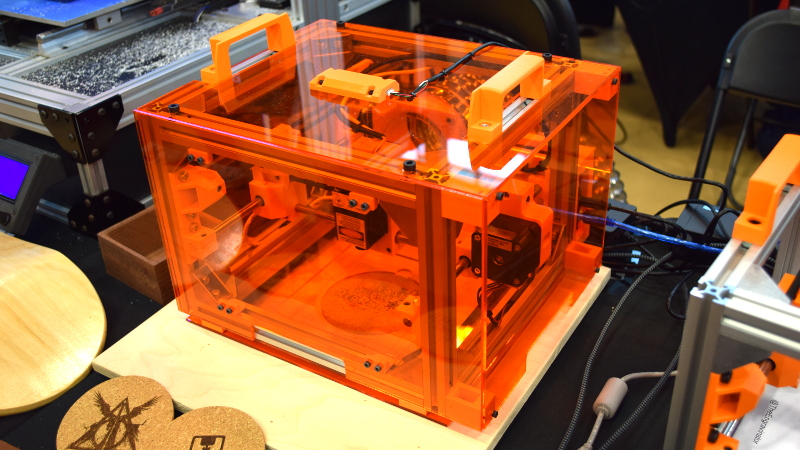
The microwave-sized Engravinator is built from standard 2020 aluminum extrusion, and offers a workable area of 130mm x 130mm. There’s a hatch on the front of the enclosure for objects that are small enough to fit inside the machine, but the open bottom and handles on the top also allow the user to place the Engravinator directly onto the work surface. [Adam] says this feature can be especially useful if you’re looking to burn a design into a tabletop or other large object.
Outside of the aluminum extrusion and miscellaneous hardware that make up the frame, most of the other parts are 3D printed. Released under the CERN Open Hardware License v1.2 and distributed as both STL and STEP files, the printable parts for the Engravinator are ripe for modification should you be so inclined. The same goes for the DXF files for the enclosure panels, which will need to be cut out of orange acrylic with a CNC or (ironically) a laser.
Movement is provided by two NEMA 17 steppers and a GT2 belt arrangement, and [Adam] has even put together a custom control board he calls the Platypus using TMC2100 drivers; though you could always swap that out for a basic RAMPS board if you’re going down the DIY route. You can use any PWM-controlled diode laser with the common 16x40mm M3 bolt pattern, of which there’s no shortage of options on eBay.
[Adam] estimates the total cost of an Engravinator, assuming you start from absolutely nothing, is between $300 and $400 USD. But naturally that price will vary significantly on how much of the hardware you can find by rummaging through your parts bins or even by salvaging from something else. If you’ve got an outdated 3D printer collecting dust, you could pull a good deal of the hardware required from there.
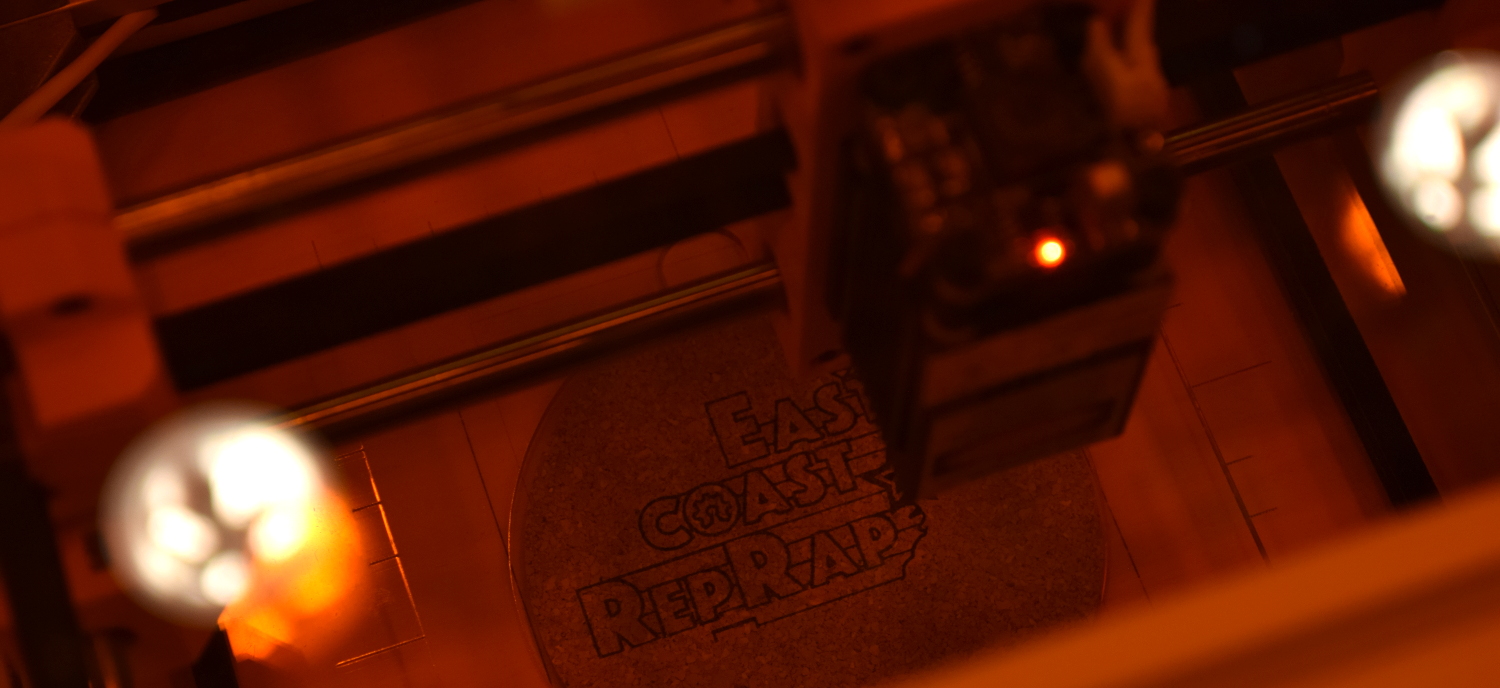
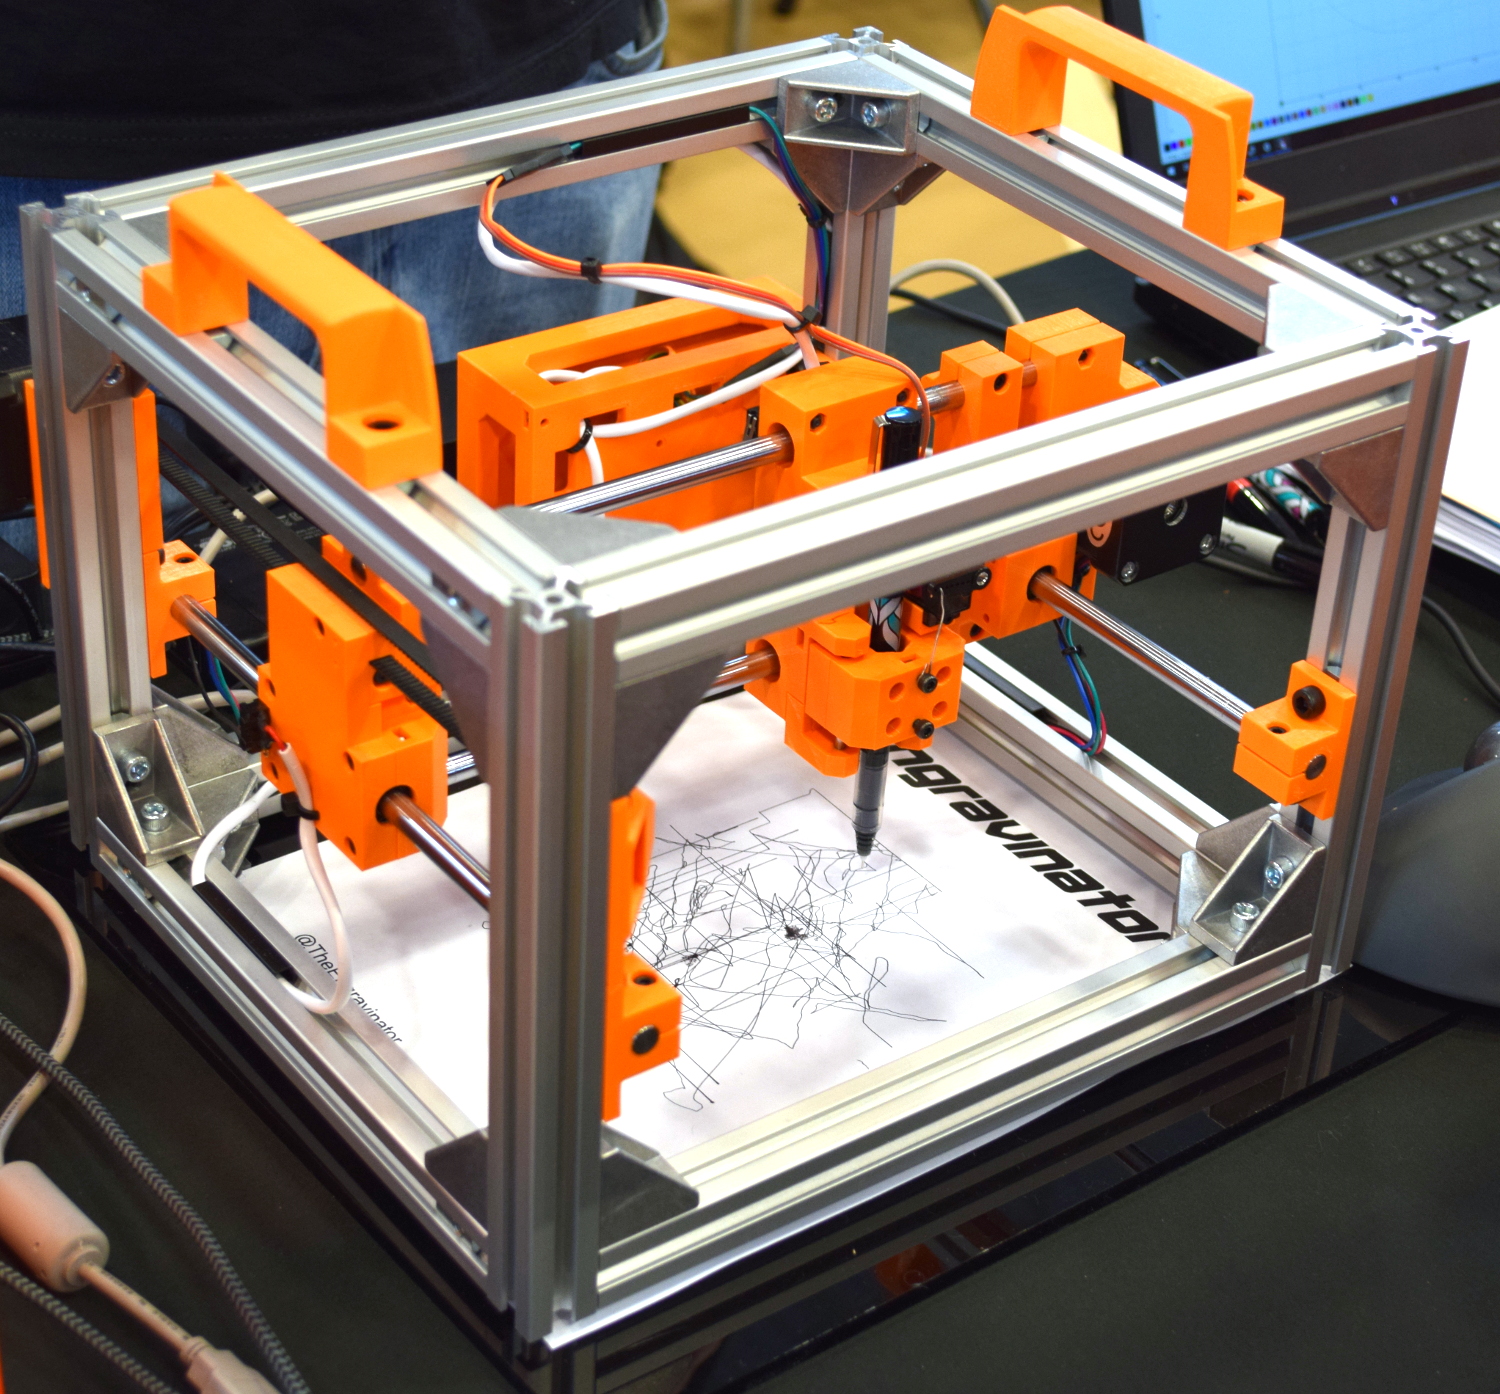
We had a chance to see the Engravinator in action at the recent 2019 East Coast RepRap Festival, and definitely came away impressed. It’s a solid machine and the results on display all looked incredibly crisp. Our favorite feature (which appears to be optional) was the small camera mounted at the top of the enclosure that allowed the user to superimpose the image to be burned over the view of the workpiece to check alignment before burning.
Some will likely argue that the all-up cost of the Engravinator is still a bit too high for wide adoption, especially considering you can get a K40 for around the same price. But if you’d rather stick with a diode laser and don’t feel like taking your chances with the questionable hardware currently on the market, we think this is a project to keep an eye on.


That looks nice. With a bit of tweaking to the head and add a quick change tool head. Swap the laser for a pen for a hot end for an rotary cutter it would be 4 or more tools in one. And all enclosed to boot.
Damn another thing to build …
@Saabman – Way ahead of you ;) https://twitter.com/ManiacalLabs/status/1181555138781159425
It’s designed to use laser modules with a 16x40mm M3 bolt mounting pattern (all the cheap Chines ones) but that ended up making for an easy way to swap out tools. The pen mechanism seen in that tweet uses the same mounting pattern and I can do the swap in a couple minutes… though you have to reflash GRBL to one that has servo control.
I’ll be adding a “Mods” section to Engravinator.com soon and the pen will be the first one (along with the camera mentioned in the article).
We’ve already got add-ons for it that make it a pen plotter
https://github.com/ManiacalLabs/Engravinator/tree/master/Mk1/Fabrication/3D_Printed/Pen_Lift
Curse you, Perry the Platypus!
My interest in piqued.
Looks completely doable on the workbench apart from the acrylic enclosure, which is a little bit of a chicken and egg situation.
If there is a cheap way to source the pre-cut enclosure panels, I might just have to add this to my ever growing list of projects.
@NFM – Note: It’s an engraver, not a cutter ;) And besides, the panels are larger than the engraving area.
We are currently doing a beta run of kits for a handful of people and after that, at the very least, I’ll be making enclosure panel kits available for sale (since I do have a large laser cutter as well).
Though, of course, the files are all available and you could get them cut at a variety of locations/services
Check out this page for more info on the 3D printed and laser cut components: https://engravinator.com/mk1/print/
A perfect example of the three point principle:
Cost
Reliability
Performance
Pick any two
At 4 times the cost you’d certainly expect it to be better than the ebay one.
Yep, exactly. While I of course didn’t want it to be *too* expensive it was definitely optimized for performance and reliability. That being said, it was designed to use commodity components source from the 3D printer world, so it uses all your standard bearings, rods, pulleys, belts, motors, etc. The ~$400 price tag is using all top quality components from Misumi. So ~$5 per bearing and $10 per linear rod. I’ve also spec’d TMC stepper drivers instead of cheaper variants. You absolutely could build the machine for closer to $200 and people are more than welcome to do so. But I wanted to define what was possible.
Also, it was designed to be used in a woodworking shop so it needed to be robust. I’ve stood on it while it’s running :)
It’s cool and all but if you check the BOM you’re looking at at least $500 USD worth of parts plus assembly. I’d rather get a Chinese K40 and buy an upgraded board and have a real cutter for not much more
I saw this at ERRF, the thing turned out beautiful engraves all day both days with no hickups-and doing it quickly. I was super impressed. Thanks again Adam, your rock!
What kind of spot size can you get out of those lasers?
Depends on the laser…
The best of the cheap chinese lasers we’ve found is from EleksMaker (of which there are many clones, so be careful). They have about a 0.3mm spot when well focused.
Cheaper models I’ve tried were sometimes up to 0.8mm or so.
And that’s just for <= 2.5W lasers. Beyond that it gets sketchy.
~5W lasers are often multiple diodes and you will often end up with a large rectangular spot (one I have was 0.4×0.8mm).
Again, the EleksMaker brand ones are better, though theirs is too fat to work well on the Engravinator.
There are really nice lasers (like from JTech) with even smaller spot sizes but you are looking at $150 for a 0.5W laser up to ~$800 for 5W
The Engravinator is designed mainly for the 2.5-3W models that have the 16x40mm M3 bolt mounting pattern. Anything else will need some tweaking.
Is the orange acrylic really sufficient to protect your eyes from the reflected laser light? Even 0.5W is an incredible amount of power (that’s why it burns ;) and your eyes are incredible sensitive.
I did a bunch of research on it and spoke with my local plastics supplier and found out that the only real difference between the 2422 Amber acrylic I’m using and the official stuff that’s sold for this purpose is that the official stuff has had each batch laboratory tested to ensure it meets the required optical density standards for the wavelengths required. So what you are paying for is the lab testing.
It, of course, won’t do much if you aim the laser directly at it but for reflected light it should be fine. Unless you are trying to engrave a mirror the reflected light will have far less power.