Peek Behind The Curtain Of This Robotic Mouse

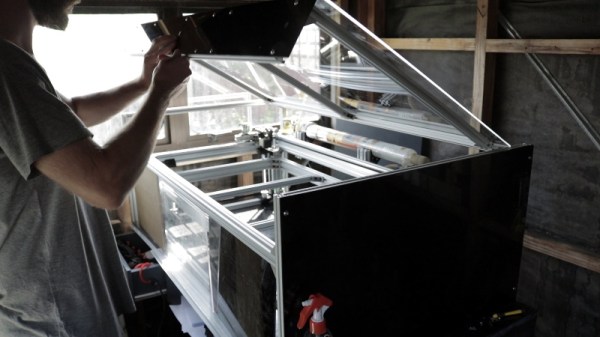
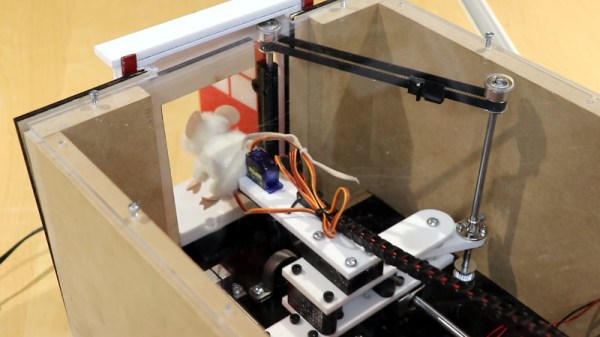
At first glance, this little animatronic mouse might seem like a fairly simple affair. A door opens, our rodent friend pops its head out, looks around, and goes back in. But just like in The Wizard of Oz, a strategically placed curtain is hiding the impressive array of gadgetry that makes the trick possible.

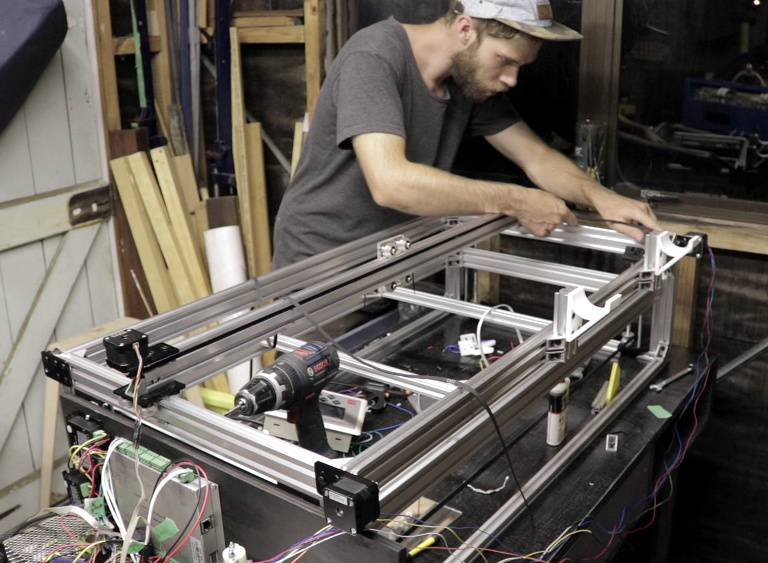
Creator [Will Donaldson] has put together a fantastic write-up of just what went into creating this little fellow, and we think you’ll be surprised at just how serious the mechanics involved are. Take for example the rig that provides horizontal motion with a NEMA 17 stepper motor mated to a 200 mm leadscrew and dual 8 mm rail assembly that would like right at home as part of a 3D printer.

The star of the show rides atop a beefy sliding carriage assembly made of printed components and acrylic, which is linked to the door via a GT2 timing belt and pulley in such a way that it automatically opens and closes at the appropriate time. To inject some life into the puppet, [Will] stuffed it with a pair of SG90 servos in a sort of pan-and-tilt arrangement: the rear servo turns the mouse’s body left and right, while the forward one moves the head up and down.

An Arduino Uno controls the servos, as well as the stepper motor by way of a TB6600 controller, and optical limit switches are used to make sure nothing moves out bounds. [Will] is keeping the CAD files and source code to himself for the time being, though we imagine a sufficiently dedicated mouseketeer could recreate the installation based on the available information.

This would appear to be the first animatronic mouse to grace the pages of Hackaday, but we’re certainly no strangers to seeing folks imbue inanimate objects with lifelike motion.

Continue reading “Peek Behind The Curtain Of This Robotic Mouse”

Stitching Up Custom Belts

If you’ve got a 3D printer, you’re probably familiar with the reinforced belts that are commonly used on the X and Y axis. These belts either come as long lengths that you attach to the machine on either end, or as a pre-sized loop. Traditional wisdom says you can’t just take a long length of belt and make your own custom loops out of it, but [Marcel Varallo] had his doubts about that.

This is a simple tip, but one that could get you out of a bind one day. Through experimentation, [Marcel] has found that you can use a length of so-called GT2 belt and make your own bespoke loop. The trick is, you need to attach the ends with something very strong that won’t hinder the normal operation of the belt. Anything hard or inflexible is right out the window, since the belt would bind up as soon as it had to go around a pulley.

It seems the key is to cut both ends of the belt very flat, making sure the belt pattern matches perfectly. Once they’ve been trimmed and aligned properly, you stitch them together with nylon thread. You want the stitches to be as tight as possible, and the more you do, the stronger the end result will be.

[Marcel] likes to follow this up with a bit of hot glue, being careful to make sure the hardened glue takes the shape of the belt’s teeth. The back side won’t be as important, but a thin layer is still best. The end result is a belt strong enough for most applications in just a few minutes.

Would we build a 3D printer using hand-stitched GT2 belts? Probably not. But during a global pandemic, when shipments of non-essential components are often being delayed, we could certainly see ourselves running some stitched together belts while we wait for the proper replacement to come in. Gotta keep those face shields printing.

An Open Hardware Laser Engraver For Everyone

Right now, you can get a diode laser engraver on eBay for around $100 USD. That sounds like a deal, but it’ll probably use some arcane proprietary software, won’t be terribly accurate, and the laser itself will almost certainly be fully exposed. Of course there’s no shortage of DIY builds which improve upon this situation greatly, but unfortunately the documentation and instructions to replicate them yourself often leave a lot to be desired.

To get a safe and accurate laser platform into the hands of hackers everywhere, we need more well documented open source designs that are actually built with community in mind. Projects like the Engravinator from [Adam Haile]. This isn’t a one-off design with documentation thrown together after the fact, it’s a fully open hardware engraver with a concise assembly guide that’s built from 3D printed parts and readily available components. You’re free to source and print the parts yourself or, eventually, purchase everything as a kit.

Pen-equipped Engravinator

The microwave-sized Engravinator is built from standard 2020 aluminum extrusion, and offers a workable area of 130mm x 130mm. There’s a hatch on the front of the enclosure for objects that are small enough to fit inside the machine, but the open bottom and handles on the top also allow the user to place the Engravinator directly onto the work surface. [Adam] says this feature can be especially useful if you’re looking to burn a design into a tabletop or other large object.

Outside of the aluminum extrusion and miscellaneous hardware that make up the frame, most of the other parts are 3D printed. Released under the CERN Open Hardware License v1.2 and distributed as both STL and STEP files, the printable parts for the Engravinator are ripe for modification should you be so inclined. The same goes for the DXF files for the enclosure panels, which will need to be cut out of orange acrylic with a CNC or (ironically) a laser.

Continue reading “An Open Hardware Laser Engraver For Everyone”

How Not To Design A 3D Printed Belt Clamp

[Mark Rehorst] has been busy with his Ultra MegaMax Dominator (UMMD) design for a 3D printer, and one of the many things he learned in the process was how not to design a 3D printed belt clamp. In the past, we saw how the UMMD ditched the idea of a lead screw in favor of a belt-driven Z axis, but [Mark] discovered something was amiss when the belts were flopping around a little, as though they had lost tension. Re-tensioning them worked, but only for a few days. It turned out that the belt clamp design he had chosen led to an interesting failure.

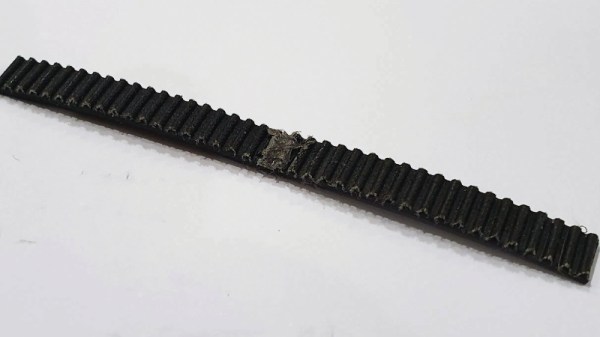
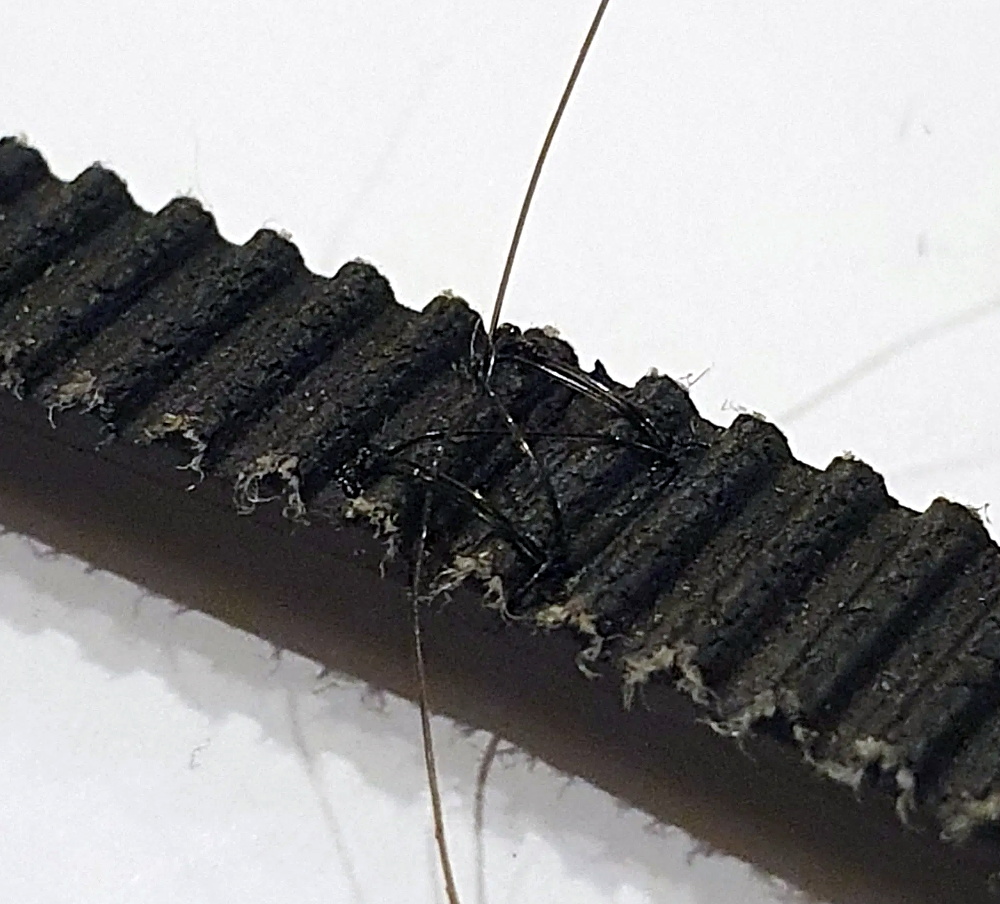
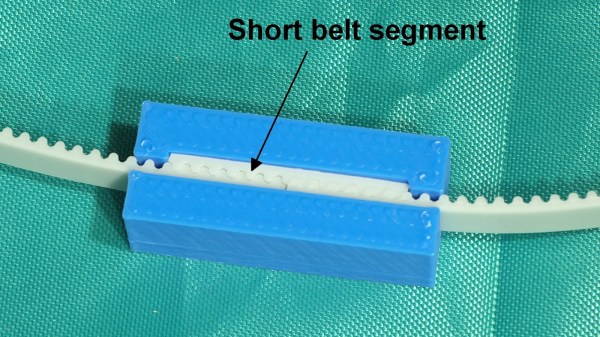
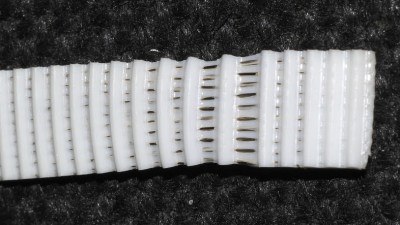
The belts used were common steel-core polyurethane GT2 belts, and the clamp design uses a short segment of the same belt to lock together both ends, as shown above. It’s a simple and effective design, but one that isn’t sustainable in the longer term.

The problem was that this design led to the plastic portion of the belt stretching out and sliding over the internal steel wires. The stretching of the polyurethane is clear in the image shown here, but any belt would have had the same problem in the clamp as it was designed. [Mark] realized it was a much better idea to use a design in which the belts fold over themselves, so the strain is more evenly distributed.

[Mark] has been sharing his experiences and design process when it comes to building 3D printers, so if you’re interested be sure to check out the UMMD and its monstrous 695 mm of Z travel.

Scratch-Building A Supersized Laser Cutter

Now that 3D printers have more or less hit the mass market, hackers need a new “elite” tool to spend their time designing and fiddling with. Judging by the last couple of years, it looks like laser cutters will be taking over as the hacker tool du jour; as we’re starting to see more and more custom builds and modifications of entry-level commercial models. Usually these are limited to relatively small and low powered diode lasers, but as the following project shows, that’s not always the case.

This large format laser cutter designed and built by [Rob Chesney] is meticulously detailed on his blog, as well as in the in the video after the break. It’s made up of aluminium profile and a splattering of ABS 3D printed parts, and lives in an acrylic enclosure that’s uniquely isolated from the laser’s internal gantry. All told it cost about $2,000 USD to build, but considering the volume and features of this cutter that’s still a very fair price.

[Rob] carefully planned every aspect of this build, modeling the entire machine in CAD before actually purchasing any hardware. Interestingly enough his primary design constraint was the door to his shed: he wanted to build the largest possible laser cutter that could still be carried through it. That led to the final machine’s long and relatively shallow final dimensions. The design was also guided by a desire to minimize material waste, so when possible parts were designed to maximize how many could be cut from a one meter length of aluminum extrusion.

The laser features a movable Z axis that’s similar in design to what you might see in a Prusa-style 3D printer, with each corner of the gantry getting an 8 mm lead screw and smooth rod which are used in conjunction to lift and guide. All of the lead screws are connected to each other via pulleys and standard GT2 belt, but as of this version, [Rob] notes the Z axis must be manually operated. In the future he’ll be able to add in a stepper motor and automate it easily, but it wasn’t critical to get the machine running.

He used 3D printed parts for objects which had a relatively complex geometry, such as the laser tube holders and Z axis components, but more simplistic brackets were made out of cut acrylic. In some components, [Rob] used welding cement to bond two pieces of acrylic and thereby double the thickness. Large acrylic panels were also used for the laser’s outer enclosure, which was intentionally designed as a separate entity from the laser itself. He reasoned that this would make assembly easier and faster, as the enclosure would not have to be held to the same dimensional tolerances as it would have been if it was integrated into the machine.

[Rob] gives plenty of detail about all the finer points of water cooling, laser control electronics, aligning the mirrors, and really anything else you could possibly want to know about building your own serious laser cutter. If you’ve been considering building your own laser and have anything you’re curious or unsure about, there’s a good chance he addresses it in this build.

Short of having the fantastically good luck to find a laser cutter in the trash that you can refurbish, building your own machine may still be the best upgrade path if you outgrow your eBay K40.

Continue reading “Scratch-Building A Supersized Laser Cutter”