Can you call it a bandsaw if it has neither band nor saw? [WeldingRod1] does, with his entry in the laser contest — a manually-controlled laser cutter that he’s dubbed a Laser Bandsaw. Some might quibble that it’s not actually sawing with the beam, and others will inevitably find the safety implications rather frightening. We think it’s a fun project and that [WeldingRod1] can call it what he wants, as long as he follows his own advice and keeps his laser goggles firmly on his precious vision orbs.
He has actually put some thought into what started as the physical manifestation of a joke in a podcast. The blue diode laser — a NUBM44 diode rated at 7 W — got a custom-made copper heatsink. It’s also got a hefty beam dump in the form of a stack of box knife blades. That’s very necessary to keep the beam from reflecting where it shouldn’t, especially when you consider this operates like a regular band saw: you turn it on, and it’s ready to cut. With only 7 W of laser power it can’t cut that much, mind you, but apparently it’s great on balsa wood and blasts black paint off like nobody’s business.
Now if this was our shop we’d probably want to put the laser diode onto some kind of CNC platform, be it Cartesian or SCARA. But we’ve seen that done many, many times and if you’ve got the motor skills this might be just the tool for you. There’s a pinout and STLs for the 3D printed frame on the project page if you’re interested. If not, why are you still here? The article is finished. Go make something lase and send it in. The deadline for the 2026 Frikkin Laser Contest is fast approaching!


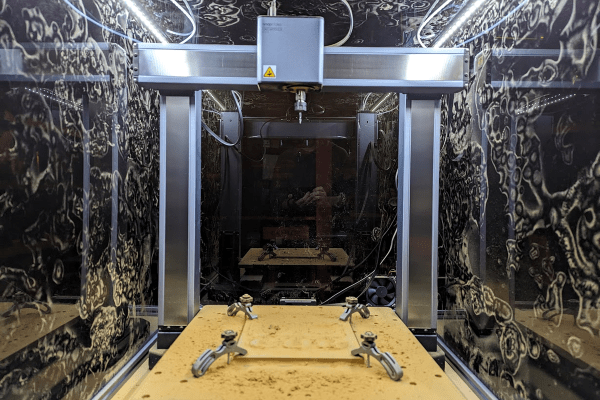
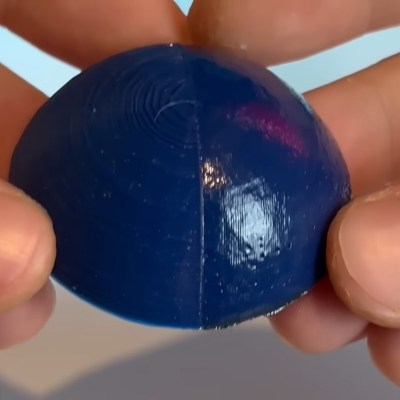 The smoothing process begins at the end of a 3D print and uses non-planar printer movements to keep the laser at an ideal focusing distance. The results proved rather effective, giving a noticeably smoother and shiner quality than an unprocessed print. The smoothing works incredibly well on fine geometry which would be difficult or impossible to smooth out via traditional mechanical means. Some detail was lost with sharp corners getting rounded, but not nearly as much as [TenTech] feared.