Lithophanes are nothing new, with examples going back to the 1800s. But they’ve become popular again thanks to the ease of which these pieces of artwork can be 3D printed. While the Internet would be more than happy to see somebody press a 3D image of their cat into a thin piece of translucent porcelain ready to have a light shone through it, that’s quite a bit harder than just firing up the Monoprice.
But since the machine is doing all the work for you, why stop at one? That’s precisely the sort of thinking that lead [The Mad Maker] to recreate animated GIFs with stop motion photography and a stack of printed lithophanes. Now all your favorite reaction memes can make the leap to the physical world…and then go right back into the computer.
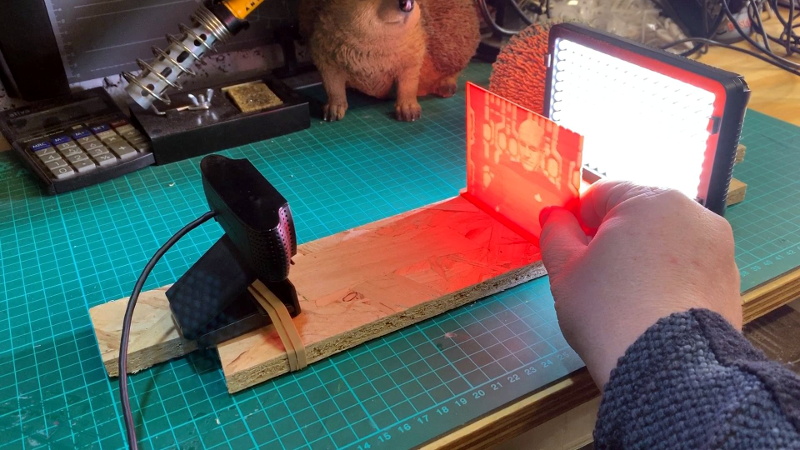
The method here is pretty simple: [The Mad Maker] disassembles his favorite GIF to get the individual frame images, converts each one of those into a lithophane STL via an online tool, prints it out, photographs it, and then stitches all those photographs back into a new GIF. Given the incredibly time consuming nature of this process you’ll want to limit it to short animations, and even then, probably do only every 2nd or 3rd frame to preserve your sanity.
In the video after the break you can see the entire process, as well as check out the final result. While there weren’t really any technical hurdles to overcome in this project, we did like seeing how [The Mad Maker] experimented to find the ideal position for the backlight and camera. The wooden frame he came up with to hold everything in position should make subsequent meme conversions a lot easier, now he just needs to add a little color.


Perfect for a zoetrope!
+1 Someone needs to do that.
After minute 6
Neat.
Using Adobe Premier to do jpg -> gif is a bit sad though.
Where does he mention Adobe Premier?
6:09 – there are simpler ways (Photoshop will do it along with a bunch of dedicated apps) but given that he’s producing videos of the build it’s a natural leap.
Completely agree and in fact I could have used the same free tool I used to break the original GIF; EasyGIF. Guess I just automatically did it the way I already knew.
ffmpeg -f image2 -framerate 10 -i image_%003d.jpg -vf scale=400×300 out.gif
or if you have imagemagick:
convert -delay 100 -loop 0 image*.jpg out.gif
You can optimize palettes and play with compression and difference frames, but that’s your basic dealy.
really no need to 3D print GIF slides as lithophanes to get animated GIF effect after scan, since you can easily implement 3D printing distortion effect into every GIF slide file, salted by some level of randomness, making such filter to work for any animated GIF on-the-fly (no 3D printer required), emulating 3D printed litophanes
easy cake ;)
Exactly, I really don’t get the point of GIF > GIF.
I was expecting some mechanical animation or zoetrope as mentionned above.
the distortion due to 3D line by line printing of lithophanes is exactly alike video signal distorted in old-era analog TV and can be easily reproduced by software based signal filter.
If you are interested, I can contact m y friend from Sydney to develop such filter, since I am busy this week.
What’s wrong with just pressing the cat.
“The only good cat is a flat cat”
How else are one going to get them under the door?
I only just discovered Firefox about:config set image.animation_mode to none , You can choose once instead of none. Thank you Mozilla.
Pro tip for anyone just starting out with lithophanes; print them vertically/standing up. This will produce the best image with the highest resolution. Laying them flat limits the luminance resolution to whatever your layer thickness is set too. Printing vertically allows you to take advantage of the the much higher horizontal resolution, which gives much better image quality.
I would only print heightmaps flat, since vertical resolution is less of an issues in this case.
Another tip; keep them thin if your printing them for light to pass through. A tea light or battery powered led is the ideal light source, as these are not glaring and make for a nice bit of decor in a dimly lit room. They can be thicker if you intend to hang them in a window for sunlight (though be careful here, sunlight can melt PLA/low temp filaments).
My recommendation for most lithophanes is a max of 2mm in thickness when setting them up on your pc. In practice they will be a bit thicker due to natural overflow of the filament, but that’s ok.