We’ve all seen recreations of the famous double-slit experiment, which showed that light can behave both as a wave and as a particle. Or rather, it’s likely that what we’ve seen is the results of the double-slit experiment, that barcode-looking pattern of light and dark stripes, accompanied by some handwaving about classical versus quantum mechanics. But if you’ve got 20 minutes to invest, this video of the whole double-slit experiment cuts through the handwaving and opens your eyes to the quantum world.
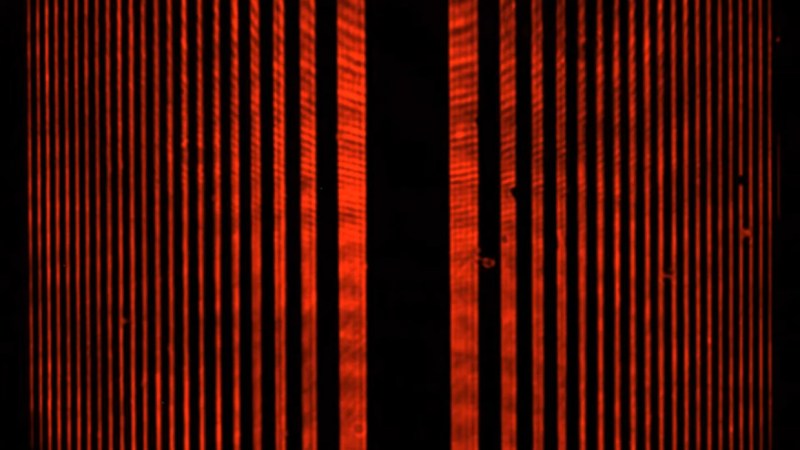
For anyone unfamiliar with the double-slit experiment, [Huygens Optics] actually doesn’t spend that much time explaining the background. Our explainer does a great job on the topic, but suffice it to say that when coherent light passes through two closely spaced, extremely fine openings, a characteristic pattern of alternating light and dark bands can be observed. On the one hand, this demonstrates the wave nature of light, just as waves on the ocean or sound waves interfere constructively and destructively. On the other hand, the varying intensity across the interference pattern suggests a particle nature to light.
To resolve this conundrum, [Huygens] jumps right into the experiment, which he claims can be done with simple, easily sourced equipment. This is belied a little by the fact that he used photolithography to create his slits, but it should still be possible to reproduce with slits made in more traditional ways. The most fascinating bit of this for us was the demonstration of single-photon self-interference using nothing but neutral density filters and a CCD camera. The explanation that follows of how it can be that a single photon can pass through both slits at the same time is one of the most approachable expositions on quantum mechanics we’ve ever heard.
[Huygens Optics] has done some really fascinating stuff lately, from variable profile mirrors to precision spirit levels. This one, though, really helped scratch our quantum itch.


It is easy to reproduce – must be, we did it in a physics lesson at a mundane UK secondary school in the 1980s.
Yeah, a handheld laser pointer, a piece of aluminum foil, a scalpel and a steady hand can give an acceptable-looking interference pattern.
If you just want interference you can just use a strand of hair.
Single stand diffraction leads to interference similar to a single narrow slit.
Agreed, same here. Not too-high-class school in Germany, early 1980s. I don’t remember the material but would suspect aluminum.
As far as I understand, the double slit experiment is much more interesting when looked at (pun intended) from the perspective of “how does the wave function work, does it collapse or is a collapse unnecessary, e.g. in a multi-worlds setup?”. The experiment in this scenario isn’t about wave-versus-particle, it’s about probabilities and single photons.
However, I didn’t watch/read/listen to the articles linked, so maybe this modern use of the experiment is being explained there. The “classic” view of it, to me, is really early-school-material and not too exciting to begin with.
Not to be a d*ck but why even post your comment. Nowhere did anyone say it was hard to observe, rather that it is a well done video explaining the physics and especially the trickier quantum mechanical aspects of it. I would argue that the single photon experiment IS traditionally hard to setup without expensive light sources and detectors, all moot now with the availability of cheap lasers and cmos sensors.
I’d venture to say, most of these people would never bother to question anything, let alone design an experiment to test it. The guy in this video is nothing short of genius, and I don’t say that lightly. Not only did he create a extremely precise experiment (ffs human hair) with off the shelf parts, he also had the ability to understand what the results were telling him, and was able to convey it better than any explanation I’ve personally ever heard for the dual slit, and I’ve heard them all.
Getting an interference pattern with bright laser is easy, but measuring the probability distribution when only a single photon arrives at a time is more difficult. Even more difficult is detecting the single photons individually, so that you can conclusively say that they are discrete particles, but simultaneously exhibit the probability distribution.
Outstanding! I especially liked his very original argument about probability regions. The experimental demonstration is superb.
Which CCD camera can detect a single photon?
your eyes according to this article
https://www.nature.com/news/people-can-sense-single-photons-1.20282
For many modern image sensors the difference between one intensity level and the next is just a handful of photons (especially for 10 or 12 bit AD conversion and high gain it may be pushed down to single photons). Separating the signal photons from the noise floor is the challenge in most applications. Here this is done by averaging many, many images.
Electron-multiplying CCD sensors have been around and available for 15+ years. They function like and array of solid-state photomultipliers, and are designed to unambiguously detect single optical photons.
Marketing blurb here: https://andor.oxinst.com/learning/view/article/electron-multiplying-ccd-cameras
They are expensive, their SNR is poor, dynamic range not great, and their quantum efficiency is not very good.
Unless you really, really need single-photon detection you are almost always better off using a modern CCD or even a CMOS detector. Modern detector readout noise is approaching (and sometimes better) than a single electron, and quantum efficiencies can exceed 90%. In other words, pretty much every photon arriving gets detected in a modern detector, but you don’t have to pay the price of an EM-CCD’s poor SNR and dynamic range (and cost).
It’s not a single photon, as he explains in the video. It’s a beam with an average of one photon in the beam at any time. There are still millions of photons which accumulate over even very short periods of time, but on average there’s only one photon in-flight at any given time.
How do they know it was “single” photon? Maybe it was married.. seriously though, how in the world can you tell it was just 1 photon?
First, it isn’t every photon – there are many lost just getting through the optics. But the bottom line is that the energy of a single photon is known, and a light source can be attenuated to the point where photons are being emitted at a known rate, like one per several seconds. You can then measure the response of sensors, while turning this light source off and on, to demonstrate that there is a corresponding increase in the sensor output. If this is the case, the infrequency of the photons guarantees that only single photons are hitting the sensor. There is still a certain probability that occasionally two or three photons arrive close enough in time (the “married” photons you propose) that there could be a cumulative effect, but this would be orders of magnitude less.
I was playing with a Tektronix 7104A oscilloscope once, back in the 80s, which used a microchannel plate as an electron multiplier, to dramatically brighten the image for very fast single-shot events. I cranked it up to its maximum sweep speed, put a viewing hood over it, and triggered it. The displayed trace was quite granular – it appeared to be composed of overlapping dots. Was I seeing individual electrons hitting the MCP, or the “clumping” of bunches of electrons? If I knew the CRT’s cathode current, I probably could have determined this, because I could have calculated the number of electrons emitted in each picosecond, and counted the average number of bright spots in the display per cm, but alas, I didn’t.
You are sort of seeing individual electrons. I built a microchannel plate amplify while working on my PhD and the way they work is that a single or few particles strike the plate and it amplifies them into a burst. So, you are seeing a burst of many electrons that have originated from one or only a few electrons that activate the plate.
Thank you. That’s what I thought. The dots I was seeing were overlapping by quite a bit, so I wasn’t seeing clearly distinct dots, but a texture, if you will, that looks like a grainy photograph. Which could be explained by either individual electrons whose “bursts” cover enough area that they overlap, or statistical highlights in the rain of electrons, where each of these highlights is caused by multiple electron strikes. As I said, if I knew the beam current, I probably could have determined which of these was the case. It was still a pretty cool experiment, though, in that I was clearly seeing the EFFECTS of individual electrons.
Interestingly, this was figured out in the 1920’s before modern electronics.
You can shine a beam of light on a thermometer and measure the increase of temperature, and from that deduce the power (energy per second). (Glossing over some details, but accurate measurement of temperature isn’t too hard.)
From the power and knowing the wavelength, you can calculate the total number of photons per second.
Make the light parallel and put the beam through a pinhole and you will reduce the power that doesn’t go through the pinhole, which also proportionally reduces the number of photons.
Hold a piece of glass over a candle to deposit carbon and block out some of the light, and then measure how much power gets through using the thermometer technique above. Make several of these, and label how much light gets through each. (This is how the original experiment did it 100 years ago.)
With your reduced photons through the hole, place a selection of filters in the beam and calculate the number of photons that get through by multiplying the blocking factor of each.
You can get the photon beam down to 1 photon a second on average this way, and have single photons to use for your physics experiment.
This was basically what kicked off quantum mechanics in the last century: Einstein proposed that light comes in discrete units, so people started generating single photons to see what sorts of properties they had, such as with beam-splitter mirrors and double slits.
And the result, that single a photon appears to take both paths, was a complete surprise to everyone.
Interestingly the double-slit experiment with feeble light (although probably not down to single-photon level) was done in 1909, about a century after Young carried out his original double-slit experiment. British physicist G.I. Taylor performed his experiment in a very dark room and using a photographic plate as the screen in which he showed that even the feeblest light source at his disposal – equivalent to “a candle burning at a distance slightly exceeding a mile” – would lead to interference fringes.
There is such a thing as “photon bunching”, however, this happens with negligible frequency, so the probability of there being two photons in flight simultaneously within the apparatus is thus negligible. All the interference effects observed can be attributed to the weird (quantum) behavior of individual photons, traversing through the double-slit one at a time.
For purists, an entangled photon source can be used in advanced single-photon experiments because the downconversion process intrinsically produces two beams of individual photons that verify each other’s existence. Photons reaching the experiment’s detector are counted only if they coincide with the detection of its partner photon. This eliminates the possibility of “photon bunching” which may affect single-photon sources based on strongly attenuated laser beams.
This is an area in which I’ve done quite a bit of experimental work, and I believe that for this purpose photon bunching can be safely ignored. Jeroen’s work (AKA YouTube’s Huygens Optics) is TRULY well done.
David is being too modest, and the apples don’t fall too far from that family tree. I’ll just leave this reminder here: https://hackaday.com/2015/11/30/uses-for-quantum-entanglement-with-shanni-prutchi/
I think as far as “photon bunching” goes, it’s mostly irrelevant, because even if you did occasionally get multiple photons in a bunch, there would be some single photons that would hypothetically not interfere.
If that were the case, the distribution would change, and you would get more proportionally more photons hitting the dark areas at lower light levels. so with a beam like this where there’s probably only a single photon in the beam the majority of the time, you would expect a more uniform distribution with only subtle interference bands from the small portion of photons that interfere.
I think the more difficult thing to think about, is if it takes multiple photons to interfere, how close together do they have to be (in either time, or distance) to interfere with each other.
Photons are bosons: they can’t “interfere with each other”.
The interference pattern is solely from photons that interfere with themselves, bunching or not.
(next level, to forestall the pedants: In non-linear media, you can get multi-photon processes due to the medium properties, but that’s not photons interfering with each other)
HaD story intro’s are like tabloid headlines “We’ve all seen recreations of the famous double-slit experiment,” followed shortly by “For anyone unfamiliar with the double-slit experiment”.
I got stuck in that loop and my computer nearly exploded.
His youtube channel is pretty amazing, best on youtube for anything optics related by far. If you were ever curious about how lenses are cnc ground and lapped, his channel covers it all. One of my favorite channels, I highly recommend a look to the curious
These oversimplified explinations of quantum mechanics are the reason why there is so much misunderstanding around it. The experiment here explains only the classical, wave, nature of light and trying to claim that this explains the quantum (ie finite and descritized) nature of light is like explaining that a baloon floats because it has negative mass. If you define the problem statement right sure it ‘makes sense’ but it blatently wrong and gives people the wrong idea about density/boyancy/etc.
What is interesting about the quantum nature of light is explicitly that, when you start to observe the quantized nature of photons, that light does not behave in the way you would expect based on this double slit experiment! The statistics start to get wonky in a way that is inconsistant with the behavior you observe with a simple ‘bright light’ setup like this one–see things like bells inequality for where things really go off the rails.
Seems to me like the single-photon part of the experiment was a pretty good demonstration of the quantum nature of light. I don’t think one photon going through two slits at the same time when they’re more that the size of the photon apart is something that can be explained by classical mechanics, but I could be wrong.
Actually, it’s “a pretty good demonstration of the” wave nature of light.
Whenever anyone says “quantum mechanics” I tune out because they’re usually wrong.
“On the other hand, the varying intensity across the interference pattern suggests a particle nature to light.”
This is one interpretation, that light are both particles and waves and that the dots on the screen represent each photon.
However, a second interpretation is that it is the interaction of the light with matter that results in an isolated interaction. In other words, it is a property of the matter on the screen molecules, which requires a multiple of the Planck constant in order to bump an electron to a higher energy level, that creates the appearance that the light is a particle. This interpretation allows the light to travel as waves yet interact as quanta.
Photons going everywhere at once?
Well, they are radio waves, after all. Try stopping radio waves going everywhere at once – you’ll have a hard time doing that!
I guess people think of a visible light photon being small, because a single atom can “receive” it, but actually, that’s just the “antenna” as it were.
That was my “take away” idea from this video, that the photons spread out infinitely unless constrained. Now my previous preconceptions have been neutralised, single photon interference does make much more sense.
What an excellent video, concise and clear. Very professional. Since I have only basic understanding of the subject, may I ask to clarify some things I cannot wrap my head around? For instance: when I direct a laser beam through a glass jar with isopropyl alcohol and climbing plant leaf extract in it, a green beam turns orange in the liquid, and exiting it is green again. What makes the photons speed up again after exiting the glass?
Second question I have is how it is possible for a 5mw laser to light up every individual led on a small led strip over a distance well in excess of 60 meter? One would think there is no connection for the energy to flow since the particles are all disconnected thus there is no direct path for current to flow to energize the led’s.
Last question that boggles my mind is why the led headlights of modern cars all have blue glow in front of them. What is happening there?
I hope you can clarify this for me as I seem to be completely lost in the fields without a firm grasp of the nature of light and it’s wondrous workings, illuminating all who do understand.
1. The green photons that exit the liquid unimpeded are not the orange photons you see. The ‘orange’ (actually red) photons are from fluorescence in the extracted chlorophyll, excited by the green (or blue) incoming light.
2. I assume you are directing a blue laser to a strip of white LEDs. The blue light from the laser is exciting the fluorescence in the LED phosphor, exactly like the blue light from the blue LEDs in each “white” LED. There is no current flow involved.
3. Blue LED-excited headlights, HID (mercury) headlights and the new laser-excited headlights all have a bright blue spike in the optical spectrum. Chromatic aberration in your eyes and/or glasses make it the blue light appear to come from a slightly different location from the desired “white” light. These types of headlights are a crime against humanity and the people who desire to use them are selfish dolts.
Absolutely beautiful in every way. Or should I say most elegant? Thank you so much.
What about the energy of the single photon proceeding in 3d? In plants, the light is needed for growth. Does energy go inefficiently into all leaf areas, or focused at one chlorophyll particle within leaf? If focused, how?
Hi, Mr. Dan Maloney,
I am Dong Zhang.
I have done an asymmetric single-slit experiment with a green laser and obtained asymmetric images or interference patterns. My thought is that the slit is a player in Young’s experiment, more than the blockers, only to produce the new wavefronts.
I am new on this site and do not know how to include pictures. Please contact me, and I would be more than happy to provide all I have.
I made a few dozen of these asymmetric single-slit samples to obtain the desired or expected enormous asymmetry photos because there are too many factors to control in the handy and homemade environment.
The construct of my sample asymmetric single slit is as follows.
1st, two pieces of stainless-steel washer with double-sided tape on one side;
2nd, cut two different metal (copper, iron, aluminum) sheets or foils into appropriate sizes;
3rd, place the two pieces on the double-sided tape of a washer and close enough to create a narrow gap in the center hole of the washer;
4th, place the other washer on the metal pieces with double-sided tape touching it, and the double-sided tape connects all the parts.
Thanks,
dz
To include a photo, you need to provide an Internet link to the location of the photo in the comment box.
If you have an account on a public site such as Pinterest, you can place the photo(s) there and link to that location. I don’t recommend using a link to your personal computer.
But since the topic is over a year old, you might do better by getting a hackaday.io account and contacting him at https://hackaday.io/DPM
Thank you!
I finally started instagram. I hope it works.
The following images are the results of my asymmetric single-slit experiment with a green laser.
https://www.instagram.com/p/C0DL-AFRIgK/?utm_source=ig_web_button_share_sheet&igshid=MzRlODBiNWFlZA==
The rest are the photos of the construction of my asymmetric single-slit assembly.
https://www.instagram.com/p/C0DLAbJRfyE/?utm_source=ig_web_copy_link&igshid=MzRlODBiNWFlZA==
The links are working!
Thank you!
Hi, Mr. Dan Maloney,
I am Dong Zhang and wish you find it interesting to duplacate my experiment of asymmetric single-slit because it shows that the slits aren’t just the blockers only to produce the new wavefronts.
Here are a few of result asymmetric images or interference patterns showing the construct of the slit matters.
https://www.instagram.com/p/C0DL-AFRIgK/?utm_source=ig_web_button_share_sheet&igshid=MzRlODBiNWFlZA%3D%3D&img_index=1
https://www.instagram.com/p/C0DL-AFRIgK/?utm_source=ig_web_button_share_sheet&igshid=MzRlODBiNWFlZA%3D%3D&img_index=2
The next is my experiment setup: a washer assembly of my asymmetric single-slit is taped onto the top of the laser pointer using double-sided tape.
https://www.instagram.com/p/C0DL-AFRIgK/?utm_source=ig_web_button_share_sheet&igshid=MzRlODBiNWFlZA%3D%3D&img_index=3
Two more images
https://www.instagram.com/p/C0DL-AFRIgK/?utm_source=ig_web_button_share_sheet&igshid=MzRlODBiNWFlZA%3D%3D&img_index=4
https://www.instagram.com/p/C0DL-AFRIgK/?utm_source=ig_web_button_share_sheet&igshid=MzRlODBiNWFlZA%3D%3D&img_index=5
I made a few dozen of these asymmetric single-slit samples to obtain the desired or expected enormous asymmetry photos because there are too many factors to control in the handy and homemade environment.
The construct of my sample asymmetric single slit is as follows.
a piece of stainless-steel washer
https://www.instagram.com/p/C0DLAbJRfyE/?utm_source=ig_web_copy_link&igshid=MzRlODBiNWFlZA%3D%3D&img_index=1
a piece of stainless-steel washer with double-sided tape on one side
https://www.instagram.com/p/C0DLAbJRfyE/?utm_source=ig_web_copy_link&igshid=MzRlODBiNWFlZA%3D%3D&img_index=2
a piece of stainless-steel washer with double-sided tape on one side
https://www.instagram.com/p/C0DLAbJRfyE/?utm_source=ig_web_copy_link&igshid=MzRlODBiNWFlZA%3D%3D&img_index=3
two pieces of stainless-steel washer with double-sided tape on one side
https://www.instagram.com/p/C0DLAbJRfyE/?utm_source=ig_web_copy_link&igshid=MzRlODBiNWFlZA%3D%3D&img_index=4
a piece of stainless-steel washer with double-sided tape on one side
https://www.instagram.com/p/C0DLAbJRfyE/?utm_source=ig_web_copy_link&igshid=MzRlODBiNWFlZA%3D%3D&img_index=5
two pieces of copper and steel foils were cut to size and placed on the double-sided tape in the middle of a washer and close enough to create a narrow gap or slit in the center hole of the washer
https://www.instagram.com/p/C0DLAbJRfyE/?utm_source=ig_web_copy_link&igshid=MzRlODBiNWFlZA%3D%3D&img_index=6
a finished product with a single slit of copper and steel
https://www.instagram.com/p/C0DLAbJRfyE/?utm_source=ig_web_copy_link&igshid=MzRlODBiNWFlZA%3D%3D&img_index=7
a piece of stainless-steel washer with double-sided tape on one side
https://www.instagram.com/p/C0DLAbJRfyE/?utm_source=ig_web_copy_link&igshid=MzRlODBiNWFlZA%3D%3D&img_index=8
cut two pieces of copper and steel foils and place them on the double-sided tape in the middle of a washer and close enough to create a narrow gap or slit in the center hole of the washer
https://www.instagram.com/p/C0DLAbJRfyE/?utm_source=ig_web_copy_link&igshid=MzRlODBiNWFlZA%3D%3D&img_index=9
another finished product with a single slit of copper and steel
https://www.instagram.com/p/C0DLAbJRfyE/?utm_source=ig_web_copy_link&igshid=MzRlODBiNWFlZA%3D%3D&img_index=10
Thanks,
dz