Photons are particles of light, or waves, or something like that, right? [Mithuna Yoganathan] explains this conundrum in more detail than you probably got in your high school physics class.
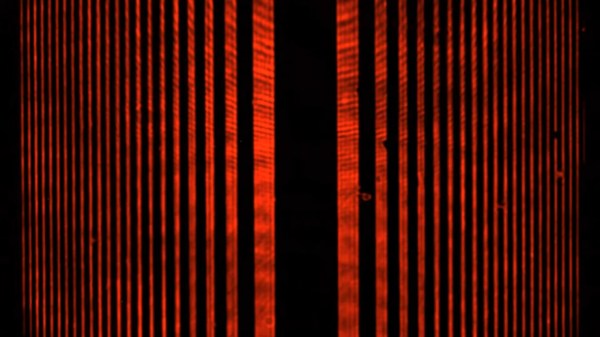
While quantum physics has been around for over a century, it can still be a bit tricky to wrap one’s head around since some of the behaviors of energy and matter at such a small scale aren’t what we’d expect based on our day-to-day experiences. In classical optics, for instance, a brighter light has more energy, and a greater amplitude of its electromagnetic wave. But, when it comes to ejecting an electron from a material via the photoelectric effect, if your wavelength of light is above a certain threshold (bigger wavelengths are less energetic), then nothing happens no matter how bright the light is.
Scientists pondered this for some time until the early 20th Century when Max Planck and Albert Einstein theorized that electromagnetic waves could only release energy in packets of energy, or photons. These quanta can be approximated as particles, but as [Yoganathan] explains, that’s not exactly what’s happening. Despite taking a few classes in quantum mechanics, I still learned something from this video myself. I definitely appreciate her including a failed experiment as anyone who has worked in a lab knows happens all the time. Science is never as tidy as it’s portrayed on TV.
If you want to do some quantum mechanics experiments at home (hopefully with more luck than [Yoganathan]), then how about trying to measure Planck’s Constant with a multimeter or LEGO? If you’re wondering how you might better explain electromagnetism to others, maybe this museum exhibit will be inspiring.