If you’re an automotive enthusiast of taste, you can’t stand the idea of fitting a janky aftermarket stereo into your nice, clean ride. Flashy, modern head units can spoil the look of a car’s interior, particularly if the car is a retro, classic, or vintage ride.
Thus, we’re going to look at how to modify your existing stock car stereo to accept an auxiliary cable input or even a Bluetooth module. This way, you can pump in the latest tunes from your smartphone without a fuss, while still maintaining an all-original look on the dash.
Fundamentals
Depending on your choice of audio player, you may prefer a 3.5 mm aux jack, or you might want to go with Bluetooth audio if your smartphone no longer has a headphone port. Whichever way you go, the process of modifying the stereo is largely the same. To achieve your goal, you need to find a way of injecting the audio signal into the head unit’s amplifier stage, while making sure no other audio sources are getting sent there as well.
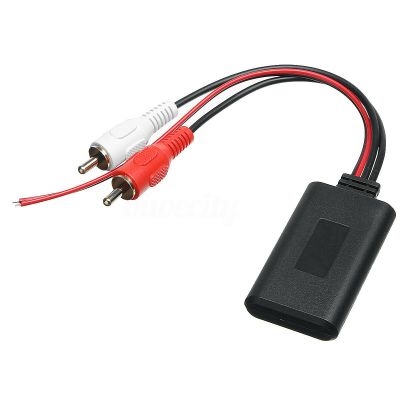
Whether that audio source is a 3.5 mm jack or a Bluetooth module doesn’t matter. The only difference is, in the latter case, you’ll want to buy a Bluetooth module and hardwire it in to the auxiliary input you create, while also splicing the module into the stereo’s power supply. In the case of a simple headphone jack input, you simply need to wire up an aux cord or 3.5 mm jack somewhere you can get to it, and call it done.
This guide won’t cover every stereo under the sun, of course. Edge cases exist and depending on the minute specifics of how your original car radio works, these exact methods may or may not work for you. However, this guide is intended to get you thinking conceptually about how such mods are done, so that you can investigate the hardware in front of you and make your own decisions about how to integrate an external audio input that suits your usage case.
Guide 1: Old School Radio/Cassette Decks
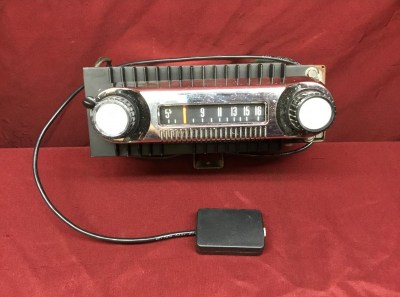
If you’ve got something quite retro, this hack can be very simple indeed. This normally applies to radio/cassette players from the 1970s and early 1980s that have an analog volume knob on the front. In this case, the audio signal flows to the amplifier directly through the volume knob. Some kind of rudimentary switching decides whether the radio or cassette signals get to the volume knob and are then passed out to the amplifier section and on to the speakers.
Thus, there are a number of ways you can splice in your own audio on these units. The easiest is to cut the stereo audio traces or wires going to the volume knob, and hook them up to a DPDT toggle switch. Hook the volume knob’s wires up to the middle two pins of the switch, and hook the original stereo feed up to a pair of pins on one side. You can then wire in your new aux cord or Bluetooth input up to the other pins on the toggle switch. The toggle switch then selects between standard operation, or the external feed. Install that switch somewhere tidy and the job is done!
Alternatively, you might find that there’s a button on the deck that switches the radio into cassette mode whether or not a tape is inserted. In that case, you may be able to wire up your auxiliary audio into the cassette module’s audio output, and simply use the existing switches on the deck to select cassette mode. With no cassette in the deck providing a signal, only your external audio will be going through to the volume knob and then on to the speakers. Easier, and even cleaner!
Guide 2: Digital Era Radio/Cassettes and CD Players
Head units from this era are usually easy to hack, with relatively large components and traces inside and simple signal flows. The equalizer input could likely also easily be modified in a similar way to the Guide 1 method.
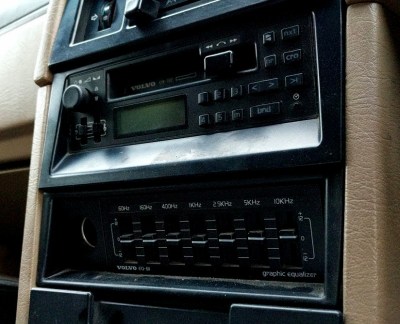
In the digital era, things get a touch more complicated. This refers to head units that use digital displays and push button controls, with a microcontroller running the whole show. Interestingly, many 1980s and 1990s radios used simple 4-bit microcontrollers, which had just enough capability to run a simple head unit while being presumably cheaper than the more usual 8-bit parts. Basically, if your 80s or 90s stereo has an LCD on it, this part of the guide may be for you.
Digitally-controlled decks typically use a chip called a mux or a multiplexer to determine which signal gets sent to the amplifier. The mux is basically a chip with many inputs and a single output. The main microcontroller in the head unit will typically control the mux chip, either by toggling a few GPIO pins or using a serial, SPI, I2C, or other interface. When a user presses the button for the FM radio, for example, the microcontroller will send a signal to tell the mux to route the FM radio input to the output to the amplifier. If they hit the button for tape, the microcontroller will instruct the mux to route out the tape audio instead.
Thus, by controlling the mux, you can control the audio that gets to the amplifier and thus the speakers. Depending on the mux chip used, and how integrated it is with the rest of the hardware in the stereo, this can be easy or rather difficult.
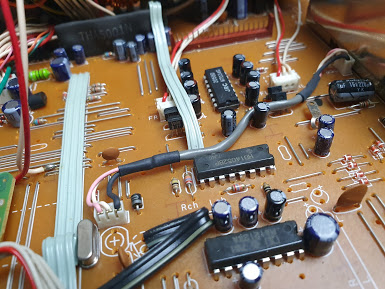
Most muxes will be a variant of the 4051/4052 series. For example, an early 90s stereo using the Hitachi HD14052BP multiplexer is easily modified with an auxiliary input; simply flipping a few pins changes the mux’s input. Thus, with a properly wired switch, the mux can be told to select the cassette or CD input even when no cassette or CD is present. Simply then wire up your aux input to those same pins and you’re in business.
Guide 3: Modern-Era CD Decks
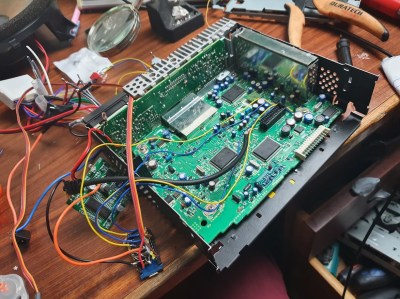
It uses an integrated mux and signal processor, making it harder to hack an audio input into the stereo. The newer technology also uses finer-pitch surface mount parts, making it harder to work with for beginners.
More modern stereos can prove difficult, however. Often, the multiplexer is integrated into more complicated chips that handle multiple functions. To get the multiplexer to switch inputs, it often requires the use of a silent audio CD, or commanding these chips over interfaces like I2C, serial, or SPI. This is on top of the job of wiring in the auxiliary input into the tape, CD, or other audio input subsystem.
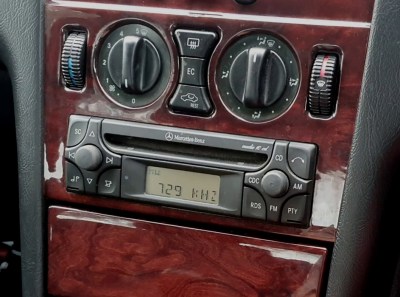
For instance, the Mercedes Audio 10 CD head unit, as produced by Alpine in the late 1990s, features the Philips TEA688OH signal processor IC. This chip handles volume, treble, and bass controls, as well as certain radio signal processing tasks while also acting as the multiplexer as well.
Wiring the auxiliary input into the CD input is simple enough, but getting the stereo to actually switch to that input is harder. Many elect to simply burn an audio CD with a silent track that lasts an hour. Inserting that into the deck gets the CD input selected, and the auxiliary audio can play through on top of the silent output from the CD itself. However, it’s an inelegant solution that requires the user to keep a disc on hand to switch into auxiliary mode, and it also means the mechanical disc player must be maintained in working order.

A more elegant solution in this case would be to force the TEA688OH to switch to the CD input, or another input, regardless of whether or not a CD was in the drive. This is quite possible, as the chip receives signals from the main microcontroller over I2C, and these are all listed in the chip’s datasheet. However, it requires adding in a Arduino or similar that can speak I2C, a DPDT relay, and some supporting components.
The I2C lines between the stereo’s microcontroller and the TEA688OH signal processor must be cut, and wired up to the relay. Under command from the Arduino, the relay normally routes signals from the stock microcontroller to the signal processor, allowing the normal control of volume and other features.
However, if the user wishes to switch to their aux input wired into the CD input, they can simply press a button hooked up to the Arduino. The Arduino then flips the DPDT relay, connecting its own I2C interface to the signal processor. Then, the command to switch inputs can be sent over I2C, and then control restored to the standard microcontroller so normal functionality of volume controls and such is resumed.
Obviously, the latter case is much harder work, and requires knowledge around the use of microcontrollers and I2C communications. The final result is a lot more elegant, however, with the unit able to switch over to auxiliary input at the touch of a button. While the example given is for a specific Mercedes head unit, other OEM stereos from the era use similar components, and can be modified in a similar way. It’s simply a matter of finding a way to get your auxiliary input piped out to the amplifier subsection via the onboard multiplexer.
Appendix: CD Changer Inputs
Sometimes, you get lucky, and there’s a simple additional input already hanging off the back of your standard stereo. Often, stock stereos come with a CD changer input so that the option can easily be added to cars without changing over the basic head unit. These inputs typically come with analog audio inputs and even a power supply, with a rudimentary way of determining whether a CD changer is connected. In the case of the Kenwood standard CD changer input, it’s as simple as tying a certain pin to another via a resistor, and the head unit can be switched to the CD changer input and audio can be piped in.

However, others are more complex. Certain luxury cars in the late 1990s use a digital audio input over optic fibre that is difficult to spoof with off-the-shelf hardware. Also, some head units use serial or other communication methods to control the CD changer and won’t switch to the input unless they receive the right messages back from the hardware. If you don’t have a CD changer already, it can be difficult to figure out how to spoof this communication as well.
It’s a great method if you can make it work, though. Often it allows a custom input to be hacked in without even opening the stereo. Old-school car audio hackers have been doing it for decades in cars like the Mazda Miata, swapping in their own audio inputs without spoiling the tasteful stock look of the original dash layout.
Summary
Overall, all you need to do to hack in an auxiliary audio input, whether Bluetooth or otherwise, is to get your signal to the amplifier in the place of any other. If you can figure out how signals are routed from the various subcomponents of the head unit – such as the CD player, tape deck, and radio modules – then you should be able to figure out how to route in your own signals instead. Hopefully this guide has served to illustrate the basic processes required so that you can figure out how to hack any stereo out there. Good luck, and if you pull off a particularly nice hack, send it in on the tip line. Have fun!


I most cases just having a good bluetooth speaker on the back seat sounds much better than stock system. Simple and modern solution.
Only the problem, you will need to turn on/off the speaker eavery time you turn on/off your car.
Sony had a line of Car Walkman CD players, where the player will be controlled by car power and automatically turn on/off when you turn on/off the ignition and resume playback.
Someone just need to make a power controller BT speaker with playback resume.
Why I am saying that? I have a VW Eurovan and I gave up making sound better. :)
Most car stereos are driven by power that is ignition-switched, so you could find that line and use that to switch a relay that powers the speakers. On British cars the wiring will be either green or white with a pink stripe. (As in you could use either, the latter preferred.)
That was true 20years ago at least in Australia but most more modern cars in the part of the world at least the power is permanently on and the head unit is switched on/off via CAN bus commands.
The headunit in a Chrysler (at least from 2008) has its inputs switched via CAN as well. VW and I’m
Pretty sure the SAABs from around the turn of century do as well. Plenty of others I doubt that’s just the ones I’ve played with
I’m not sure “most” is accurate. And a loose Bluetooth speaker in the back better than a4 channel system designed for the vehicle volume…. No
Does it work to play music in the space without much effort, sure. But that’s about it.
i suppose I was sort of lucky, the radio on my 2003 Volkswagen Jetta had a connector at the back to attach the aforementioned optional 6-disc CD changer in the trunk.
i bought a $14 eBay part made specifically for that and compatible Audi stereos which tricked the head unit into playing out of the CD changer. this part terminated in an Aux jack, which I cleanly mounted on a dummy panel on the dash. like i said, i think i got off easy.
btw I apologize for replying directly to you, not sure how that happened!
I had modest success on a mid 2000’s dodge factory head unit AM/FM/CD. All controls were digital for volume/tone/FR-LR balance, etc. Output from the CD transport was serial digital, ugh. All IC’s were OEM labelled – no luck with data sheets. I tapped in at the power amps with a 4PDT relay to switch between my hack and normal operation and it wasn’t awful. I put an op-amp between phone’s headphone output and power amps, and that gave me decent volume control via phone. Lack of tone control/FR-LR balance was tolerable. I got what I wanted – the ability to stream music from my phone.
I’ve used a 4bit mux tapped into i2s lines between the cd transport and mainboard of the Audi mmi plus system in mine. Have interfaced an rpi zero and used a gpio line to control the mux. The rpi zero runs mpd so the music plays in the car rather than being streamed and breaking up via bluetooth. Could probably set the rpi zero up to be a bluetooth sink if wanted to but not bothered. Smart phone is then simply a remote control.
If it’s a difficult hack with modern digital deck, might it be easier to provide an amp module and splice it into the speaker wires?
I had similar to this USB-AUX Adapter in my 2003 CRV. It plugs to a CD Changer port.
https://www.youtube.com/watch?v=HdWbzRXeS4Q
I did this in the deck of my Renault Clio when I first started driving. The CD transport was on its own board with a ribbon cable for control / power, and a 5 pin cable, which only appeared to use 3 pins (L/R/Gnd). Spliced a jack into these, and stuck an old Dension iPod adapter cradle thing in (starts / stops iPod with engine power etc), and stuck a CD with a 74min blank track in the deck.
About 20 years ago I was buying up Delco digitally tuned car radios, they were good radios. One had a cassette deck that was missing. Very easy to figure out the 4 pin connector, so I had an aux input.
But otherwise, they had no volume control where you coukd splice in an input. The control handled DC to an IC. So for others, I had to splice the cable between the tuner board and the other board.
I had a 2004 Jaguar, which uses fiber optic system called D2B (pre MOST). It was a challenge, but managed to reverse engineer a solution to emulate the CD-changer. Add in a RPi and got a full blown bluetooth solution.
Sold a number of them online, but the cars are now too old and not many requests come in, so I stopped making them.
D2B was also used in some Benz cars from 2000 to 2003, weirdly enough they decided to use different plug for the fiber wires, but the rest was very similar.
Hi just wondered whether your fix would work on my mgrv8 philips radio 22dc741 – I have tapped on the audio feeds ok to the cd changer socket but the radio still cannot recognise the new aux input!
Thanks
Meh, my solution delivers much less fidelity, but wins on convenience:
https://www.amazon.com/Upgraded-Bluetooth-Transmitter-Wireless-Adapeter/dp/B07PK2WMQR/
Thank you! I kept reading this article over and over and wondered why no one recommended a simple FM (or AM, I guess) Bluetooth->FM transmitter. I’ve had plenty of shitty cars over the years and this always the go-to. Yeah, it isn’t CD quality, but if you don’t think Bluetooth is recompressing your audio and is at least as bad, I have some bad news for you…
I’m big into audio fidelity and can usually pick up on heavy compression via noise artifacts or washed out instrumental volume. That said, the Bluetooth FM transmitters I’ve tried (like this one) are usually adequate enough that I can enjoy the music still.
That’s what I chose too. KISS!
I did this a number of years ago on my 5th Gen Honda. It had a CD changer, but no Aux input. (Bluetooth audio really wasn’t a thing yet at that point) but I could use my MP3 player direct via headphone jack output.
I hacked a signal through the 6 disc CD changer lines and then just play a special “silent” CD so the head unit was happy accepting the audio from the pirated aux-input.
See my instructables write-up here: https://www.instructables.com/Add-an-auxiliary-MP3Ipod-input-to-your-cars-st/
Coincidentally, yesterday I’ve upgraded my car audio with one of those cheap 5$ bluetooth/mp3/usb/sd_card/fm_radio panels which you connect to an amp and a power source. The big problem was decoupling the panel module from the power source, because it inputted a tremendous amount of noise to the amp. This always seems to be a problem with audio over bluetooth, when you power the bluetooth module and amp from the same source, because those modules are super noisy. It happened to me before with all the bluetooth modules I’ve worked with, it’s often even a problem with commercial headphones, but this time it was something else. Some big, 2200u and 3300u low esr caps, dc-dc isolating converter and even a low noise regulator had to be used.
One simple and non-invasive way to interface with cassette players is to use the cassette head for input. Back in the day I used a cassette with a standard jack cable sticking out of its side to provide aux to my car stereo. By now I’m sure someone would have made a cassette with an internal Bluetooth module, powered by the mechanical force exerted when one of the rollers is spun in playback mode.
Back when I was still driving, I used one of those cassette tape aux adapters, but I found it still suffered from tape hiss even though there was no actual tape. I think the heads are just garbage when it comes to converting the magnetic signal to audio. Better than nothing in the 90s, but not good by any standard.
Why go through all these since most new smartphone do not come with an 3.5 mm headphone port?
You can take your car stereo apart and add an aux input if you have an electrical engineering degree. It it both skill and time intensive and honestly, who has time for that? This seem to lots of work and very little reward. There are better ways to play / stream smartphone music through your older car radio.
When it comes to car sound system. The most important things is the sound quality. If this OEM sound system modification is not done correctly, you will end up scull penetrating humming, hissing or static noise, which will drive you crazy.
The Bluetooth FM Transmitter is the popular option 80 and 90’s vehicles with double din. However, for 2000’s cars with more modern D2B system or integrated navigation and infotainment system. It will not work. Most of the Bluetooth FM transmitter suffers from ground loop noise since most of them are made to be connect to the cigarette lighter for power.
You will need to find a FM Transmitter that is NOT power by the same power source as the car. It will works like magic with great sound quality. There is a great new product by Gizmo Guy. It’s a simple iPhone adapter that plugs into the iPhone and enable you to stream all your iPhone music through any car radio. It even works with cars with fiber optic sound D2B system. No need to replace or modify any part of your old / classical car. Just plug the gizmo guy gadget to your phone and set your radio and you will be able to play and stream all your music right through your stock sound system.
A hard-wired FM modulator is both universal and largely easier than anything in this article.
I have a 2005 Toyota Tacoma. The CD player stopped working. I used a couple different FM Modulators for awhile. Never liked the quality of the music. So I pulled the radio/Cd player out, opened it up. I found where the signal from the CD player went into the Amp. I soldered a 3.5mm stereo plug to it, then cut the traces going to the CD player. Hooked it to my MP3 player. I should have invested the time to install a resistor to the CD present signal. I didn’t think of it till I had everything reinstalled. I just stuck a CD in the unit upside down, works great to this day. Did almost the same thing to a 2001 Corolla with only a radio and tape player. It was much easier on the Corolla because the unit had a connector for external CD player. Did this 5 years ago or more.
Given that Crutchfield has a few easier options avail, I saw an 08 Hyundai Accent that had a near factory looking in-dash system. However, the 2 x 12 inch subs may have slightly spoiled that illusion. A very long time ago, a friend had 62 Volvo 544 with a sleeper system. The bad 70’s era audio system would power up…And do nothing. He’d pop the glove box open and it was stuffed with a decent (even now) system hidden from any casual glances for easily stolen gear. The 6×9 and 6 inch door speakers did a great job of LOUD but good tunes.
Is no one going to talk about the article art? Could be a potential hack itself. Imagine a tape deck, but meant to receive phones (maybe a usb or audio jack inside, or maybe even an RFID inside that would trigger an automation to automatically connect the phone to the car’s bluetooth and play music). I might just do it myself.
I’ve thought of this, and it would be sweet, but it blocks access to the phone for picking music or navigating.
A lot of Fords (at least in my experience – Fiesta, Focus, Mondeo, Fusion and Transit Vans) had an additional extra when buying to install bluetooth units or aux etc. As a result it left pins at the back of the radio exposed for Aux/Bluetooth audio. You can look on ebay for a number of pre crimped stereo jack wires with single pin connectors that just slot into the main connector with a 3.5mm jack at the end. The Bluetooth functions required either the module to be present on the board or alternate firmware or some engineering input in the panel/canbus (I cant remember quite which was required) but in most cases, switching to bluetooth mode switched the output the aux L/R input anyway.
I just want a CD changer emulator for late 90’s to 00’s Fords that I can pop an SD card into with six folders, each with up to 99 MP3 files. Operate it with the head unit CD controls. Nobody ever steals the “football” out of a 1997 Taurus dash.
There are two other easy input options for some 2000-2008 vintage cars that have phone or Satellite (Sirius) hardware.
I did this this weekend for a 2007 Passat/Audi with a Sirius box, and without an AUX option. If you aren’t using the Satellite, it’s easy to splice into the audio input at the output connectors of the Sirius box. Then selecting Satellite on the console gets your AUX input.
Also for older SAABs, I used the phone input option. Spliced a AUX connector to that and a switch to toggle the phone option to ground. That says “TELEPHONE” on the console, overriding the radio/CD.
Fantastic article but a bit over my head. I have a transporter guessing with can-bus so I don’t want to take the radio out. I would love bt but it all looks to complicated for me.. I am thinking to put rca pre outs though. Would it be easy to solder in a pair before the signal enters the amp? Would the sound quality be better than running a converter on the amplified speaker wires? Great article and great info for those that can play with the switching…
hello can you please tell me how to hack and connect an audio ( aux) in , in my cd changer ( 14 pin ) in a panasonic pacr 06 , radio cd?
the following link is my cd changer pin out
https://pinoutguide.com/dev/Honda/Element/
thank you in advance
Looks like you just need to connect to pin 11 Ground, Pin 13 Right and Pin 14 Left. Get a female mini jack, and use jumper wires to connect to that (probably a map of L, R Gnd on the mini jack packaging). You can splice in to the wires going into those pins either by cutting in and soldering, or use non-solder tap connectors. You’ll want to use a female mini jack instead of one long male jack, because in the long run you’ll change your mind about placement and aux cord length.
Thank you but it does nto work – propably needs something to make the pin read that there is a cd changer some how… in other mdels thay add a 10Ω resistanece , but i dont understand where in my case
if any of you have made this mode , please reply
it ssems that there is different adn difficult to bypass the cd changer when is a 14 pin cd changer in??
Is the CD a separate component that goes to an Amp? Some people with similar CD hacks use a CD (blank or silent) to enable something in that pathway to use the output. Did you try using any CD with your AUX connection to test that idea?
Not yet really because i have a completely different cd changer connector ( CN 702 ) and i thing that i must jumber somehow the tx+ and tx- in order to activate the port… of my pacr 07 panasonic radio-cd
but i will try what you say and let you know tomorrow ,
thank you for your quick reply
Liana
finally is not working this way………
Hey,
I’m looking to add a phone aux input to the OEM Pioneer radio/cassette unit in my ’91 LS400.
I’m trying to do it right without using a cassette adapter. I figured out how to modify the switches on the cassette mechanism to fool the controller into thinking a tape is playing, so once the aux is installed I can simply press the tape button to switch to aux (phone).
I tried disconnecting the head and soldering the 3 aux wires in there. It sounds like hell I’m assuming because the aux has to be installed after the pre-amp? It sounds bad, but works great as far a AM/ FM functioning and switching to phone using the Tape button.
I found 3 test terminals that are after the cassette pre amp and installed the Aux there. Sounds good, but now the problem is the phone audio is there using AM/FM or tape, and it kind of overrides the AM FM audio as you turn the volume up on the phone.
OK. Read this article and it seems like he’s talking about my exact problem.
Guide 2 discusses a chip called a mux or multiplexer and how this is most likely the cause of the Aux input going to AM FM and Tape as opposed to Tape alone when the button is pressed. This method should also allow me to completely remove the cassette mechanism since I no longer need to fool the controller.
I have the service manual and schematics on the unit, just need a little help finding and adjusting the MUX???
Dont know if I’m at the right place, so here I go:
I’ve got an old ipod classic that I want to connect to an old Kenwood car radio.
Head Unit: Kenwood KDC-9000
CD changer (does not work) KDC C300
I’ve already connected a Y cable, mini plug to RCA.
I’ve connected the 10k resistance to pin 3 and 9 from another diagram that I found a while ago. This does not work.
In the pin diagram shown above, pin 1, what is the color of that wire?
Thanks for the help.
Does anyone have a pinout of the pcb for an 80s factory cassette radio?