Sure the box said they would last for years or even decades, but anyone who’s picked up some bargain LED bulbs knows the reality is a bit more complicated. Sometimes a few LEDs in the array pop, reducing the overall light output. More commonly, the power supply starts to fail and the bulb begins to flicker or hum. In either event, you end up pulling the bulb and replacing it.
But [Bifferos] thinks we can do a bit better than that. Rather than just chalking it up to poor QA and tossing the bulb, why not do a little exploratory surgery to identify salvageable LEDs in an otherwise “dead” bulb? After pulling apart a couple of burned out bulbs (name brand and otherwise), he was able to pull out an impressive number of handy LED panels that could be easily repurposed. Naturally, with a little more coaxing, the individual SMD LEDs could be liberated and pushed into service as well.
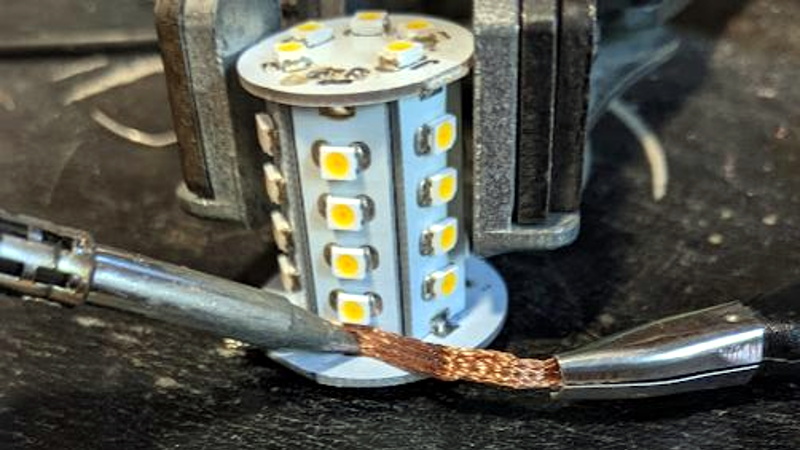
As you might expect, there are far too many different LED bulbs out there to create a comprehensive teardown guide, but [Bifferos] does provide some tricks to help get the bulb open without hurting yourself or destroying the thing in the process. Once inside, the design of the bulb will dictate what happens next. Bulbs with multiple arrays of LEDs on their own PCBs can be easily broken down, but if there’s just the single board, you may want to pull the LEDs off individually. To that end, the write-up demonstrates efficient methods of stripping the LEDs using either hot air or a pair of soldering irons.
We’ve talked previously about the rather underwhelming performance of modern LED bulbs compared to the manufacturer’s lofty claims. We’d rather see these bulbs designed well enough that they actually live up to their full potential, but the ability to salvage useful components from the failed luminaries at least softens the blow of having to toss them early. Though that’s not the only reason you should disassemble your LED bulbs before you put them in the trash.


I’d posit an even better way is to take preventative measures… modern LED bulbs generally aren’t made from shitty components, but they do suffer massively from the fact that these components are driven to the absolute maximum of light that the manufacturers can push out of them, leading to overheating and breakage. It seems like it’s a better idea to buy a bulb that gives more light than you need, open it up and change the power supply current setting resistor so it only runs at half its rated current. Heat should go down and your LEDs not only run longer but also more efficient.
BigClive has many videos on this topic, especially on failing LEDs due to harshly overdriving them…
And how Dubai government demands that bulbs last longer so the manufactures put more LEDs within the bulb but drive them much less. Just amazing.
When I was in Dubai recently I decided to check out the LED build section of a hardware store. There was just one solitary Dubai bulb on the shelf surrounded by hundreds of other “ordinary” ones
I like his videos about that design that is usually found in dollar store light bulbs, with two resistors in parallel to set the current limit. Most of them are set right at the limit of what the LEDs can handle, and they fail prematurely. Just cut out one resistor and it runs with less power and probably the full lifetime of the LED chips. Sometimes there’s only one resistor, that’s a bit more work, but I had some 0603 resistors that fit diagonally across the pads. It brought the light down to 2W and was a much less harsh light for close-up use.
They also seem to have less silicone holding the bulb cap on, making them easier to pop open than more expensive bulbs, while still staying on well afterwards.
“change the power supply current setting resistor so it only runs at half its rated current.”
There lies the first problem. LED bulbs should contain a constant current power supply, but often don’t.
I’ve taken apart several that died, and none had a constant current regulator.
All they had was a capacitive dropper circuit. That is, a capacitor to reduce current.
Any variation in the input voltage results in changes in the LED current.
I did this for an automotive lamp which I wanted to use to replace a 5W bulb in the car headlight. It was rated 2,5W. When I bought it, I expected it to have about 1/3 of this power, as many chinese LED lamps. Surprisingly it really took 2,5W – and I burned my fingers after a few seconds of operation in free air. The thermal camera confirmed it, >100°C on the LEDs. Nothing to put into an enclosed car headlight. So I reduced the current to 50%. Acceptable temperature of ~ 60°C and still enough light. It works since >1 year in the car.
Problem is they make those things impossible to take apart peacefully most of the time these days. When you do get one that can be taken apart it’s a rare treat.
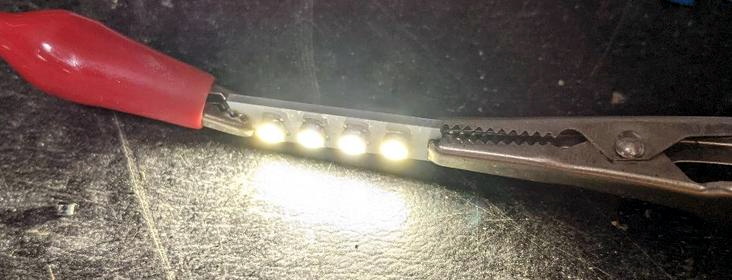
Exactly. That’s what I’ve found in every case so far. The circuit board has overheated and fried but the LED array is still good. The bulbs I’ve seen use standard 6V, 1W SMD LEDs. I actually got most of them off using just a fingernail – no heat required. The SMD spacing is such that you can (carefully) solder them to standard 0.1 inch spacing project boards. They start lighting at about 5 volts.
I have several Tradfri lights from IKEA where the warm white LEDs have failed but the cold white ones are still going strong. It’s taken a few years, but they all have the same failure pattern. Still, they are good, and cheap. I will buy more.
Another good source of really bright white LEDs is old LED TV backlights. You can remove the individual LEDs or just arrange the strips for things like under counter lighting.
or use the whole TV backlight assembly as an area-covering-lightsource above your workbench -> almost no shadows anywhere anymore.
It’s basically the original TV with only the LCD panel removed and a modified power supply / driver circuit to turn on despite the missing “on”-signal form the processing(CPU) board.
Haven’t tried it yet but most should be dimmable with a PWM circuit.
Put a diffuser over that.
I only remove the LCD panel and the 1-2mm thick diffuser plate.
The wired light bending / polarizing / whatever foils and sheets stay and they are/were enough for the three TVs I’ve converted so far.
I’ve been saving all of my failed LED lights for some time. I’ll need to study the teardown tips because I tended to destroy the power supply when opening them in the past.
But since i work as a manufacturing engineer, I’m always interested in how thing are made (which is why I tear everything apart before its tossed out, and why a hammer and chisel are actually part of my office tool kit).
I’ve been saving the failed ones too.
Destroying the power supply is par for the course, it is most likely the part which failed anyway.
I also tear almost everything apart before I throw it out. Just out of pure curiosity of how it works. But, let’s not forget scavenging/hoarding either :)
by my observation, generally the ones with a discrete circuit board tend to cook the capacitor first, and then something silicon goes tits-up. one I recently pulled though had an integrated aluminum board with the entire driver, and Push-connectors for the single large capacitor; the failure was NOT in the capacitor that time, but in the whole-unit current-limit resistor that fed from the edison-threaded base
I’ve found that a common failure mode of these cheap LED bulbs is that an individual LED in a series string will fail open circuit. Simply shorting out the failed LED will often resurrect the bulb, albeit with slightly lower light output (not even noticeable). Depending on the current regulation scheme used this could lead to premature failure of the remaining LEDs (if a simple resistor is used vs. an actual regulator), but you can at least get some additional life out of the bulb.
https://hackaday.com/2021/01/17/leds-from-dubai-the-royal-lights-you-cant-buy/
Reminds one of the Dubai lamps
What is the failure patten? I tend tot have them at quite a low setting and no failures yet …
Coincidentally, I just swapped a failed power supply from a cheap LED flame bulb. After disassembling the failed blub I found the LED section ran on 5 volts so I swapped the cheap, tiny failed power supply with a spare USB power supply.