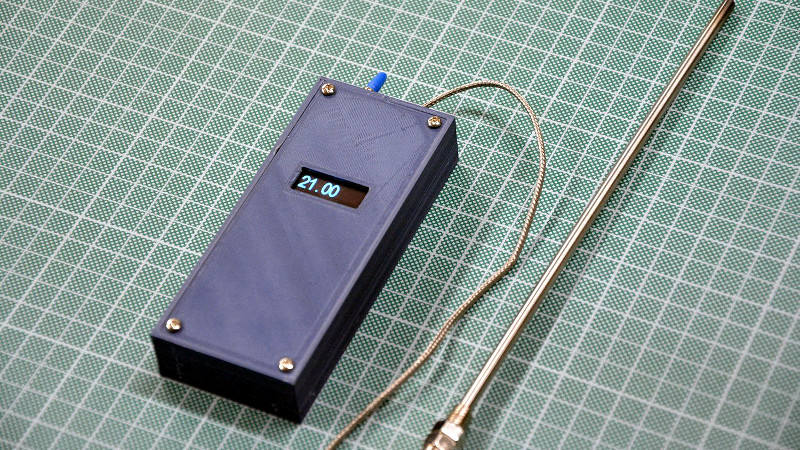
Looking to keep an eye on the temperature inside his wood-fired pizza oven, [Giovanni Bernardo] decided to skip the commercial offerings and build his own high-temperature thermometer using a type-K thermocouple. The end result is a no-nonsense handheld unit with a surprisingly low part count that, at least in theory, can read temperatures as high as 1023.75°C. Though we hope he’ll be pulling the pizza out long before that.
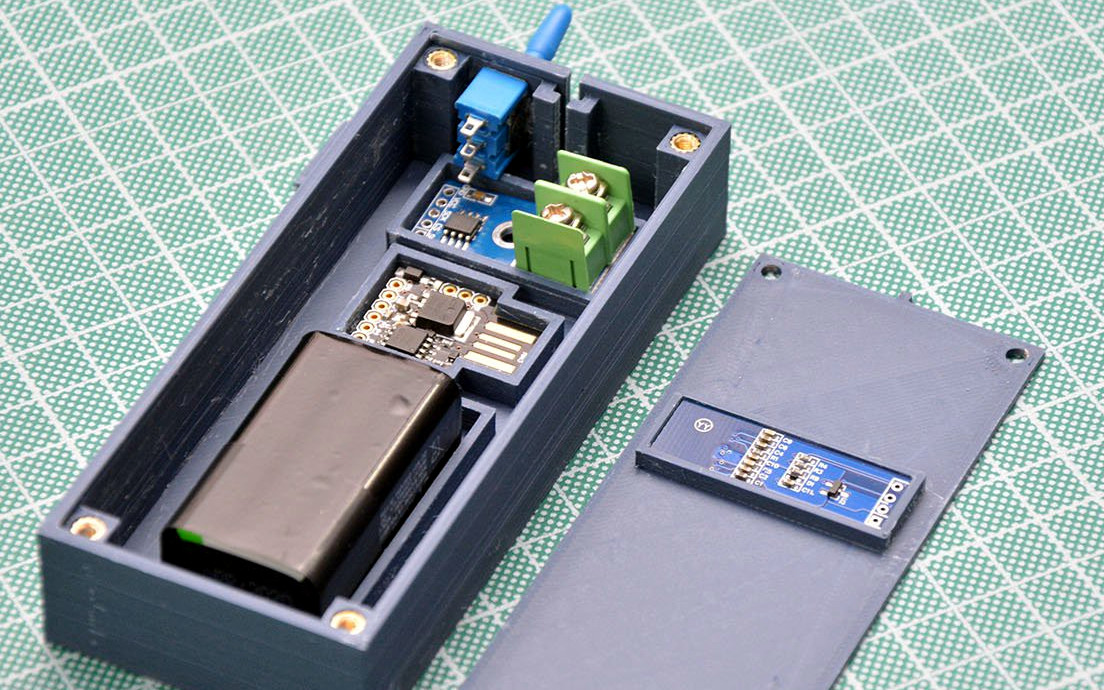 Inside the 3D printed case we find just a handful of components. The 0.91″ OLED display mounted in the front panel is wired to a Digispark ATtiny85 development board, which in turn is connected to a MAX6675 breakout board. This takes the input from the thermocouple probe and converts it into a digital signal that can be read over SPI with an Arduino library from Adafruit. Rather than going through the added complication of adding a rechargeable pack, [Giovanni] is running this thermometer from a standard 9 V battery thanks to the 5 V regulator built into the Digispark.
We especially appreciate the attention to detail [Giovanni] put into his case design. Each component is nestled into a perfectly formed pocket in the bottom of the box, and he’s even gone through the trouble of using heat-set inserts for the front panel screw holes. It would have been quicker and easier to just model up a basic box and hot glue his components in place, but he took the long way around and we respect that.
This project is another example of an interesting principle we’ve observed over the years. Put simply, if somebody is going through this much trouble to check an object’s temperature, there’s a higher than average chance they intend on eating it at some point.


Quiescent drain of just the *regulator* in the Digispark is a ridiculous 4 mA, and that OLED display sucks at least that much too. This will hardly last a day on that battery.
I built almost the same thing for the same purpose, with the same K-type thermocouple and MAX6675, but with an Arduino Pro Mini and a Maxim ICM7224 LCD instead of the OLED.
It wakes up once per second, sipping a few mA for a couple of milliseconds to read the temperature (and battery voltage) and update the display. If the temperature has not changed much in a while, it goes to sleep for 8 seconds.
It has no off switch, and runs directly from 3 AA alkaline cells (no voltage regulator). It’s used every day, and has been running continuously for more than two years on its original batteries.
This appears to employ the archaic technology of a “switch” that is not a soft input to a microcontroller, but actually interrupts the power! How barbaric! Just because a device will have intermittent use is no reason not to fuss over microamps and pick a microcontroller based on how many complicated sleep states it has! :D
Good project.
The problem isn’t the design, it’s the selection of the battery. 9V batteries are *really* low capacity (alkalines are nominally 550mA), which is obvious if you ever pulled one apart and found out they (for alkalines at least) are really 6 AAAA cells in series. And feeding that into the linear regulator to get 5V immediately guarantees 50% of that capacity will be wasted as heat. Unless you actually need the voltage and have designed the circuit appropriately, a 9V is rarely an appropriate choice.
That’s not “unnecessarily fussing over microamps” and straight into “damn I have to start buying batteries by the dozen”. 3 AA’s in series instead will provide 3.6v-4.5v which is plenty for everything in this box, and will last a lot longer.
The worse part is that the price of the 9V is significantly higher than AA. They seem to charge by voltages instead of watt hours.
I have converted the $5 LCD thermocuple reader to 1AA rechargeables. The chip only need 3V, but they regulate it down with a low quiescent regulator. The new design uses a few mA, but it last long enough. I always have some charged up AA.
mA isn’t capacity, do you mean mAh?
So a battery will last around 24 pizzas.
I harvested a thermocouple and it’s meter from some Purdue surplus and ran the wire pair thru the back wall of the oven. The meter sits on the counter backsplash. Compared to the above it doesn’t get any simpler than this. No battery, computer-s, calibration, and a parts count of 2! Powered by the oven.
The oven’s thermostat quit and could give full on only. No parts available. Fortunately the line feeding the oven had it’s own cutoff valve under the burner pans. I ran a linkage to it behind one of the burner valve holes and now I use the oven like a manual burner with metered accuracy. Preheat on high, cut down when temp is reached. With practice I adjust it like a stovetop burner by looking at the flame height, it gives me constant temp not on and off. Great pizza comes out of it!
The only thing I’d add would be a preheat reached signal. PID control, peer inside-decide.
I made a similar project sometime last year for low power temperature measurement of hot scalding drinks. Here is the hackday project https://hackaday.io/project/165595-hotornot-coffee-stirrer
Or… you could just feel how hot the mug is… :)