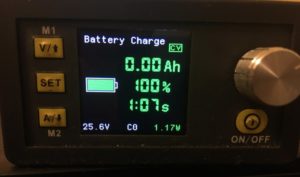
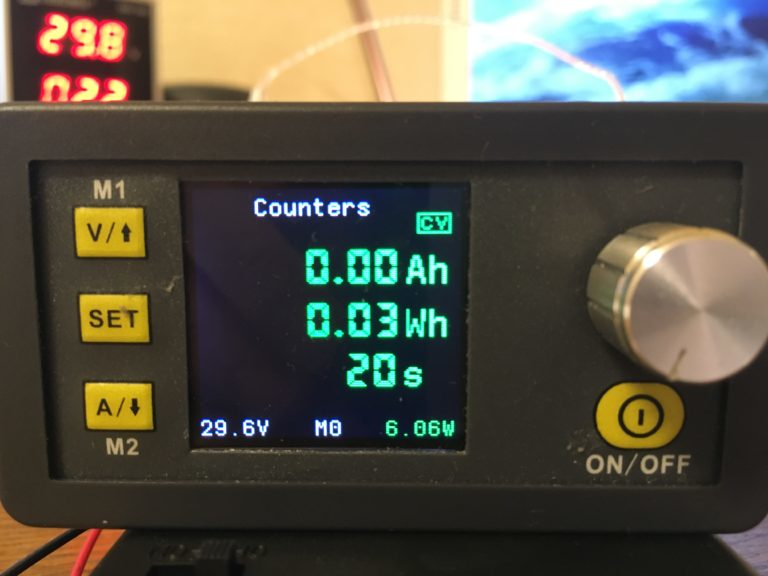
These cheap Chinese-built programmable power supplies are nothing new, we’ve been using them for years. They’re not particularly good power supplies, since current feedback is in software, but for some tasks they’re a great fit and you can’t argue with the price. Alternative firmware projects have also been a thing for a while too, but none we’ve seen have been quite as capable and polished as this latest DPS firmware project by [Profi-max.] We’ve not come across the source code yet, but at least the binary image is freely downloadable.
The firmware has some interesting features, such as programmable pre-sets intended for battery charging applications. In fact, there is a dedicated battery charge mode screen. We want to warn, however, that charging lithium ion batteries with this might not be at all wise, not in the least because of a lack of protection hardware in place. It would be very easy to destroy the unit or overheat a battery this way! However, if you must do this, there are a few features to help you out, such as a handy ‘counters’ screen showing approximate charge delivered.
Remote programmability is, as usual, via the easily hacked in serial port, with firmware support for Bluetooth serial modules if wired USB serial doesn’t suit. For those who like to mount things differently, the screen can be rotated by holding a key on power-up, or if you hook up a MPU6050 accelerometer/gyro module it will even do it automatically!
To update a stock DPS unit, the only requirements are access to an ST-Link compatible programmer dongle, to target the STM32 SWD programming interface, and the STM32CubeProgrammer utility. Open source alternatives to that are also available, stlink comes to mind as a good option. Once you have the module PCB popped out of its plastic casing, only three wires need tacking onto a handy set of pads to complete the connection to the programmer dongle. Pretty simple stuff.
If you’re looking for a similar project, with source immediately available, then checkout the OpenDPS project we covered a few years ago, and if you’re thinking of going crazy, building a DIY open source electronics lab, we got you covered.
Thanks [Luke] for the tip!


This looks good, the other one was a bit lacking in features. Too bad my DPS5005 just died (the LM321 exploded for some reason when I connected a 5S lipo pack) but will try out the FW as soon as I have it fixed.
Did you read the comment about mandatory diode when charging battery?
“In case of polarity reversal – 100% failure of any DPS model.”
In the video he switches on the output and it shows 9.5V/0.44A/42.3W.
Before switching on the output it is 9.5V/0.53A/4.75W
What math is that? Neither of these wattages seem correct.
That does seem to conflict with a top bullet point of “Rigorous technical design”. That being the first thing pointed out always makes me assume the opposite.
You are right, but this video was filmed a long time ago, before the finished firmware appeared on the site. This bug has been fixed.
Interesting. I’ve wanted something like this ever since I took my DPS3205 out of its box four years ago. While this alternative screen looks feature rich, it still has tiny buttons, a tiny encoder and tiny text in setup mode. My eyes and fingers are the problem, not the lack of features. Nevertheless, I might try it as anything would be better than the original front panel.
One question: As others have noted, these supplies are easily damaged by reverse flow current. If a large Schottky diode is placed in series with the output, can the calibration screen of this device be used to compensate for the diode’s Vf drop?
Yes, it is possible to connect a diode and then calibrate. But due to the non-linearity of the diode, the accuracy will decrease. Since the voltage drop across the diode depends on the current flowing.
Unfortunately, at high current, the Schottky diode burns out very easily and begins to conduct current in both directions.
You may not notice this. And by the time you do, it will be too late.
I accidently damaged STM32 microcontroller of by DPS5020 PSU. I replaced it but realized that RIDEN is not providing firmware on their website.
Now I tried this firmware and works great :) Calibration process is pretty simple.