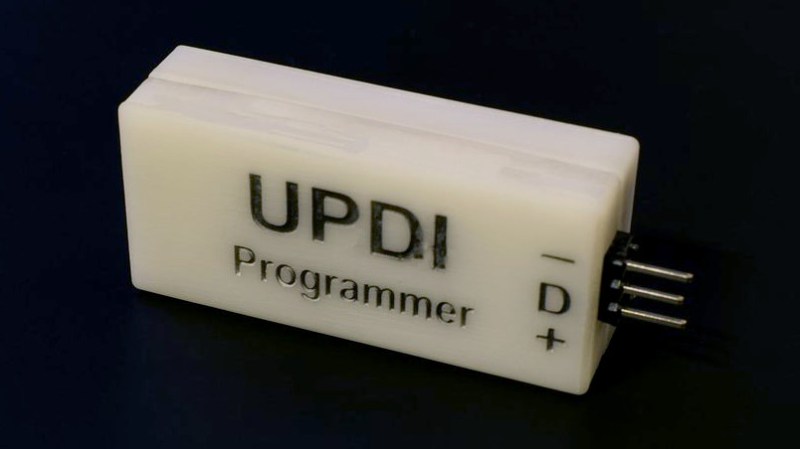
[Daumemo] likes experimenting with DIY electronics, and like many people, eventually ran across an AVR microcontroller with a Unified Program and Debug Interface (UPDI). One option is of course to purchase an UPDI programmer, but an even better solution was to make a DIY USB version from nice, cheap parts.
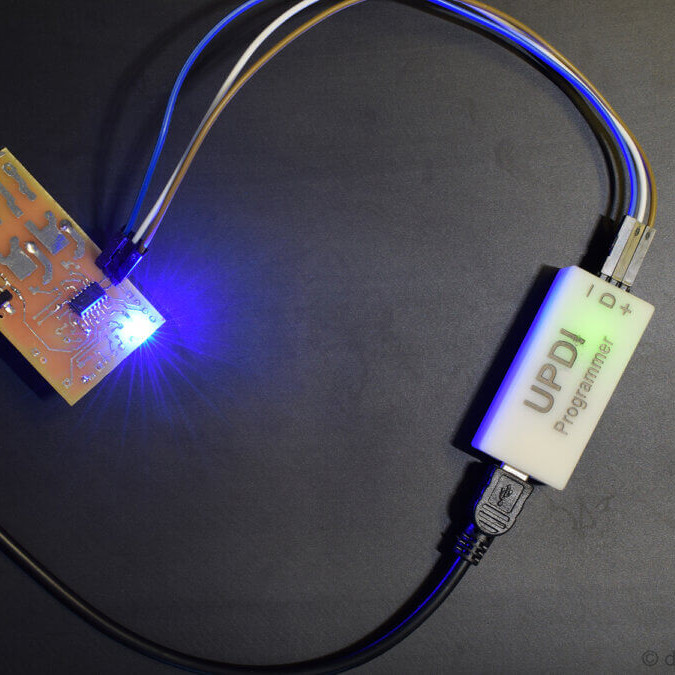
UPDI is an interface for external programming and on-chip debugging of microcontrollers, and [Daumemo]’s solution is based on the jtag2updi project. It combines an Arduino Nano (in this case, a clone) with a single resistor, a single capacitor, and a six pin angled header (with a cleverly bent pin) to enable programming UPDI devices over a USB connection. [Daumemo] is happy to report that the device works just fine in both Microchip Studio with AVRDUDE, or PlatformIO.
Is an Arduino Nano a bit overpowered in this role? Maybe, but the price is certainly right. There’s no need for a custom PCB either, since everything can be soldered direct to the Nano board. A matching 3D printed enclosure is about all that’s needed to make a robust and reliable DIY USB UPDI programmer out of a handful of parts, and that sounds good to us.
On the other hand, if you do find yourself making custom PCBs, you may be interested in another of [Daumemo]’s DIY projects: a printable structure to turn a rotary tool into a PCB drill press.


Is an Arduino Nano a bit overpowered in this role?
Since you asked. No. About right actually.
Is UPDI actually a challenge? — I first used UPDI last year, with pymcuprog and a generic USB-serial adapter. It’s slow, but it does work!
AVRDude now integrates it (serialupdi), you’ll have to do a fresh build from the repo as it’s not been put into a release yet I think. Fast and all the features you expect from AVRDude.
Maybe the challenge part of it is “device works just fine in both Microchip Studio with AVRDUDE, or PlatformIO”.
UPDI is really lovely for only requiring one 1kOhm resistor like this https://github.com/microchip-pic-avr-tools/pymcuprog#serial-port-updi-pyupdi onto an USB-UART.
I place a SMD resistor in-between the TX and RX pins, at the back of the board where there is a bit of solder left from the PINs joints, then cut the TXD pin out to not mistake it for a regular USB-UART adapter.
P.S.: in my case, 3kOhm also worked fine.