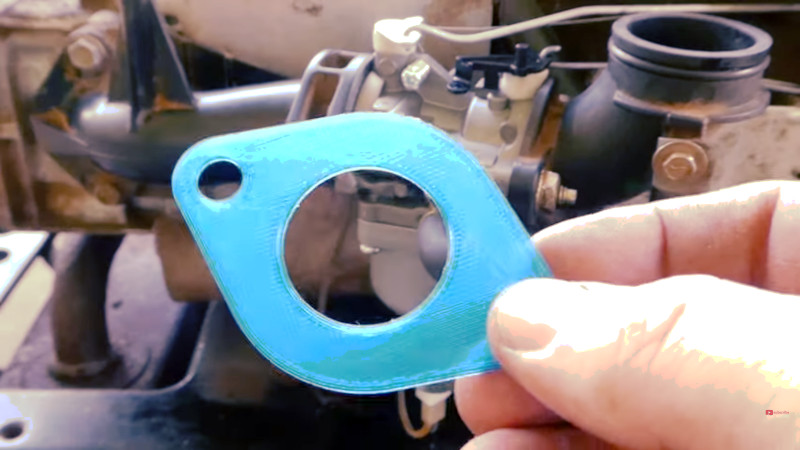
Anyone who’s owned an older engine, whether it be in a car, motorcycle, or garden machine, will at some time have been faced with the need for a gasket. Even when the gasket is readily available there may be an imperative to fix the engine rather than wait for the part to arrive, so it’s common to make your own replacements. Simple ones are easy to cut from thin card, but if you’ve ever tried to do this with a really complex one you’ll know the pain of getting it right. This is the problem tackled in a video from [the_eddies], who has explored the manufacture of replacement gaskets by 3D printing.
The advantages of CAD and easy manufacture are obvious, but perhaps many common plastics might not perform well in hot or oily environments. For that reason he settles on TPU filament, and gives it a test in a bath of 2-stroke fuel mix to see how well it resists degradation. It passes, as it does also when used with a carburetor, though we’d be curious to see the results of a long-term test. We’ve placed the video below the break, so reach your own conclusions.
Gaskets have featured here before, and if you’re interested then there are other machines which can be used to make them.
Thanks [Zane Atkins] for the tip!


It’s not so hard to make a paper gasket using a ball-pein hammer. You tap around the edge of the part, letting the sharp edge shear the paper to the exact size. I am starting to get the impression that this is something of a lost art.
https://youtu.be/nvvKu56nHDw?t=22
Shows how.
Yes, you can solve it with a 555 too, whoo-hoo!
Personally I prefer exploration of new techniques like this vid does, than a naysayer moaning that the ancient way is good/enough/better/cheaper/etc.
And he addresses paper gasket in the video too…
I was not suggesting that 3D printing wasn’t a very interesting addition to the field. Especially for gaskets with raised areas like he seems to have. I was just pointing out an alternative field-expedient method that seems to not be as well known now as it once was.
I’m aware of Andy’s method and have used it. It works well.
I had never seen that before, thanks for the link!
I’ve pressed manually on parts to make rudimentary outlines this way but never thought to use the part as a shear, thanks for the share Andy
and for holes like head bolts, use the head of a carriage bolt: much easier to centre on the hole and just tap.
Ball peen hammer and done.
Does the holes. Does the profile. Does it all.
I’d suggest the hard plastic end of a screwdriver, it’s rounded, it’s harder that gasket paper and it’s softer than aluminium.
My mind immediately went to laser or mat cutter if it’s something time consuming or intricate to design. Roughly the same with a bit of automation.
I’ve laser cut intake manifold gaskets. They work well. It does mean you have to accurately model the part or autotrace it, and both of those come with issues. The cool thing about Andy’s technique is no modeling required, and for complex seals like camshaft covers, where you might have 10-20 bolt holes and an irregular curved sealing surface, measuring/modeling can be a real challenge.
I’ve never tried the ball peen hammer method; I’ve bought gasket sheet and used rubber cement to adhere it to the face, then traced the outline with an xacto knife, and that’s done well for light alloy parts I’d be reluctant to hammer even gently.
There is RTV silicone gasket maker. https://www.ebay.com/itm/303711011853
Done and done.
Except that RTV isn’t gasoline safe,
> Except that RTV isn’t gasoline safe,
You might want to explore which RTV gasket maker you use. The gas safe one I’ve used for over three decades works well. It does take a lot longer to set, so it won’t become your first choice for all uses.
Beware using too much.
It’s a good gasket maker, not so good as a lube or coolant chunk additive.
I’ve downloaded a picture of a motorcycle side cover gasket, and used a vinyl cutter to cut a paper test gasket. Then adjusted the sizing until it fit before cutting the final gasket out of gasket material. The intricate design didn’t allow the use of the hammer tap. All great info to have.
Use the end of a screwdriver with a rounded plastic handle tip.
I carry about 4 sheets of gasket paper in my ute so I can make just about any gasket even if I’m in the bush and a long way from nowhere. This method is one of many, depending on what the gasket is for and how long you want it to stay in place, ie it may be a temporary partial repair and you’re going to remove it soon.
Consider contacting an oilfield supply company for your rubber needs for automotive powertrain applications. This may seem like odd advice, but the rubber they use for seals often exceeds anything they will experience under the hood of a vehicle. But then again, rubber that can withstand ridiculous amounts of high temperature and pressure might be more than you need.
It’s pretty easy to get a gasket shape, no matter how complex, into the computer for manipulation. Just take a picture of it with your phone, bring it into Adobe Illustrator or Inkscape (free), image trace it, measure the gasket length on your actual gasket in real life (physical item), resize it in the software, constraining proportions and it’s done. You can now make them whenever you want. I use this method for laser cutting and 3d printing all the time.
I 3D printed a TPU gas cap gasket when the aftermarket cap did not securely tighten. Had it on there for over a year with no issue. The cool thing about 3D printing is you can change the infill density to make the gasket harder or softer depending on the percentage of infill.
You have to be careful when you buy “rubber” sheet / strip now as a lot of the time it’s not rubber at all, instead it’s very flexible plastic and doesn’t last long. If you’re not sure then buy the rubber that has the inbuilt fibre re-enforcement it’s always actual quality rubber. just don’t use it where the fibres are a problem ie fluid , gas, pressure propagation.
Paper or rubber, you can buy sheets of rubber.
It’s worth mentioning that about the 2.5 minute mark he does talk about how you could make it in paper.
Agreed; ball pin hammer just requires patience. A 3dprinter is an interesting idea. However something like a Cricut vinyl/paper cutter would be faster and easier.
Still cool though application.
I don’t think that a Cricut would be quicker for just a single gasket, compared to tapping it out. (and, Cricut are, maybe, evil? https://hackaday.com/2021/03/15/cricut-decides-to-charge-rent-for-people-to-use-the-cutting-machines-they-already-own/)
Both 3D printing and CNC cutting require you to measure and model the shape. Worthwhile for running a number of them (or a gasket with ribs, for example, in the case of 3DP) but maybe not for a one-off.
If you have some sort of CNC (possibly the printer?) and a touch-probe then there is a G-code routine for digitising a part outline in the desription of this video: https://www.youtube.com/watch?v=JO8lLaV6pbw (and the same channel (which I should point out is mine) has a video on how to make an easy touch-probe)
Depending on the individual the mat cutter should be faster as it doesn’t need to make multiple passes.
Myself I wouldn’t get specifically a cricut due to the required online and definitely not if they changed to a yearly subscription model. A vinyl mat cutter also frees one up to do other things like cleaning & prepping surfaces while waiting on the gasket.
Thanks for the link quite cool.
Making simple 2D gaskets are quite easy by using RTV or 2K silicone formulations, but for complex geometries you can also give a try to silicone 3D printing. There is a swiss company that offers 3D printing service for silicone parts.
In a previous lifetime made hundreds of gaskets using the ball peen method, you can also run the hammer along the sharp edges if you don’t want to tap the part, then cut the gasket out with snips, running your fingers along the edges will also crease/leave a mark, especially if your fingers are a bit dirty.
The heavy reinforced rubber gasket material was harder to deal with and much of the time outlining the shape with a pencil or pen was done then the gasket was cut out with snips. For extra ease having some hole punches for the holes was nice .
It’s not the art that is lost it’s the common sense 😐
Yeah, back in my auto shop class in high school we learned and practiced the art of gasket making with gasket paper and a ball pein hammer. Most mechanics and DIY types kept a few sheets of various thicknesses of gasket paper around the shop as standard shop supplies.
Your right in that this is a simple, cheap, and well tested solution to a problem that’s largely been lost today.
I do like the idea of 3D printing them so thanks for the article. My concerns are not only TPU’s resistance to chemicals, but the inherent nature of 3D printing output to have rig textures and shedding of small pieces.
Hi Tachyon1 – you may be interested in 3dmatters.co.uk. They can print in ceramic and metal materials which are resistant to chemicals. They can 3D print in ceramic any shape you want.
Been working on cars and bikes for 15 years and never knew about this…. I owe you a beer.
Agreed, With a set of paper punches as well I can make any gasket needed.
That’s how my Dad taught me to make gaskets. “Tapping” out a gasket is a time tested technique that’s easy and inexpensive.
Only that hammering on the sealing surface rounds the edges and damages it.
Far easier to use a tape measure and draw the thing.
T
We have been printing them for some time. Currently we use Onyx Pro410. In our case we print the gaskets in place with the part/product and they have performed well. Yes they are super flexible. We have not tested against anything other than air and tight fit as those were our requirements in environments that generally range from -5C to 60C and continuously vary.
Forgot – ours are more like C shape than flat for our purpose.
I really don’t see this a good use of a 3d printer – thermoplastics that are printable tend to be rather soft at low temp and most gaskets go around things that get at least warm in use while having to hold pressure…
It might work fine for some things, but if you want to use the 3d printer to make gaskets fit it with a drag knife and cut the appropriate gasket material!
You know the old saying… “When all you have is a hammer, everything looks like a nail”.
Besides the heat issue, I wonder how the plastic would flow over time when subjected to pressure. Use the right material for the job. In most cases, this isn’t it.
Given how incredibly cheap and versatile plastic is, the fact that auto manufacturers still make gaskets out of almost anything except plastic probably tells us something.
And the auto industry love making stuff out of plastic – brake master cylinders, gears in the gearbox, pedals, pulleys, intake manifolds, fuel tanks…
I’ve had a hard time finding good data on the thermal properties of printed TPU. On the one hand, done sources list it as having a pretty low glass transition temp. On the other hand, some places say that the heat deflection temp is pretty high.
Probably because there are no hard and fast rules, and every filament is probably a different damn blend.
It is more than just temperature concerns – also got to handle the pressure of the mounting without that plastic deformation tendency leading to creeping and loosing its seal, and the pressure of operation.
Not that I’m saying such materials can’t be used, and if you are doing it on your own motor you know enough to figure out your troubles are likely caused by it failing and fix it properly this time etc, and in some places you need gasket it probably won’t be any trouble at all, not every seal has to take stupidly high pressures or temperature cycles etc…
200 degrees Celsius is low temp? Ok boomer.
Not even visibly glowing.
Get out more. Learn to use a second tool.
By the standards of many materials and environments 200 is very very low, and most FDM plastics soften at much much much lower temperatures than you print them at – 60 to 100 Celsius would be my suggested range as to get higher you generally end up with FDM printers well beyond most of ours, or potentially further processing off the printer…
PLA for instance warps badly under just its own weight at something like 40 up to maybe 60 C (Variation to be expected due to different filament blends and printer settings), which is why folks using PLA for their cosplay have found grief leaving the prints in their cars, might need 200 C to print, only takes 60 to end up a distorted mess…
“PLA for instance”
Has one of, if not the, lowest glass transition and melting temperatures of all the printable materials.
Some fancier materials such as Carbon Fiber PEEK have an HDT of 280° C. ABS/ASA are nearly as commonly used as PLA and have Vicat softening temperatures around 98° C. Ultem/Delrin (while a giant PIA to print with) can produce parts that can be used at up to 170° C indefinitely.
These can all be sourced by regular people in reasonable quantities (you can buy a 1kg/0.5kg spool like any other filament) and be printed on affordable consumer printers.
While it’s true that not all filaments are meant to withstand high temperatures, it’s disingenuous to imply that filaments that can, or printers that can print them, don’t exist. Because they do, and they are more common than you might think.
Oh I know they exist, I print almost exclusively in ABS, but all the common ones are not good for high temp. Soft under 100C. I just used PLA as the example because it is by miles the most commonly used it seems to me, certainly the easiest to print.
I’d argue you can’t print most of the better filaments on ‘affordable consumer’ printers, as almost all of the slightly better mechanically or thermally want at least one of abrasion resistant nozzle, special bed material, heated chamber would be nice, heated bed definitely required, high power part cooling fan to not turn into amorphus goo (or sometimes printing really slowly) – and the really affordable printers tend to have no more than one of those… Something capable of printing them isn’t all that expensive, but it is certainly not what I’d call the “affordable” printer…
I’ve made an expedient gasket from the foiled paper from a Tetrapak milk carton, it seemed to work ok, at least for a temporary fix. This was for a fuel pump on top of a Morris Marina engine (showing my age there..)
I made a new head gasket for an air compressor out of a Dr. Pepper can.
It’s been working for over a decade.
I had great success making a gasket for an old carburetor by laser cutting gasket material. I scanned the broken one on a flat-bed scanner, then “traced” over it with Inklscape to make a high-quality CAD drawing of the original. Then sent it to the laser. Very inexpensive and rewarding!
I’m curious. What did that smell like?
It smelled like success! (Actually, it smelled pretty horrible. If I were going to make a lot of these, I would study the MSDS, etc., and make sure that I was not releasing any toxic fumes, etc. )
Or, you know, you could have traced with a pencil directly on the new material and use scissors… unless your goal was to produce hundreds of replicas.
How dare he have fun with his hobby?
Help help I am being repressed!! :)
True, but my particular gasket was significantly more complex than the example in the OP, lots of small screw holes, odd shapes, etc. Since I had the laser already, I figured, correctly, that it would be easier, faster, and higher quality to go all digital. I’m sure I would have butchered it with scissors, XActo knives, etc.. And if it’s not perfect with the laser, tweaks are quick and easy. You can see it here: https://fiatspider.com/f15/viewtopic.php?f=5&t=35898&hilit=laser+gasket#p275601
a three d plastic printer will never# 1 print a gasket as fast
#2 as cheaply and # 3 a gasket or seal that has to hold significant pressure.a cereal box has better mechanical properties and I have made many gaskets from found and
purchased materials,I have also witnesed a head gasket
made from oil soaked cardboard and then imiediately put
into hard use.
Why not save the printer for building forms for forged carbon
components ?
Heh, done several cereal box gaskets and all of them lasted as long as the rest of the car did.
I have used my cricut mat cutter many time over the years to make gaskets. Everything from thermostats to intake manifolds. My materiel of choice is beer or soda case. A thin covering of permatex make a great sealant.
Even better if you have a laser cutter! Can buy sheets of gasket paper ( ebay)
I’ve had to rebuild small RC gas engines where, although I could get mechanical parts, the gaskets are often unavailable. So for a crankcase gasket, I rub a greasy finger over the surface and then pressed it to a sheet of paper, scanned it into a drawing program and finally laser cut a few.
You definitely can print them. You can coat each side with silicon too if needed.
During lockdown in 2020 I decided to get my old Suzuki ATV running again. I made custom oval high squish o rings to seal my broken oil filter cover, intake gaskets, and new vibration isolators for all the electronics out of TPU. It even lead to me making new seals for my leaky pressure washer. I got alot of mileage out of my printer during the lockdown.
I’m in the same boat. Bought a Yamaha with a Keihin carb that someone decided to assembly without the molded o-ring that seals the midplate. I took some photos and modeled a new one that I printed in TPU; it worked wonderfully. It was also an application where I couldn’t just “ball peen” it from gasket material as everyone here seems to be thinking.
Heat doesn’t appear to be an issue, but like most motorcycles the carb is attached to the head with a rubber coupler so the carburetor doesn’t see much heat.
I agree with you … lots of comments before talks about “flat” gaskets that are easy to make with flat materials. But some gaskets, or seals, with some thickness required another method, and the 3D printer can meet the requirements: “The right tool for the right job”.
For my suzuki gsf 600 I had a leaking gasket between the tank and the petcock tap (ref. 44348-87420). This gasket has a special “8” shape, and was easier to CAD than cutting it in a gasket sheet.
The gasket I printed of TPU did not suffer from heat or gasoline, and worked very well. Some weeks after I received the genuine ones and replaced the homemade one that did the job: it hasn’t been damaged by the gasoline and is still flexible (I keep it on my office desktop for showing to people that want to talk about 3D printing).
I’ve put the stl and the freecad files are available on thingiverse, and according to the download statistics it seems that some people found it useful :)
there’s a follow up video with more tests https://www.youtube.com/watch?v=dSGOzGJjoWc
to summarize, some small swelling in fuel and seems stable up to 100c/200ishF temps.
Wonder if it can be done with a Cricut?
If it’s a flat gasket, yes, that’s actually what I bought mine for (though I’ve barely used it for that). though I gather this exploration was mostly about more dimensional ones.
I needed a vacuum port on a small engine. There was already a spacer between the caburetor and that intake, so I modeled that and added a threaded port from which I could pull a vacuum. It worked great…. for about half an hour. The PETG plastic started deforming due to the heat of the engine.
Typically we use the hammer/punch and gasket material method, but I have had good success laser cutting the gasket material as well.
I did 3d print an obscure fuel pump cover, though, in PETG that held up quite well. 3d printing has it’s uses, but I don’t thin gaskets are it.
I don’t know how I should feel that I’ve been on both ends of the spectrum.
On one hand, made intake manifold gaskets out of cardstock with thin coating of bearing grease applied.
But on the other hand, had a signmaker friend precision cut with his “X&Y scalpel cutter machine” a set of gaskets I measured up with a caliper and drew in Solidworks.
The 3D printer should not be used to print the gasket directly. Filament that is thermo-formed might not make the best gasket material in most applications that use gaskets today. Instead, the printer should be used to print a fixture or guide for cutting the gasket out of the right material. The material is cheap from a local auto parts store, and you’d be able to re-use the printed fixture as well.
I’ve done something similar to this with electronic gasket/insulator.
The strategy that works well is to calibrate your printer and designs (because what you print will be somewhat undersize) then print out a stencil on the printer then cut around the stencil.
Obviously this makes the most sense when you have four axis worth of H bridge of transistors (aka 16) to mount to a heatsink and you have no TO-220 insulators but some bulk non-stick kapton and plenty of spare time. If you only have one insulator (or gasket…) to make, just free hand it.
Gaskets come in various shapes and sizes with varying purpose. Many seem stuck on the idea flat gasket not the best for 3D printing yet seem to misunderstand the reality of the idea and current uses in industry. Yes, the OP is probably not doing his goal the best way. That however does not take away anything from 3D printing gaskets. Many also seem to think ‘plastics’ without taking into consideration the many other options available.
I made gaskets for printed vacuum clamp hold downs. They worked ok. Added a bit of silicone between the surfaces and that really helped.