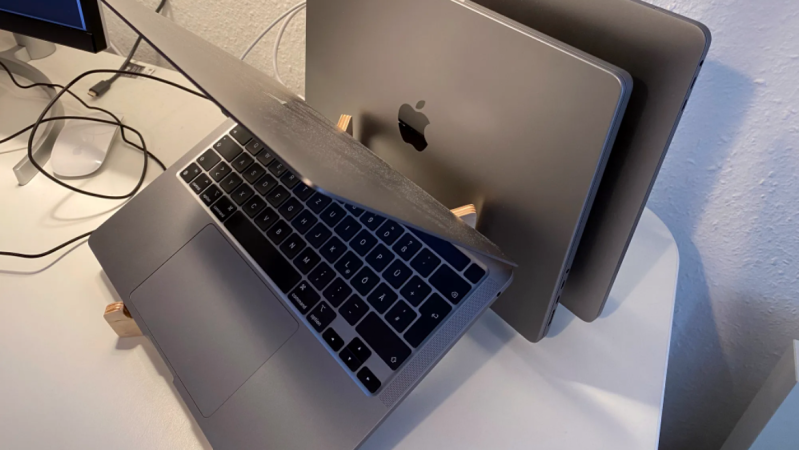
We make the tools we need, and that’s definitely the case with [Marco Schulte]’s laptop stand. It slots not one, not two, but three laptops at once.
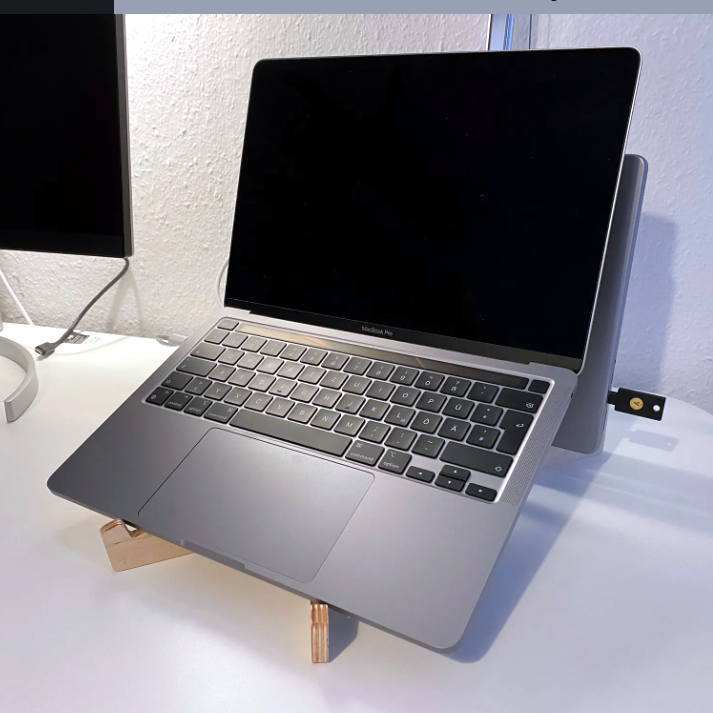 For all their portability, multiple laptops can be a bit clunky to manage on a desk, so [Marco]’s solution definitely saves space while keeping things accessible. The laptop in the front can be open for use and easy access, while the two in the back are held vertically and can be attached to external monitors or other peripherals.
Not only does it save space, but the stand provides ample spots to anchor cable ties for securing the inevitable mess of wires and cables that dealing with three laptops brings. It makes for a tidier desk, that’s for sure.
The stand was designed in Fusion 360 and was cut from plywood with a CNC router. Does this design give you any ideas, or would you like to make one for yourself? The design files are here.
No access to a CNC router? No problem if you have glue and some spare boxes laying around! You might be surprised at how sturdy a few layers of cardboard and glue can be.


all laptops have ugly keyboards
What makes a keyboard beautiful?
Big cursor keys make laptop keyboard beautiful. Hard to find one now.
I guess beauty is in the eye of the beholder.
I could moan about modern laptop keyboards a lot and corsor keys are one of main issue. Keyboard is main reason I bought Thinkpad.
The compose button.
I have deployed hundreds laptops, but never got used it for myself.
Alternative: 1 nice big monitor & a 3 port KVM switch.
My favorite ones were switchable with the scroll lock key. They could hide behind the desktop and make use of that legacy key. Sadly they used VGA and PS2 and are now useless. Linux seems to not recognize that key at all.
I read about software-network setups for this job so there are alternatives.
File that whole laptop here in the second row behind the other. I’ve seen coated wire racks for a few vertical file folders that could do this probably as well right off the shelf. Available at an office store perhaps.
I use a program called Barrier. I run it on the three machines and four monitors I have on my desk. You can share the keyboard and mouse among all three machines as if they were one, just move the cursor to the screen you want to use them as if they were on the machine the focus is on. I have a W11 machine, an Kubuntu machine, and a raspberry pi all run by one keyboard and mouse. It’s great.
“No access to a CNC router? No problem if you have glue and some spare boxes laying around! You might be surprised at how sturdy a few layers of cardboard and glue can be.”
Or, you know, you can use a $30 jig saw, or a $10 coping saw to cut out the patterns, and use the original design.
Getting tired of the idea that a “CNC design is just impossible without CNC, so if you don’t have a CNC router go play with some recycled trash instead, loser” stuff.
In this case I agree with the cardboard method, yes you can make much the same as the 2.5D CNC by hand without huge pain, but for something like this – only to be used indoors, and that you probably want to custom fit a little to suit your particular setup cardboard is great, and really really cheap.
I keep any larger good quality corrugated box I receive flattened behind the sofa for when I need a new insert tray (etc) in my workshop – so easy to work with, and actually works out just as good or better than wooden ones – being card it is easy to create rounded forms to better fit the requirements and as long as you keep it dry (or coat it) its way more than strong enough and has a very nice surface finish – add paint and it wouldn’t know it wasn’t plastic, MDF or wood if you really need it to look pretty.
So really the only reason to make something like this on the CNC is if you half expect to make many identical ones, or because you already have the CNC and want to improve or keep your CNC design skills sharp… I guess also if you really must make it out of some lovely looking wood to match your fancy all real wood desk – but really this is a bit of cable covered portable computer tat, its never really going to look all that pretty, just less of an awful rats nests than it might…
What is the point of a laptop stand like this? You can already open a laptop screen to any reasonable position without one… actually, putting it on a stand means you have to be able to open it even farther. It also puts the keyboard in mid-air at an uncomfortable angle, and deprives your arms of support while you type.
And finally, you’re only saving a minimal fraction of the laptop’s footprint, if even that.
Looks to me like the intention is to let you use the laptops screen at a sensible more ergonomic height with external keyboard etc.
Though with how shallow this particular stand is I don’t think it would be particularly awkward or uncomfortable to use directly either, I’ve certainly pushed my laptops closer to vertical (though obviously not that much more) in the past and still found it comfortable to use directly – infact it was more comfortable, bringing the screen up to a less neck destroying height while the keyboard still remained very comfortable to type on.
I use a 4-position newspaper/magazine rack and just snake usb and power to each. Holds 4 laptops plus an ipad or two great!
A-la: https://m.media-amazon.com/images/I/91myyLYJwQL._AC_SX679_.jpg