All Dressed Up And Nowhere To Flow: Russia’s Nord Stream 2 Pipeline

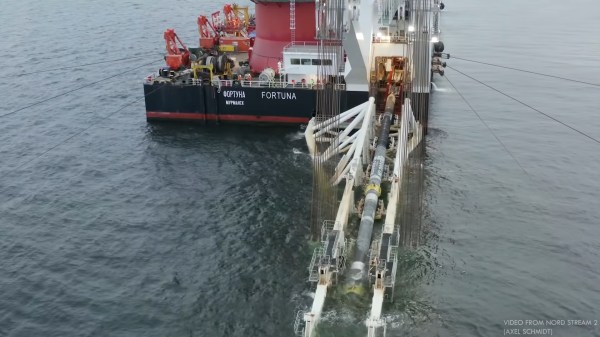
At over 1230 km (764 mi) in length, $10 billion in cost, and over a decade in the making, the Nord Stream 2 pipeline was slated to connect the gas fields of Russia to Western Europe through Germany. But with the sanctions against Russia and the politics of the pipeline suffering a major meltdown, this incredible feat of engineering currently sits unused. What does it take to lay so much underwater pipe, and what challenges are faced? [Grady] over at Practical Engineering lays out out nicely for us in the video below the break.

A Bubble Curtain containing the disposal of WW2 ordinance

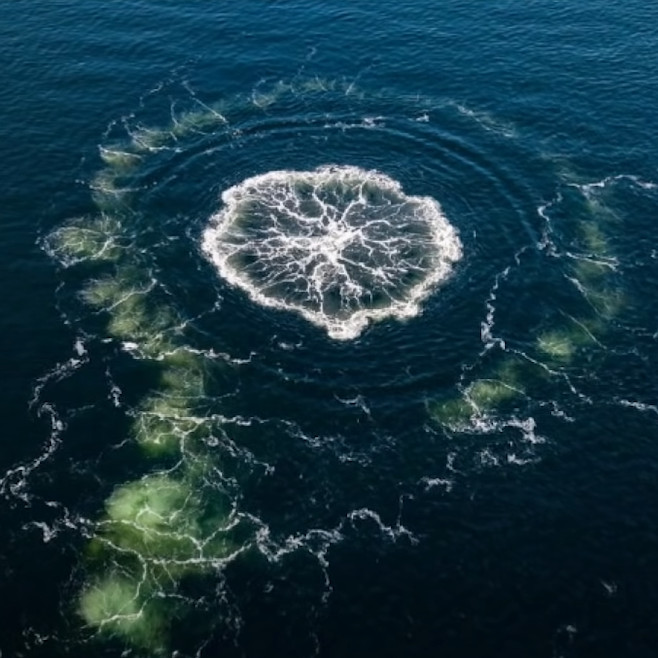
As with any undersea pipeline or cable, a survey had to be done. Instead of just avoiding great chasms, underwater volcanos, or herds of sharks with lasers, planners had to contend with culturally important shipwrecks, territorial waters, and unexploded ordnance dating from the second world war. Disposing of this ordinance in a responsible way meant employing curtains of bubbles around the explosion to limit the propagation of the explosion through the water- definitely a neat hack!

Speeding up the job meant laying several sections of pipe at once, and then tying them together after they were laid. The sheer amount of engineering, manpower and money involved are nothing short of staggering. Of course [Grady] makes it sound simple, and even shares his take on some of the geopolitical issues involved, such as Germany refusing to certify the line for use after the Russian invasion of Ukraine. So far, the $10 billion pipeline is unused, and even Shell has walked away from its $5 billion investment.

Be sure to watch the whole video for even more fascinating details about the Nord Stream 2’s amazing engineering and construction. Check out a Robot Eel concept for the maintenance of underwater pipelines too.

Continue reading “All Dressed Up And Nowhere To Flow: Russia’s Nord Stream 2 Pipeline”

IBM PCjr Types Again, Thanks To KeybJr

Most of us think of keyboards — even vintage ones — as being fairly standardized and interchangeable, but that isn’t the case for the IBM PCjr. Its keyboard was quite unlike most others of its time, which means that a PCjr without an original keyboard is pretty much a dust collector. That’s what led [Jozef Bogin] to create the KeybJr, a piece of hardware that allows one to use any AT, XT, or PS/2 keyboard with the IBM PCjr.

The PCjr’s oddball keyboard can be a bit of a hassle for vintage computing enthusiasts.

What was strange about the PCjr’s keyboard? From the outside it looked pretty normal, but it definitely had its own thing going on. For one, the PCjr keyboard operated over a completely different protocol than the other keyboards of the time. In addition, its connection to the host was either by IR, or via its own wired cable adapter.

The KeybJr solves this by using an Arduino-based board to turn inputs from other keyboards of the time into something the PCjr expects. These signals are sent out and received either over infrared, or by the PCjr’s “K” port for a wired keyboard link.

Why bother with the IR functionality? Well, the connector and pins on the PCjr are not very rugged, and sometimes they are damaged. In those cases, it is nice to have the option of using a normal (for the time) keyboard over the IR link. Vintage hardware is not always in perfect shape, after all. That’s why things like ATX power supply adapters for the PCjr exist.

Want to give it a shot? There is a GitHub repository for the KeybJr, and you can see it in action in a brief video, embedded below.

Continue reading “IBM PCjr Types Again, Thanks To KeybJr”

Hackaday Links Column Banner

Hackaday Links: April 24, 2022

Wait, what? Is it possible that a tech company just killed off a product with a huge installed base of hardware and a community of dedicated users, and it wasn’t Google? Apparently not, if the stories of the sudden demise of Insteon are to be believed. The cloud-based home automation concern seems to have just disappeared — users report the service went offline at the end of last week, and hasn’t been back since. What’s more, the company’s executives removed Insteon from their LinkedIn profiles, and the CEO himself went so far as to remove his entire page from LinkedIn. The reasons behind the sudden disappearance remained a mystery until today, when The Register reported that Smartlabs, Inc., the parent company of Insteon, had become financially insolvent after an expected sale of the company failed in March. The fact that the company apparently knew this was going to happen weeks ago and never bothered to give the community a heads up before pulling the switches has led to a lot of hard feelings among the estimated 100,000 Insteonhub users.

Then again, with a comet the size of Rhode Island heading our way, a bunch of bricked smart bulbs might just be a moot point. The comet, known as C/2014 UN271, has a nucleus that is far larger than any previously discovered comet, which makes it a bit of an oddball and an exciting object to study. For those not familiar with the United States, Rhode Island is said to be a state wedged between Connecticut and Massachusetts, but even having lived in both those states, we couldn’t vouch for that. For scale, it’s about 80 miles (128 km) across, or a little bit bigger than Luxembourg, which we’re pretty sure is mythical, too. The comet is a couple of billion miles away at this point; it may never get closer than a billion miles from the Sun, and that in 2031. But given the way things have been going these last few years, we’re not banking on anything.

From the “Answering the Important Questions” file, news this week of the Massachusetts Institute of Technology’s breakthrough development of the “Oreometer,” a device to characterize the physical properties of Oreo cookies. The 3D printed device is capable of clamping onto the wafer parts of the popular sandwich cookie while applying axial torque. The yield strength of the tasty goop gluing the two wafers together can be analyzed, with particular emphasis on elucidating why it always seems to stay primarily on one wafer. Thoughtfully, the MIT folks made the Oreometer models available to one and all, so you can print one up and start your own line of cookie-related research. As a starting point, maybe take a look at the shear strength of the different flavors of Oreo, which might answer why the world needs Carrot Cake Oreos.

And finally, since we mentioned the word “skiving” last week in this space, it seems like the all-knowing algorithm has taken it upon itself to throw this fascinating look at bookbinding into our feed. We’re not complaining, mind you; the look inside Dublin’s J.E. Newman and Sons bookbinding shop, circa 1981, was worth every second of the 23-minute video. Absolutely everything was done by hand back then, and we’d imagine that very little has changed in the shop over the ensuing decades. The detail work is incredible, especially considering that very few jigs or fixtures are used to ensure that everything lines up. By the way, “skiving” in this case refers to the process of thinning out leather using a razor-sharp knife held on a bias to the material. It’s similar to the just-as-fascinating process used to make heat sinks that we happened upon last week.

2022 Sci-Fi Contest: CyberGlove Tests Your Reactions

Since the 1980s, we’ve seen innumerable attempts to revolutionize the way we interact with computers. Since the advent of keyboards and mice, we’ve seen everything from magic wands to electric gloves, with [Deemo Chen]’s project fitting into the latter category.

The build takes on a cyberpunk aesthetic, with addressable LEDs installed along each digit. The various digits light up randomly, and the wearer of the glove must tap a button on the corresponding digit in order to test their reaction times. An Arduino Uno runs the show, and keeps track of the score, displaying the results on an attached HD44870-compatible LCD.

The mess-o’-wires aesthetic, with bare electronics hanging off the glove, goes a long way to making this look like a proper bit of sci-fi kit. The lurid, colorful glow is a key part of this look, and something we’ve seen on many projects over the years.

Overall, the reaction trainer served as a great freshman project for [Deemo], along with their chums [Dhruv] and [Ryan]. Along the way, the team clearly picked up skills in microcontroller programming, as well as learning how to work with LCD displays and addressable LEDs. Master these skills and you can pull off some impressive feats. Video after the break.

Continue reading “2022 Sci-Fi Contest: CyberGlove Tests Your Reactions”

The dash of Xiaomi Mi 1S scooter, with the top panel taken off and an USB-UART adapter connected to the dashboard, sniffing the firmware update process

Xiaomi Cryptographically Signs Scooter Firmware – What’s Next?

[Daljeet Nandha] from [RoboCoffee] writes to us, sharing his research on cryptographic signature-based firmware authenticity checks recently added to the Xiaomi Mi scooter firmware. Those scooters use an OTA firmware update mechanism over BLE, so you can update your scooter using nothing but a smartphone app – great because you can easily get all the good new features, but suboptimal because you can easily get all the bad new features. As an owner of a Mi 1S scooter but a hacker first and foremost, [Daljeet] set up a HTTPS proxy and captured the firmware files that the app downloaded from Xiaomi servers, dug into them, and summarized what he found.

Scooter app firmware update dialog, saying "New firmware update available. Update now?"
Confirming this update will indefinitely lock you out of any third-party OTA updates

Unlike many of the security measures we’ve seen lacking-by-design, this one secures the OTA firmware updates with what we would consider the industry standard – SHA256 hash with elliptic cryptography-backed signing. As soon as the first firmware version implementing signature checks is flashed into your scooter, it won’t accept anything except further firmware binaries that come with Xiaomi’s digital signature. Unless a flaw is found in the signature checking implementation, the “flash a custom firmware with a smartphone app” route no longer seems to be a viable pathway for modding your scooter in ways Xiaomi doesn’t approve of.

Having disassembled the code currently available, [Daljeet] tells us about all of this – and more. In his extensive writeup, he shares scripts he used on his exploration journey, so that any sufficiently motivated hacker can follow in his footsteps, and we highly recommend you take a look at everything he’s shared. He also gives further insights, explaining some constraints of the OTA update process and pointing out a few security-related assumptions made by Xiaomi, worth checking for bypassing the security implemented. Then, he points out the firmware filenames hinting that, in the future, the ESC (Electronic Speed Control, responsible for driving the motors) board firmware might be encrypted with the same kind of elliptic curve cryptography, and finds a few update hooks in the decompiled code that could enable exactly that in future firmware releases.

One could argue that these scooters are typically modified to remove speed limits, installed there because of legal limitations in a variety of countries. However, the legal speed limits are more nuanced than a hard upper boundary, and if the hardware is capable of doing 35km/h, you shouldn’t be at mercy of Xiaomi to be able to use your scooter to its full extent where considerate. It would be fair to assert, however, that Xiaomi did this because they don’t want to have their reputation be anywhere near “maker of scooters that people can modify to break laws with”, and therefore we can’t expect them to be forthcoming.

Furthermore, of course, this heavily limits reuse and meaningful modification of the hardware we own. If you want to bring a retired pay-to-ride scooter back to usefulness, add Bluetooth, or even rebuild the scooter from the ground up, you should be able to do that. So, how do we go around such restrictions? Taking the lid off and figuring out a way to reflash the firmware through SWD using something like a Pi Pico, perhaps? We can’t wait to see what hackers figure out.

SSH Is Magic, But Tunnels Are Even Better

Once upon a time, I was doing on-site support for a hardware install at a hotel a few years ago. The remote tech’s remote desktop software didn’t want to play with my Linux laptop, so he couldn’t get into the switch he needed to configure, to make the install work. I asked if it had an SSH port he could use, were he were in the room with me. Of course it did, but that didn’t do him much good. I ran a reverse SSH tunnel out to my public server, and pointed it at the switch on the local side. I convinced him to SSH to my server on the given port, and he was magically connected to his switch. He was literally in awe of that trick, and demanded to know how it could be done. SSH is magical, but tunneling traffic over SSH is straight-up wizardry. [Shawn Powers] agrees, and decided to help the rest of us understand the process.
Continue reading “SSH Is Magic, But Tunnels Are Even Better”

DIY Laptop Stand: Why Stop At One When You Can Slot Three?

We make the tools we need, and that’s definitely the case with [Marco Schulte]’s laptop stand. It slots not one, not two, but three laptops at once.

For all their portability, multiple laptops can be a bit clunky to manage on a desk, so [Marco]’s solution definitely saves space while keeping things accessible. The laptop in the front can be open for use and easy access, while the two in the back are held vertically and can be attached to external monitors or other peripherals.

Not only does it save space, but the stand provides ample spots to anchor cable ties for securing the inevitable mess of wires and cables that dealing with three laptops brings. It makes for a tidier desk, that’s for sure.

The stand was designed in Fusion 360 and was cut from plywood with a CNC router. Does this design give you any ideas, or would you like to make one for yourself? The design files are here.

No access to a CNC router? No problem if you have glue and some spare boxes laying around! You might be surprised at how sturdy a few layers of cardboard and glue can be.