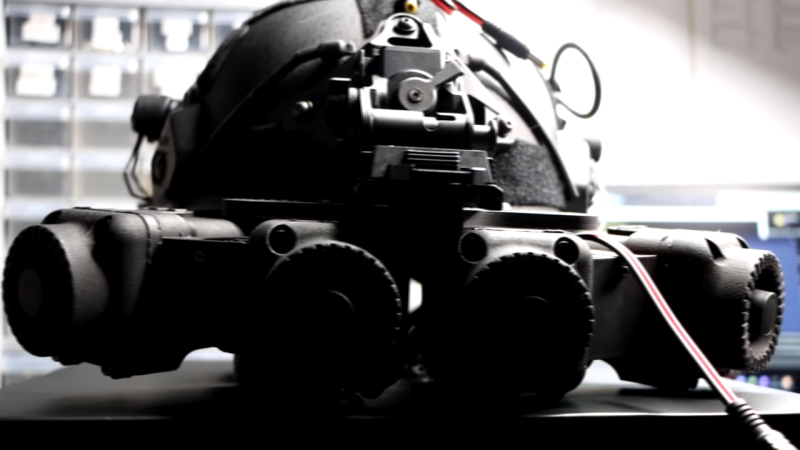
Night vision projects are great, and the hardware available to hobbyists just gets better and better. [Just Call Me Koko] shows off just such a build using four low-light, IR-sensitive cameras, four displays, and four lenses in 3D printed enclosures mounted to a helmet. Why four? Well, mounting two cameras and displays per eye is the easiest way to yield a wider field of view, and for bonus points, it sure looks extra weird.
 At its heart, each of the four segments is the same. A Foxeer Night Cat 3 camera is mounted at the front, its output is connected directly to a 2″ diagonal NTSC/PAL display, and at the rear is a DCX (double convex) lens 38 mm in diameter with a 50 mm focal length. Add a printed enclosure, and the result is a monocular night vision display. Do it three more times and arrange them around one’s eyeballs, and one can make a night vision system with a panoramic view that probably takes only a little getting used to.
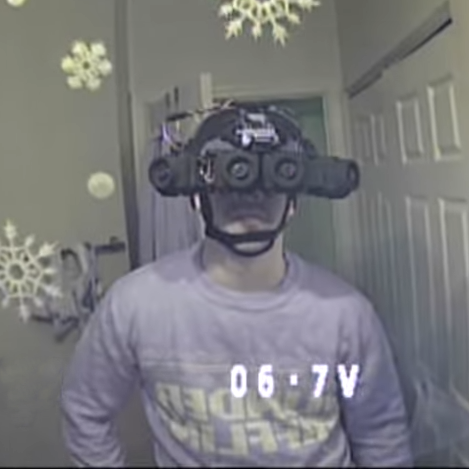
How well does it work? [Just Call Me Koko] does some walking around and also tries some target practice while wearing them, and concludes that while they don’t have nearly the clarity of the real deal (the 320×240 resolution displays limit the details one can perceive), they do work fairly well for what they are. Also, the cost of parts is a small fraction of the cost of the real thing, making it a pretty enjoyable project in the end.
The kind of hardware available to hobbyists today is what makes this kind of night vision project accessible, but there’s always the good old high-voltage analog method.


I built the monocular version of this and it works quite well. It does need an illuminator in pitch blackness, but overall it’s FAR better than a pair of romanian gen1 NVGs I have. One point he mentions in the video is incorrect. 850nm is NOT the ideal wavelength for the illuminator. That’s true for the tube NVGs but the CMOS sensors can see longer wavelengths than that. An 850nm illuminator looks like a red dot to the naked eye, which is obviously not ideal for stealth. I use a 940nm illuminator instead and it works great, while being completely invisible to the eye. It has the added advantage of not being seen very well be tube NVGs. They can still see it, but it looks fairly dim, like an indicator LED instead of a flashlight.
The latter is good in that people aren’t asking about the lights you have on the house.
Could use multiple 850nm illuminators set-up to sweep like a Larsen scanner. Visible to the naked eye and blindingly obvious to NVGs, but a cool statement.
s/Larsen/Larson/g
No eyes in your back?
No 360 surround vision?
But 4 is of course already much more better then two.
On the other hand, lots of variations could be made of this, even during daytime.
For example put the camera’s a bit higher for periscope vision out of the trenches or look around corners.
With the camera’s a bit higher, you could also easily add a hinge on the display to switch between “biological” and “enhanced” vision.
Another option is to put a camera on your gun and switch to that so you don’t have to look around corners.
I was thinking that with 4 cameras, at least 1 would be thermal.
850nm is thermal.
850nm is IR, but is not thermal at room temperature.
Googled it, and the wavelength is about 10 times larger.
>”A body at room temperature (about 300 degrees Kelvin) emits radiation mainly around a wavelength of 10 µm, which is infrared.”
The 4 cameras are used to to widen the field of view. Sensor fusion (combining the video outputs of thermal and low-light cameras into 1 display) is not a trivial undertaking.
Really? I was thinking you could take a cheap x86 sbc, (atomic pi comes to mind) run OBS, overlay the image of some webcams sans ir cut filters with the image from some cheap USB thermal cameras (thinking seek thermal). Then adjust the thermal image via the transform settings to match the webcams image so they align, then set some preset scenes to some hotkeys on a bt keypad. One webcam only, the next thermal only, the last a combination of the two with the opacity set to 50%on the thermal image. Then pipe that into a cheap vr headset with the cameras mounted to it.
Seems pretty straight forward to me.
the latency would be a nightmare!
Right
>”(the 320×240 resolution displays limit the details one can perceive)”
Quick googling indicates that that camera should be able to output around 720p resolution (assuming I understand it correctly, I’m not very familiar with 1200vtl). I’m curious why he didn’t go for higher resolution displays.
I don’t know of any displays that can be purchased off the shelf that are higher res while being approximately 2in diagonal. The display these use has a custom backpack from adafruit to accept composite video.
The only source I can think for such a display is high end fpv goggles.
Better to just skip the awful composite video link altogether and use cameras with digital links. e.g. use a couple of the RPi NoIR cameras with optical-blocking fitlers and the associated Pis to capture the video, process (e.g. un-distort for wide angle lenses or composite for multiple camera arrays, and pre-warp to compensate for non-rectilinear viewing optics) and display on an attached LCD.
the raspi will add a fair bit of delay, definitely percetable
also, the problem is the lack of easily usable, small, high-res displays.
If you can grow display size by 1″ diagonal, you can use the panels from the Leap Northstar (and also borrow its optical assembly whilst you’re at it) for 1440*1600 per eye.
Any URLs to these open source nvg project repositories? I’m finding random crap only.
This is a good resource to get you started. I stumbled across this a few weeks ago and went down quite a rabbit hole. Surprisingly there’s a lot out there in terms of development on this project.
https://github.com/justcallmekoko/BPNVG/wiki/bpnvg-v2-by-stubbs
We were issued the “real” version of these, the GPNVG made by L3Harris, back then the replacement cost was about $60K per unit, I believe they have come down quite a bit and are “only” $41K – $42K now. A camera based system like the one above could potentially put ground panorama in the hands of far more soldiers, without the cost of the current solutions, I would love to see a commercial development of this.
It’s good work, but there is plenty of issues here depending on usage. I have some experience with both display, camera, IR and nightvision systems.
# I bet those lenses on the displays makes the wearer see only a portion of the display, that is why he said to go for 1.5″ displays. I would guess 1″ would be better. It means the real resolution the eye actually see is far less than 320×240.
# It’s Colour displays, and it gets annoying real fast looking at sharp colour pixels. But monochrome displays are harder to get without getting in to gritty detail. This build is a quick one using cameras and displays going via NTSC video, so far far from ideal, but very easy to do. Optimizing contrast helps, but probably a good idea to decrease sharpness from the camera. Tends to be annoying.
# The FOV that lens and display gives, is nowhere close to having the same 120 degree view that the cameras have, and displays are spread 45 degree meaning that there is a huge overlap. Sure the brain adapts, but it quickly becomes weird and disorienting and will give a headache.
# A huge improvement in usage would be to make sure the rear end with the lenses is as close as possible, and that might involve grinding down two sides so they get 10mm or so closer. It will make the image more seamless. Then measure which actual view angle you get, and order camera lenses as close as possible to that. The end result will be a better and more seamless image that actually means that the brain and eyes will see something in the correct scale and range, and by optimizing camera FOV and display FOV, actual resolution will improve by a huge amount. Quick math: Say he sees 200 display pixels of the screen, on a 30 degree lens view, which means 6.6 pixels per degree. But the camera is in NTSC mode so the video signal is about 400 pixels wide (1200TVL camera just means its 400 good pixels), and that is over 120 degree so about 3 pixels per degree. So the limiting factor is camera FOV. If the cameras lens actually match what the displays see, well, then you have optimized the system, and it will feel more natural. The only thing optimized are the lenses and the design. If I was building it I would focus on getting the display part as good as possible first, then design the case and get as close as possible with the front lens.
# Eye wash. Those displays can’t really be set for a lot of different brightnesses and tend to be far too bright. I assume they all start at max brightness. I would mod that and make it lower. It will help with spill, and be far more comfortable and resting for the eyes in the long run. You can see he added red filters over them in the end. Adding darkening film would probably be a good cheap idea. Adding eye cups help with light spill, but fogging will become an issue.
# A good mount helps a lot for just getting the system in the right place in height and eye distance, plus angle. You want it all to match and feel solid.
# Strong 940nm IR illumination will always be a better alternative for digital, as they can use it well, and it’s invisible to the naked eye, but doesn’t matter much before making light spill from the displays a non issue. Both Gen2 and Gen3 will see 940nm IR sources well and from far if aimed at them, but will have less use of the illumination.
I’ve built a set very similar to these and you can see the whole screen. Like maybe the tiniest bit of the corners is cut off but, but I’d say they’re basically perfect in that regard. And I’m using them with glasses.
Hey, I’m a uni student looking to build this for my thesis. Could I get in contact with you, because you seem like someone who knows what they are talking about, and I have a few questions regarding this project. Thanks! -R.