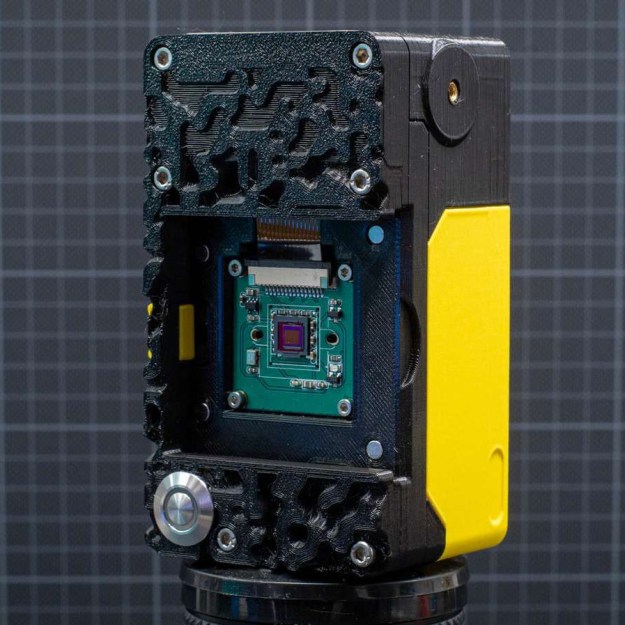
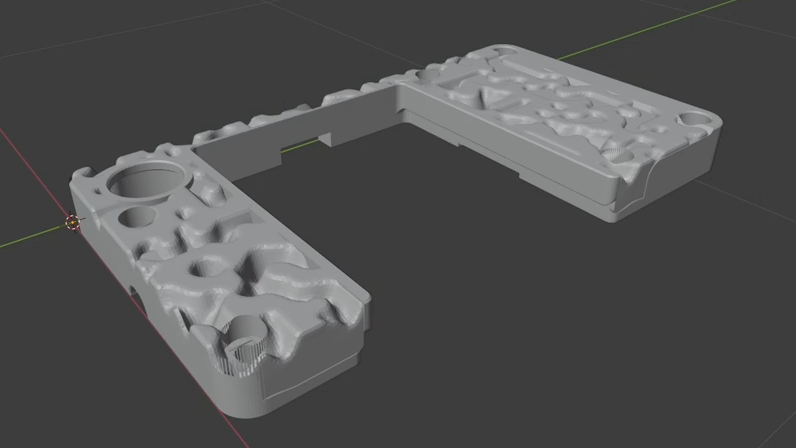
Want to add a bit of visual flair to 3D printed parts that goes maybe a little more than skin-deep? That’s exactly what [volzo] was after, which led him to create a Python script capable of generating a chunk of Perlin noise, rendered as an STL file. What does that look like? An unpredictably-random landscape of hills and valleys.

The idea is to modify a 3D model with the results of the script, leaving one with something a bit more interesting than a boring, flat surface. [volzo] explains how to use OpenSCAD to do exactly that, but it’s also possible to import the STL file the script creates into the CAD program of one’s choice and make the modifications there with some boolean operations.
If the effect looks a bit bit familiar, it’s likely because he used the method to design part of the 3D printed “toy” camera that we featured recently.
[volzo]’s method isn’t entirely plug and play, but it could still be a handy thing to keep in your back pocket when designing your next part. There are also other ways to modify the surfaces of prints for better aesthetics; we’ve previously covered velocity painting (also known as ‘tattooing’ in some slicers) and also fuzzy skin.
Perlin noise was created by [Ken Perlin] in the early 80s while working on the original Tron movie as a way to help generate more realistic-looking textures. It still fulfills that artistic function in a variety of ways, even today.


Can this technique be used to apply a wood grain finish? That would be sweet.
perhaps! q.v.
https://skybase.wordpress.com/2012/01/26/how-to-creating-super-simple-procedural-wood-textures-in-filter-forge/
I’ve done this exact thing. Basically I use a walk to create a basic pattern, then apply some transforms to make it more wood-like. I’ll try to find my old code and do a short write-up on my site. I’ll reply here with a new link when I do if you’re still interested.
I would be very interested!
I did the thing. https://github.com/morrowsend/proceduralSpaltedMapleWoodgrain
I wrote some code that allows you to generate designs like in spalted maple. You could add the result as a texture on top of your 3d print surface in your slicer and it’ll adjust the surface accordingly. https://github.com/morrowsend/proceduralSpaltedMapleWoodgrain
The IdeaMaker slicer has this feature built in. You can apply any texture to a 3D print that you want, scale it, rotate it, determine how deep the greyscale image goes, and they even have a library of online textures to choose from.
Unpredictably-random is the best kind of random.
Sue Doe likes her random more!
If you want to use code in your slicer to generate extra functionality such as this I can’t recommend IceSL enough, it’s not Python but Lua which of course is easy to use as well.
IceSL has the most accurate slicing from my experience which is why I use it.
In Blender 3D you can just import a simple STL file, add your textures and bake the displacement maps to geometry and then export that to STL. A lot like shown here, https://www.youtube.com/watch?v=McALCOr39rY
Nice technique! Thanks for sharing.
The result looks like Termite wood XD XD
Which, admittedly, does look really cool!
For my class at MIT, i’d like to show students some 3D models of the back-end-of-line CMOS process (https://en.wikipedia.org/wiki/Back_end_of_line). I searched but didn’t find any 3D models.. do people know of this? If not, would anyone be interested to try? (i can cover some costs through, eg, freelance contract )
For my class at MIT, i’d like to show students some scaled-up 3D models of the back-end-of-line CMOS process (https://en.wikipedia.org/wiki/Back_end_of_line). I searched but didn’t find any 3D models.. do people know projects on 3D printing for this purpose? If not, would anyone be interested to try? (i can cover some costs through, eg, freelance contract. And btw my research grp is here: rle.mit.edu/qp/)