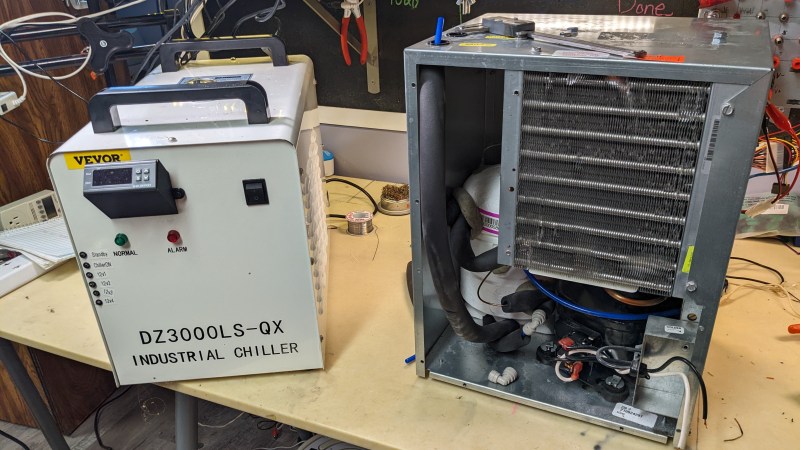
Getting a cheap CO2 laser cutter is great for your workshop needs, and while you might get a weaker-than-declared laser tube, it’s still going to cut whatever you need to be cut. That might not be the case for the cooling equipment you’re getting alongside it, however, as [RealTimeKodi] shows in a post-project blogpost. They bought a CX3000 “chiller” and found out it had no chiller components (Nitter), only equipped with a radiator, a fan, and a pump.
Having your laser tube water be somewhat close to ambient temperature is something you can already achieve with an aquarium pump and a bucket of water — and it isn’t worth paying $100 for. Left with the sunk cost and an unfulfilled need for a proper chiller, [RealTimeKodi] started looking for paths to take – first one was using TEC elements. The upgrade process was fun, but the result was subpar, as the elements gobbled power with hardly any useful output to show for it.
[RealTimeKodi] didn’t give up, and eventually found an old water fountain chiller with chiller-like components inside, sold for $200. They could’ve used the water fountain as-is, but a few design issues and thirst for adventure got in the way, indisputably forcing them to stuff the fountain’s guts into the CX3000’s case.
Buying a laser cutter can sometimes feel like buying a 3D printer a decade ago — you get a K40, learn to use it, add the missing safety features, mod in autofocus, upgrade the control board, expand the work surface… That said, our experience shows that you don’t need any of those if A4-sized 3 mm wood cutting suit you, but a proper chiller is still worth its weight in gold-plated acrylic.
I really need to finish this chiller.
all that's left is cutting some speed holes and minor finishing touches pic.twitter.com/TrYW5V7FDA— 🏳️🌈Real-Time (@RealTimeKodi) October 25, 2022


I wonder how well an old refrigerator pump style dehumidifier would do. Just using the cold side, no doubt you’d be able to get the coolant pretty cold.
I was thinking of using an old refrigerator to upgrade my CW3000, but the problem is that your need to move quite a lot of heat. In my case, it’s a 100W tube, which probably produces about 400W of waste heat. The cooler can maintain a difference of about 10C with the environment, but that’s not enough in the summer, since the water should stay below 30C for laser power and longevity.
The difficult part is that you can’t take the refrigerator circuit apart without losing the gas, and the exchangers of a refrigerator aren’t exactly ideal. A water cooler may be a much better donor!
This fact that you need to break the refrigerant circuit opens up a world that’s ripe for hacking, and dangerously so even! Enter hydrocarbon refrigerants like propane and butane! Propane is kinda close to R-22 and butanes are kinda close to R-12. And I can tell you from personal experience experience, these conversions work, and maybe even work well and for thousands of continuous hours, despite all the warnings of fireworks and death (some of which are even true) or the fact that the lubricants happily and readily dissolve and flow gleefully throughout the compressor without incident or diminished performance.
I’m not an expert in this field, but I’ve been met with nothing but success the handful of times I’ve tried it with small cans of propane. I always vacuumed the system out beforehand and did my best to keep moisture and of course air OUT. And I never used big BBQ tanks because I can’t guarantee the hygiene of the refills. The amount of actual gas you need is quite small, and BBQ tank fills (and perhaps small disposable cans too but I feel less likely so) are mixed and filled with different ratios of propane to other gasses to control vapor pressure depending on seasonal and regional climate, which is to say they don’t put a whole hell of a lot of isobutane in tanks that live in Alaska, just because it won’t vaporize when it’s less than 11°F.. and if you want to do your math I’m thinking that that means that any refrigerant system that you put it in won’t be able to achieve a temperature lower than that without drawing The low side down below 1 bar, which I definitely wouldn’t recommend because then a leak during operation on the low pressure side is going to let air into the system. That’s full of flammable gas. So I guess if you’re going to use isobutane, Don’t under-fill it.
And then naturally if you really want to be some kind of scientific about it you put pressure gauges everywhere.
There’s actually some fun reading on this subject of not allowing hydrocarbon refrigerants in the United States and a whole conspiracy theory surrounding why some commercial interests and heavy lobbying ended us up with an ozone hole. Thankfully, It seems like regulations are relaxing a bit nowadays and more and more refrigeration systems for the home are shipping with hydrocarbon.
If I’ve learned one thing being on these internets it’s that refrigerators won’t work for cooling electronics, you want an AC. They make them in all sizes and they should probably be going on sale this time of year. Refrigerators, on the other hand, are just not built for the kind of load we’re looking to put on them and just burn out.
I also have a mediocre experience with that “Vevor” shop.
When I saw the big 150mm Machine vice from this old Tony, I was quite impressed by the quite solid construction, and I also bought one from the “Vevor” shop.
The vice I got delivered has the fixed jaw screwed on while the advertised vise has it as a single casting, it also does not have the half moon for force equalization, but instead has a small bump directly in the casting. Worst of all though is that the spindle is too short. When the jaws are closed, it has just a single thread of engagement, which is certainly not enough for a cast iron nut.
The half moon can be fixed with a bit of finicky milling with a ball nose mill, and the spindle length can be fixed by adding the thrust ball bearing which was omitted, and maybe add an extra bushing.
I thought it was common knowledge that the “3000” units are passive cooling only, and that you need to look for a “5000” unit if you want active cooling.
with such things, “common knowledge” is never a given – there’s a lot of newcomers and they’re bound to miss things. It’s confusing that it’s still referred to as “chiller” and judging by the price, you’d expect at least some kind of chiller capability as opposed to “glorified pump in a bucket of water”.
I would be looking for how a lawyer could recitfiy this not a hack a day post..
I “upgraded” my “3000” unit with a DIY active inline chiller using a Peltier device and a pair of aluminum water heat exchanger blocks.
https://www.amazon.com/gp/product/B07NZ5C7F8/ref=ppx_yo_dt_b_search_asin_title?ie=UTF8&psc=1
https://www.amazon.com/s?k=DIYhz+Aluminum+Water+Cooling+Block&i=electronics&crid=1HOX3A5SO3OCJ&sprefix=diyhz+aluminum+water+cooling+block%2Celectronics%2C107&ref=nb_sb_noss_1
My system is located in my basement workshop, which is a steady 68F (20C), and with longer laser jobs I would see a 4-5 C increases in temp, which was hitting the edge of the recommended operating temp. My add-on cooler keeps the water under 24C for a 6hr engraving job, and was a simple build and not too expensive.
Made a DIY cooler using a Peltier device and a pair of aluminum water cooling blocks for my “3000” unit. The laser is a 40W CO2 OMT system located in my basement, which is a very steady 20C. Running a 6hr job the water temperature does not climb above 24C (below the recommended operating temperature upper limit). Without the added cooling the longest I could run was about 2-3hrs.
Easy build and not too expensive (about $120.00); far less expensive than replacing the unit with a commercial active cooling system.