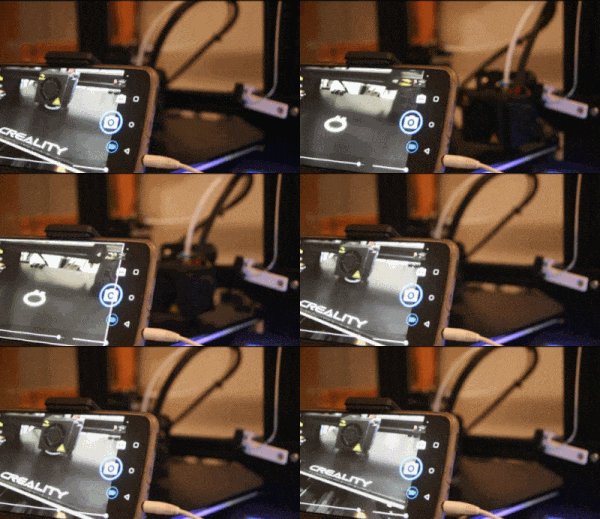
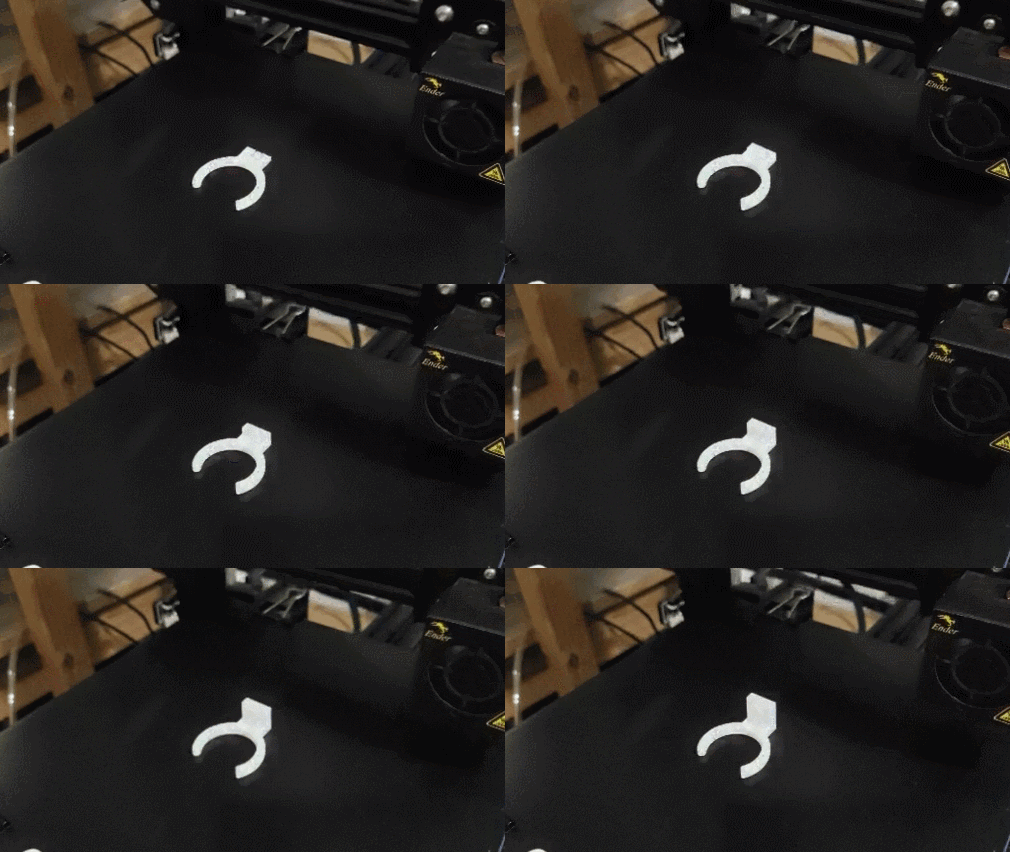
The trick to producing great 3D printing time-lapse animations is to ensure that the extruder has moved out of the frame each time a photo is taken — which usually requires OctoPrint to be controlling both the camera and printer. But [NirL] managed to bodge up a system to get the same result with a spare limit switch, a resistor, his mobile phone, and an old set of earbuds. Not bad for some spare parts and a little extra G-Code.

Inserting custom G-Code to park the print head at regular intervals takes care of standardizing the printer’s movements; there’s even a post-processing extension in Cura that makes this easy. As for triggering the camera, [NirL] was inspired by the remote shutter button on a selfie stick. By positioning a physical switch in such a way that the print head pushes it every time it (briefly) parks, a photo gets taken for every layer. Essentially the same thing Octolapse does, just with fewer parts.
To create the DIY remote shutter button, [NirL] used a spare limit switch, resistor, and cannibalized an old set of earbuds for the cable and 4-conductor 3.5 mm audio plug. Most phones and camera apps trigger the shutter when they receive a Vol+ signal through the audio plug, which is done by connecting MIC and GND through a 240 Ohm resistor.
In this way a photo is snapped for every layer, giving [NirL] all that is needed to assemble a smooth animation. Sure, it ties up a mobile phone for the duration of the print, but for just a few spare parts it does the job. You can see the project in action in the video, embedded just under the page break.
As mentioned, the usual way to implement effortless time-lapses is by using the Octolapse plugin for OctoPrint, which creates silky smooth animations without the typical blur of time-lapses.


Always wondered what good might become of that old android phone i have laying around. This looks like a simple project. Would probably need to 3d print a phone holder or is an independent tripod better?
And if you put a probe on your system there is a good chance you already have an extra limit switch. This is going on the todo list. Awesome hack.
What good you can you do with that old Android phone ?
Well, you can run octoprint directly on it (https://github.com/feelfreelinux/octo4a)
You just need then a USB OTG cable for power supply and connect to the printer itself.
As bonus you get the octoprint UI on the phones touchscreen, and integrated camera, and WLAN.
I upgraded my phone last month and had already skipped an upgrade last year, so I knew I was not going to get any money as a trade in.
It was a good thing I neither gave it to them in a trade in nor recycled it. Despite already showing it’s age, it still a capable phone.
After upgrading, I had to install the apps that give me access to work stuff, which I need to install because my job requires me to be on call from time to time.
My workplace insists in having the ability to wipe out my entire phone whenever they see fit instead of setting it up with a separate profile which restrics access to hardware and software resources to just those apps. It’s 2022 and separate restriced profiles are not new so I was not going to cave in again because they haven’t bothered to catch up with times.
Old phone to the rescue. It was factory reset to get rid of my personal stuff from it and then I instealled the work apps on it.
Duiring my on call week, every 4 to 5 weeks, I turn it on and carry it around with me, and it uses my personal’s phone access point for all connectiivity needs.
Carrying 2 phones might not be something many want to do, but it’s only for 7 days once every 4 to 5 weeks, so it’s not bad.
What’s old is new again! I did this 2 1/2 years ago, but I used a blue tooth button to trigger the camera instead of a wired connection. See: https://drmrehorst.blogspot.com/2020/04/fancy-no-hack-layer-synchronized-time.html
Remember when Raspberry Pis were so popular they were given out at gatherings like Automaticon in Warsaw? At 2019 edition I got (“won”) 1x R-Pi B from Farnell stand, two STM32F4 boards, one NXP S32K board, two IMU boards and one NFC demo board, set of resistors, not to mention gadgets like cogs, bearings, connectors and stuff. Now the best that big corporations seem to offer is some useless pens, small notebooks and cloth bags with their logo. Not even paper catalog from TME! Goddamn chip shortage and economic crisis.
Nice hack but I’m not going to be impressed until someone makes a software based solution that merely processes a video stream with zero modification to the printing process.
you have to modify the printing process, at least by parking the head every layer so that you can snap a photo without it in the way.
Idk, for me I’d rather add a bit of hardware and tweak the gcode over having to record an entire 5-10 hour print in HD, taking up gigabytes and gigabytes of limited write endurance flash storage, just to distill it down to a 30 second clip. But yes, having more options of doing the same thing is never a bad thing so by all means I’d like to see both approaches and select the best one for my use-case.
Use something like “Motion” to record the video. (https://motion-project.github.io/index.html)
Mask off the area where the printer builds stuff so that it only triggers when the head goes into its “home” position. When the head goes home, make one image.
Thanks for the recommendation, I’ll have to take a look at Motion
My project uses an android phone and as images are shot, they are immediately uploaded to google photos, so they can be viewed from any web browser, anywhere on earth. When the print is done I use ImageJ to convert the sequence to a video file. The nice thing about using a phone is the camera is usually much better and higher resolution than something like a RPi camera. The phone I’ve been using has 128 GB of storage. Before I select the image resolution in the camera I calculate the storage requirements for the whole print (image size x no. of layers) to ensure that the camera won’t run out of “film”.
So what Octoprint has build in? Octoprint has a timelapse feature build into the software. Connect a cam, turn on the feature, done. You can set it to record on layer change.
The problem is the extruder would never normally leave the print and move off to the side like this (other than maybe in a multi-material setup when it needed to purge). So if you took e a continuous video, but you’d never have a frame where there wasn’t a extruder zipping around.
It doesn’t necessarily need to be synchronized with the camera, but no matter what, some component of the system will need to modify the print process to lift and move the extruder away.
Cura can wipe nozzle between layers…. This could be used for this function
A better hack would be opportunistic head parking on the slider side: instead of physically traversing the head to the parked position every layer, instead scan the print for a common bed position shared for each layer (almost guaranteed, as prints must sit on the layers below rather than floating in space), then scan the orthogonal axis each layer for those bed positions and look for times the head is clear of the print from the direction of the camera. If so, insert the camera command at that point in the output G-code. If not, look for travels that come the closest and extend them for that single move.
The result will be a timelapse where instead of a perfect entire layer per frame you get some frames with less than one complete layer and some with more than one complete layer, but as the payoff you add almost no additional time at all to the total print time.
With the standard every-layer head-parking you’d add park & reset travel time x number of layers to the print – e.g. if it takes 2 seconds to move to park then 2 to return to the next layer start, and you print has 500 layers (100mm tall print with 0.2mm layers) you are wasting over 33 minutes on moves just for the timelapse!
You can already do that but you will have the print head in the way, the whole point of moving the print head is so it doesn’t get in the shot or is in the same place every time, so to take a timelapse with the print head in the same place every time, you need to modify the printing process sin e most prints aren’t the same every layer.
I did a similar thing using an MX style key switch and a TRRS hack but made it modular so the trigger end can easily be swapped. https://www.thingiverse.com/thing:5204464
Marlin has built-in support for this with G-code M240 making it easy to insert into layer change scripts in other slicers, too, which I also took advantage of.
I always wondered if parking the print head away to snap a pic effects the print in anyway. Like does it effect later adhesion or something?