Some design choices on manufacturing equipment really leave you scratching your head for a while, as recently happened to [Chris Cecil] when the belt on a reflow oven’s conveyer snapped. Although the solution seems simple enough, getting a new belt on the thing would involve essentially taking the entire machine apart, before reassembling it again. Thus the frayed belt went through the oven over and over until during a recent production run of Smoothieboard controller boards until [Chris] heard a funny noise and the conveyer ground to a halt.
Moving the conveyer by hand kind of worked, but with a more permanent fix urgently needed to finish the production run, two stepper motors took the place of the belt, which just left driving these steppers to keep the conveyer moving in sync. Lacking a simple Arduino board to toss at it, and with a Smoothieboard being absolute overkill, [Chris] figured that a humble NE555 timer IC ought to do the job just as well.
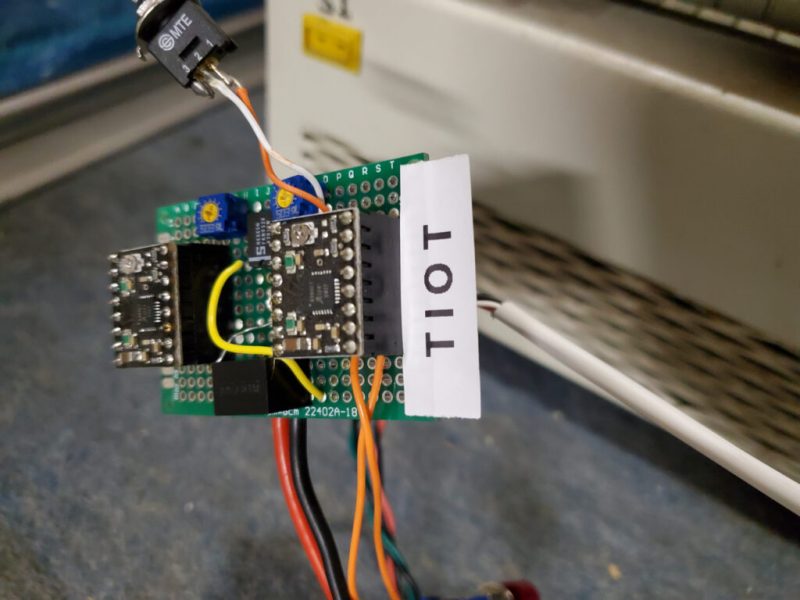
Using a project on Hackaday.io by [KushagraK7] as the starting point, and a 1992-vintage NE555 IC harvested from an old project, [Chris] managed to put together a basic stepper driver that uses the NE555 to provide the timing signal. In addition to restoring basic functionality like starting and stopping the conveyer belt, [Chris] added a new feature with the reversing of the conveyer direction. Along with some cobbled together components to physically rotate the conveyer’s two rollers, it restored the reflow oven to working condition.
And one day the prototyped driver board will be updated to a proper PCB. It’s only temporary, after all :)


Well…I had an arduino…but I didn’t have any DC motors with encoders. And this is way simpler :)
You could have used a, oh, never mind.
I was thinking, this guy makes the smoothie board but doesn’t have a microcontroller lying around?
Why not just drive the stepper motors from the Arduino?
Because he could have used a ‘555.
He could use a single stepper driver to drive both motors, since they are in sync.
Yes. But I had them on hand. And it tends to drive the pololu drivers a bit hard running 2 motors.
Easier to ensure passive cooling is sufficient this way too.
No shortage of old a4988 drivers laying about…or ramps boards.
It does seem a bit complicated compared to replacing the belt: buy strip of belting (or larger loop of endless belt and cut it, sometimes cheaper and generally easier to acquire as a one-off), install around pulleys, use trio of clamps to pretension (clamp belt ends just downstream of both ends, then use third clamp to pull those two clamps together leaving very tips slack and manipulable), then bond ends of belt. Since these aren’t toothed timing belts or taking any convoluted path, then you can skip all the scarf-cutting and just butt-joint the ends and then overlap a strip to reinforce (as the overlap will be on the outside it will not interfere with the rollers.
I debated that (as well as attempting to fix the old belt). This method actually works better than the belt ever did in the time I had the machine…and I didn’t need to order anything. Just stuff laying around the shop mostly.
Eventually, the 555 timer will be replaced with an MCU that interprets the PWM and sets speed based on that…but other than that I don’t think I will do any other mods.
Hello
The use of a 555 timer is a very ingenious solution.
However, I would be interested to know exactly what kind of furnace it is, because I like the circuit board transmission part, I have not seen a similar solution.
Thanks in advance!
It is a Manncorp/ Essemtec RO-260E Number plate has a ’99 next to the CE spot…so I am assuming that is the vintage. (My PnP is a 2008 model so that would make sense, I bought them used from the same person).