As amazing and groundbreaking as the Nintendo 64 was, over the years it has also become synonymous with blurry textures and liberal use of Gouraud shading as its most strongly defining visual features. In a recent video, [James Lambert] covers how the system’s minuscule 4 kB texture memory (TMEM) can be circumvented using mipmapping. By loading progressively more detailed textures (each in 4 kB chunks) in a level-of-detail (LoD), the visual fidelity can be maximized while keeping rendering speeds relatively zippy, as the real-time demo proves.
This project was made for the N64brew 2023, with the source code available on [James]’s GitHub account. Although impressive, it bears noting that mipmapping was not an unknown approach in 1996, and many approaches were used to work around the N64’s physical limitations.
In the case of mipmapping, [James]’s demo perfectly demonstrates the problematic nature of mipmapping, as it dramatically increases the storage requirements for the textures, hitting 40 MB just for this one single room, for a system that supports up to 64 MB cartridges.
Ultimately, this shows that the 4 kB TMEM was not the only issue with the N64, with the limited (and expensive) mask ROMs for the cartridges proving to be an insurmountable obstacle that systems like Sony’s PlayStation largely did not have to contend with. With roomy 650 MB+ optical storage, the PS1 got instead tripped up by the glacial access and loading speeds of optical media and its soggy-potato-powered GPU.
Seeing demonstrations like these manage to wonderfully highlight the bottlenecks in these old consoles, and makes one wonder about what could have been, even in an era before 1 TB solid-state drives and direct resource streaming between GPU and said storage.


I wonder m, how this would work with procedurally generated textures?
> procedurally generated textures
1. They need lots of CPU cycles to generate
2. They need spare RAM to store
Both are a scarce in N64
Would it be possible to have a cartridge of writable flash. Then have something like a 100kb .kkrieger. On Level load, write 60MB of texture data to the cartridge and then use this megatextures with the procedurally generated level data. ?
I’m sure the cartridge is not supposed to be writable, but there probably would be some hack to do it…
If we are talking about some kind of N64 cart with flash writable from itself, then we can think about mapper, that can simply extend flash capability of cart to some serious size.
Some dude below said, N64 actually supports cards far over 64MB. 64 was just the biggest commercial available module and is the max some emulators support.
you can do that today with the SummerCart64 (https://github.com/Polprzewodnikowy/SummerCart64/blob/main/docs/02_n64_commands.md)
once the N64 is executing code from RAM you can replace blocks of SDRAM in the cart with whatever sectors you want off the SD card,
I modified that N64 linux kernel build posted here ages ago to use the SDRAM as a primary swap device with zswap compressor to reduce the size of DMA transfers, and mount a squashfs volume from the SD card using the scratch buffer to transfer sectors in and out.
You could do the same with an everdrive, although the SD interface is very low level in comparison, so code complexity is higher but modern N64 SDKs like libdragon ( https://libdragon.dev )abstract a lot of that and make it very developer friendly.
that being said a featureful linux kernel is pretty useless on it due to RDRAM limits, so it spends a decent amount of time swapping, i’m currently porting xv6 instead.
You should look into the crazy mario 64 modding kaze emanuar (and others) are doing
Not that it would ever be practical, but I wonder if it would be possible to interface with an N64 in such a way as to send a small program that just interprets commands/data over one of the ports and renders graphics on the fly. So I’m seeing this connected to a PC somehow and being used as a crude graphics card to display gtx on a TV. I don’t know if the port on the bottom would be the best or the cartridge slot, but I could image this is doable. Again virtually useless but it seems like it would be a fun challenge.
you can do that quite easily with the https://github.com/Polprzewodnikowy/SummerCart64 using its high speed (~23.8MiBps) USB UART to stream straight into SDRAM on the cart and have the RCP DMA and processing display lists, not as practical with the everdrive as USB speeds are pretty hit and miss, depending on board revision and UART used.
A more advanced approach but potentially destructive to the N64 would be to modify a design for one of those portable N64 motherboard revisions, replacing the CPU with an FPGA, exposing PCIe on the PC side and SysAD on the RCP side, and map all the RCP registers and RDRAM, you could leave the PI bus exposed over a 50 pin connector so you could plug N64 carts into the card, or map it back into the FPGA so you could map the full bus into system memory.
It makes me wonder what would’ve happened had the Nintendo and Sony partnership not fallen through with the SNES CD drive. An N64 with a CD drive (or a CD drive and cartridge slot, like the Saturn) could’ve been a very interesting system. But then things would’ve been pretty different without the Playstation in the mix too.
Sounds familar. A bit more room for texture data on a disk. https://hackaday.com/2017/05/06/the-nintendo-playstation-finally-working/
The N64DD was a CD-ROM expansion for the n64
No, the 64DD was a magnetic storage cartridge, similar to a Zip disk. There were unofficial/aftermarket CD-ROM drives such as the Doctor v64 (which were primarily used for piracy and homebrew) but there was never any official CD expansion for the N64.
Check out James’ absolutely insane Portal64 project … recreating Portal for the N64 and actually runs on the real hardware.
The mipmapping isn’t really why it takes up so much space; even without the mipmaps, the texture data would be 30MB, as mipmaps only increase storage requirements by 33%. The enormity of the texture data in this scene is simply because he opted to put in a lot of texture data.
Also what he implemented isn’t, strictly-speaking, megatextures, but it’s a similar-enough concept that it’s a reasonable analogy.
64MB is not the limit of N64 ROMs, its just a convention based on the largest commerically released cart, and many emulators only implement support for 64MB.
you can access anything from 0x1FD000000-0x7FFFFFFF over the PI bus by mapping it in using the TLB into either kuseg or kseg2
Thats over 1.5GB is it? Crazy.
The Hackaday author seems to have misunderstood both the goals and the accomplishments presented in the video.
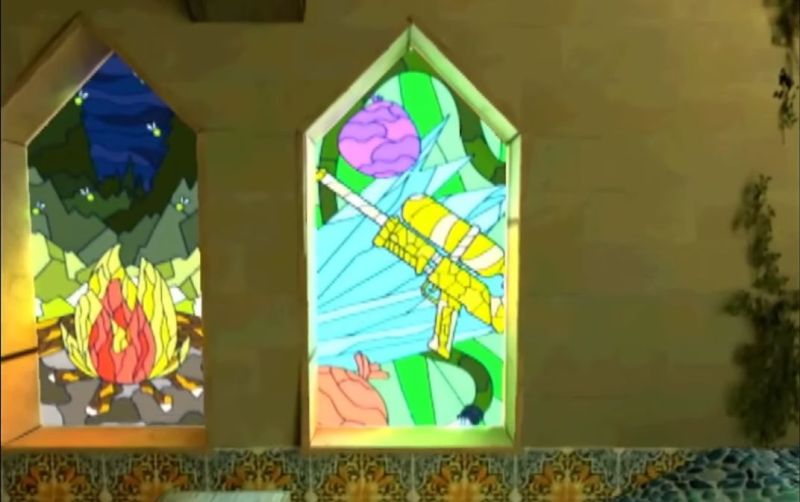
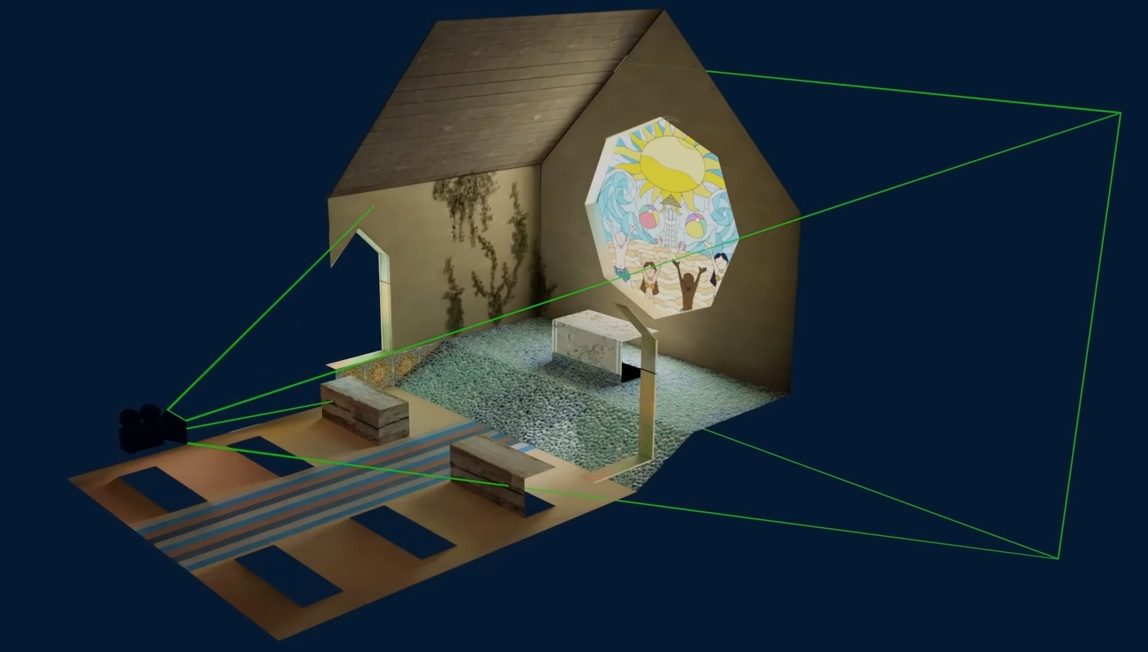
The goal is to render a scene with giant textures. Each individual wall, window, floor, roof and bench has its own 1024×1024 texture, that totals to 40MB in size for the scene.
Now, the N64 has somewhat limited hardware. Its GPU renders textures from a 4kB texture buffer called TMEM. That’s only big enough to hold a 32×32 texture, so that’s the maximum texture size that can be rendered in one call. To render bigger textures you can split the big texture into tiles of 32×32 pixels and swap them out between system RAM and TMEM.
Moving new tiles to TMEM requires some time, so there’s a bit of overhead to that operation and that overhead eventually becomes a too much to achieve a decent framerate. You don’t want to waste time rendering detailed textures for things that are too small on the screen to show that detail. This is where Mipmapping comes in. You scale the image down in factors of 2, creating images with decreasing detail and size, until your entire texture fits in a single 32×32 tile. So you’ll have the same image in 256×256, 128×128, 64×64 and 32×32 pixels. Now instead of always rendering 64 tiles of the full 256×256 for some far away object, you can choose a smaller variant and only upload a couple of tiles. By calculating how big a texture would be when rendered to the screen, you can choose a smaller variant without losing detail in the final image.
The story up to this point has all been normal mipmapping and N64 rendering. If you give it the textures, the N64 will do all of this (and more) in hardware and default microcode. Here’s the tricky thing in the video:
Even the full system RAM of the N64 cannot hold all of the texture data in this scene. The RAM is 4MB, one tenth of the total image size, and that RAM also needs to store the program and polygon data.
This is where the Megatextures (or sparse virtual texturing: https://silverspaceship.com/src/svt/ ) comes in. The program determines which triangles are actually visible on the screen, what parts of the textures they belong to, and how big they will be on the screen. It will then choose the right level of detail for every tile of the image. Not just the level of detail of the entire image like mipmapping does, but for every individual tile within each image. It will then load those parts from the (relatively) slow cartridge ROM.
All these tiles in various levels of detail are packed tightly into the available RAM, with some algorithms determining which tiles can be replaced, which are ready to use, and how to map that jumbled mess to the screen. The algorithms need to balance to desired level of detail, the space available in RAM and the speed at which tiles can be loaded from ROM.
This technique was originally developed for late 2000’s GPUs with fancy programmable shaders. To do this on a mid-90’s console is a major achievement.
nice summary, thank you
Another reminder of how far ahead of their time SGI (the company responsible for the n64s hardware) was and how we are still appreciating their technology.