 If you want something as personal as a keyboard done right, you have to do it yourself. Not quite satisfied with the multitude of mechanical offerings out there, [summific] decided to throw their hat into the ring and design the Chrumm keyboard. And boy, are we glad they did.
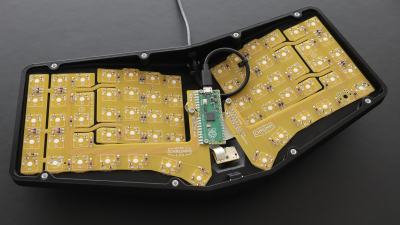
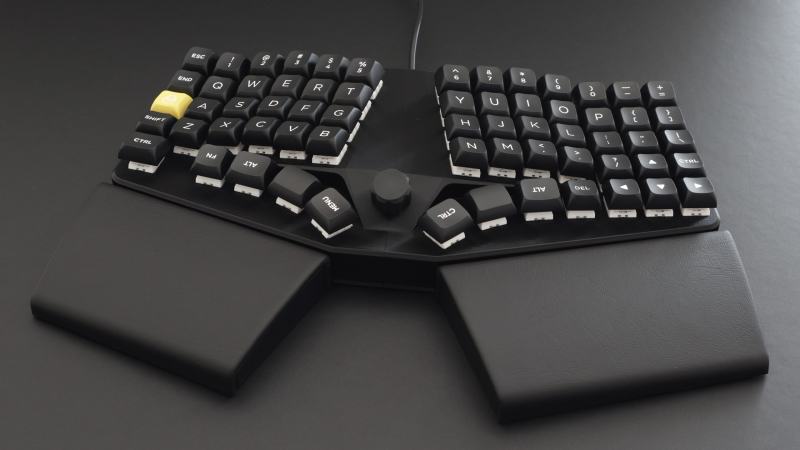
Between the lovely tenting angle and tilt, the gorgeous flexible PCBs, and the pictures that could pass for renders, [summific] has given us something beautiful to behold that we can only dream of thocking on. Even the honeycomb plate is nice. Oh, but this monoblock split is completely open source.
This Raspberry Pi Pico-powered keyboard features a 3D printable case design without visible screws, and a rotary encoder in the middle. Those palm rests are firmly attached from the underside. Why are the thumb cluster keycaps upside down? It’s not meant to drive you insane; it’s because the contour is more finger-friendly that way, according to some people.
[summific] makes this look easy, but it doesn’t matter, because all the hard work is already done. If you want something easier, start with a macropad. Or a macro pad, even.
Via reddit


Beautiful construction
This is the first time I have said “Sexy keyboard” ever.
It looks like a keyboard I’d like to use.
Any reason given for the name?
Sounds like the swiss-german word for ‘hunched’ or ‘bent’, but I’m not 100% sure, I’m not swiss. The german word would be “krumm”, swiss folks might write chrumm in dialect.
Uh-oh. That is sharp looking indeed.
I’d like to know the rough cost to build one. Its so beautiful.
Heyo, building one right now. Just thought you might like a quick price estimate.
The hardest part for most people is probably finding a place to 3d print the case. 3d printing websites are super pricey, so try to find a friend or local 3d printing group on reddit if you don’t have a printer yourself.
Also keep in mind you’ll need a soldering iron. The creator did a really good job making it 90% through-hole soldering so it’s pretty easy to do.
~$15 – Hardware (sourced from ACE hardware)
$10 – bumpons (expensive as hell from amazon)
$30 – switches (i chose kailh box white v2)
$30 – keycaps (i resin printed, but aliexpress is a good source for cheap ones)
$10 – PLA for printed case
$30 – pcb (i used jlcpcb but pcbway is also great. most of the cost is shipping)
$20 – various electronics (flexstrips, encoder, diodes, etc)(I used Mouser ~$12 before shipping)
Sooo, like $150. I already had a large portion of hardware and printed my own caps. So there are ways to reduce costs if you already have stuff. Also obv. doesn’t include soldering equipment and additional 3d print costs.
thanks for writing about Churmm Kristina, definitely in awe at the results.
Why are the FN, ALT, and CTRL keys upside down?
Also the menu key…
Probably because the top usually is slightly sloped.