Sometimes the most interesting part of a project isn’t the widget itself, but what it teaches you about the manufacturing process. The story of the manufacturing scale-up of this Atari Punk Console and the lessons learned along the way is a perfect example of this.
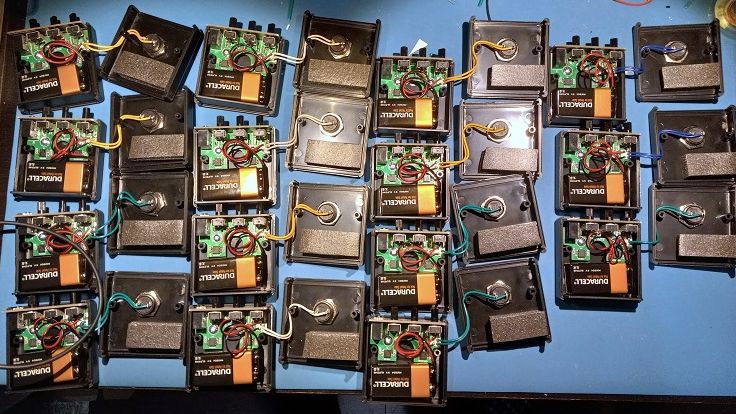
Now, don’t get us wrong — we love Atari Punk Consoles. Anything with a couple of 555s that bleeps and bloops is OK in our books. But as [Adam Gulyas] tells the tale, the point of this project was less about the circuit than about the process of making a small batch of something. The APC was low-hanging fruit in that regard, and after a quick round of breadboarding to decide on component values, it was off to production. [Adam] was shooting for 20 units, each in a nice enclosure and a classy package. PCB assemblies were ordered, as were off-the-shelf plastic enclosures, which ended up needing a lot of tweaking. [Adam] designed custom labels for the cases, itself a fraught job; glossy label stock and button bezels apparently don’t mix.
After slogging through the assembly process, boxing the units for shipping was the next job. [Adam] sourced jewelry boxes just a bit bigger than the finished APCs, and rather than settle for tissue paper or packing peanuts, designed an insert to hold the units snugly. That involved a lot of trial and error and a little bit of origami-fu, and the results are pretty nice. His cost per unit came out to just a hair over $20 Canadian, including the packaging, which is actually pretty remarkable for such a short production run.
[Adam] includes a list of improvements for larger-scale runs, including ordering assembled PCBs, outsourcing the printing processes, and getting custom boxes made so no insert is needed. Any way you cut it, this production run came out great and teaches us all some important lessons.


nice!
It was interesting to see how much effort he put into making the folded paper insert. Came out looking very professional. Nice touch.
I have had many of these, and similar, experiences.
But my takeaway from this article is self-adhesive weather strip for padding – thanks!
I’ve seen that in a lot of products. Cheap way of hindering battery movement.
Rather than putting a sticky paper onto a stiff board, a better way is to lay the sticker down on a flat surface and put the board onto the paper.
If the board flexes just a little (which PCBs will do), place the lower edge of the board onto the lower edge of the sticker and “roll” the board onto the sticker.
The table holds the sticker perfectly horizontal, and the “rolling” action of the PCB makes a perfect fit without wrinkles or bubbles.
(That’s the method I use to put paper backing/masking onto wood and other materials before laser cutting.)
Nice looking product… in fact too nice! Atari will probably be sending a cease and decist letter any minute now.
This type of project would be perfect for a Industrial Engineers program as a “class project” as it covers all aspects of DFM.
It’s not really mass production with just 20 units.
The first lesson should be design for cost. Why is the battery internal with that wired connector – surely more expensive than a friction fit recepticle and a couple of contacts. etc.