[TeachingTech] has a video covering the OpenScan Mini that does a great job of showing the workflow, hardware, and processing method for turning small objects into high-quality 3D models. If you’re at all interested but unsure where or how to start, the video makes an excellent guide.
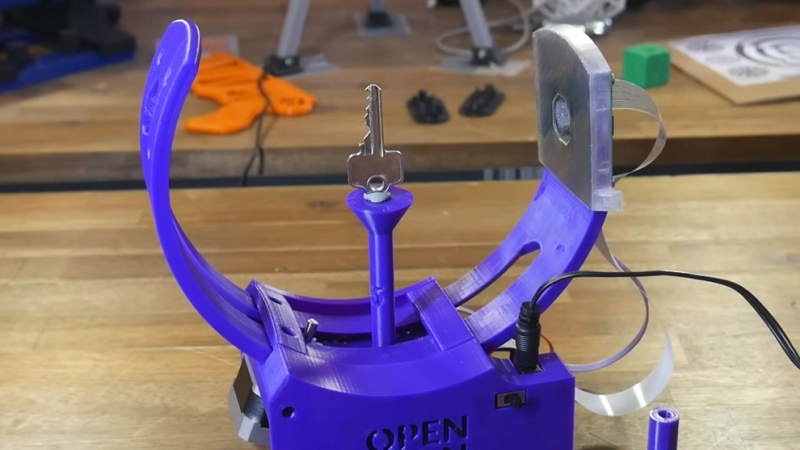
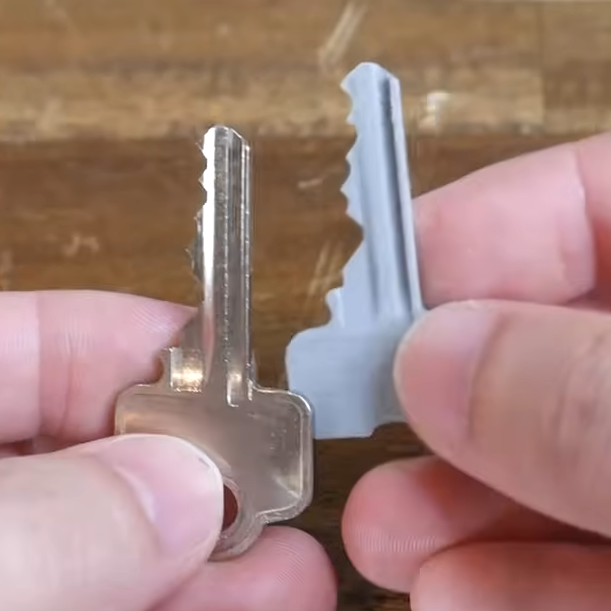
We’ve covered the OpenScan project in the past, and the project has progressed quite a bit since then. [TeachingTech] demonstrates scanning a number of small and intricate objects, including a key, to create 3D models with excellent dimensional accuracy.
 [Thomas Megel]’s OpenScan project is a DIY project that, at its heart, is an automated camera rig that takes a series of highly-controlled photographs. Those photographs are then used in a process called photogrammetry to generate a 3D model from the source images. Since the quality of the source images is absolutely critical to getting good results, the OpenScan hardware platform plays a pivotal role.
Once one has good quality images, the photogrammetry process itself can be done in any number of ways. One can feed images from OpenScan into a program like Meshroom, or one may choose to use the optional cloud service that OpenScan offers (originally created as an internal tool, it is made available as a convenient processing option.)
It’s really nice to have a video showing how the whole workflow works, and highlighting the quality of the results as well as contrasting them with other 3D scanning methods. We’ve previously talked about 3D scanning and what it does (and doesn’t) do well, and the results from the OpenScan Mini are fantastic. It might be limited to small objects, but it does a wonderful job on them. See it all for yourself in the video below.


It’s great seeing these tools becoming ambiguous, with commercial tooling for sub €1k and this DIY approach for about half that. The tool is very useful for recreating obsolete mechanical parts, and even more so for parts which require less precision.
I’ve played with Revopoint mini and a turn table, and scanned a key as a POC as well. For understanding high security locks it can be very valuable, but it’s far from necessary for low security keys. I’m guessing the key to be an aftermarket copy of a Whitco, which isn’t a very good lock. As the locksport community has shown, we just need a single picture to recreate a key with not more than a file and a blank.
Currently, we 3D print keys to show it’s possible, but there isn’t much use for them. While I’ve not found metal printing to be precise enough, it’s a very cool technology, and expect it will be useful in the near future.
I already have way too many tools that are ambiguous…
I don’t think anyone expects photogrammetry to produce that kind of accuracy.
> ambiguous
I think you meant “ubiquitous”.
A key is the easiest thing you can copy. The scanner is interesting not gonna lie. But since a key is almost a 2D object. You can easily take a picture of it, scale it, trace it and then extrude it. Simple as that.
What about the ridges? Do you have any really flat keys?
Sure, this particular key is not a very challenging object, but it is an copyright-free object with at least some amount of detail. But truth told, the key definitely does not show the full potential of the scanner ;) see for instance https://sketchfab.com/openscan/models
Clearly you’ve never actually done what you are suggesting otherwise you would know that it does not work, at all
It’s a cool device to make and design, but I don’t really see the point.
I would like to buy a cheap 3D scanner (probably in a few years considering the prices of these scanners), to scan things, but nothing that would fit inside this tiny area. I see people on YouTube use these to scan cars so they can design 1:1 bumpers, spoilers, suspension systems, engine mounts, etc. That’s what I would like to do. Not cars in my case, but motorcycles.
note, that there are larger variants available and one of the beauty of photogrammetry is, that it can be scaled up or down to almost any scale.
This might be covered in the video, or I may just be plain wrong, but I thought the photogrammetry software depended on the object being lit the same way in every photo. If the goal is for the computer to “learn” the shape of the object by viewing it from different angles, wouldn’t the changing lighting confuse it?
On the other hand, there are “structured light” scanners that use patterns projected on the object to extract the 3D shape. Using that method, with this project to automate scanning an object from all angles to be stitched together, makes perfect sense to me.
Generally speaking you are right and this is a little shortcoming of the video. The build-in ringlight illuminates the object evenly and shadowless (from the cameras POV). Furthermore most photogrammetry programs can handle slight changes in lighting as long as the underlying features (small dots) stay roughly the same. Reflections can mess up the whole process, but that’s why there is a build in cross-polarisation setup :)
I found this project a few years back, but the results then weren’t overly impressive (it was very early) .. it appears to have been greatly improved. I wish Michael (TeachingTech) would have shown the non-textured models in a comparison — texture wrapping hides a lot of the real model detail — and also done some of the benchmark models that people have created for evaluating scanner detail performance, but maybe he’ll do a follow up.
There are some other DIYers that have achieved great results using similar rigs and DSLR cameras. I can’t help but wonder if combining some form of structured light with the photogrammetry couldn’t help tease out a tad bit more resolution.
the actual point clouds still suck IMHO. you can texture wrap nearly anything and make it look correct but when you get data points that is what matters and it is not even close to being there yet. as another had pointed out a key is basically a 2d object so this was either a poor choice on his part doing this or IMHO because he is mostly clickbait any more it was chosen because you can get good results with garbage data. heck someone good in fusion could copy this key 100 times faster and better with a flatbed scanner scan of the key. Basically more clickbait to show a sub par project.
i totally agree, and that’s why we try to post all our scan results raw and untextured, see for instance these https://sketchfab.com/openscan/models
With the right preparation you can achieve low double digit micron accuracy with this setup. But those numbers are always hard to verify in the lower budget market. There is currently a scanner comparison going on, where I collect data of the same object with a wide range of scanners (SLS, photogrammetry, Laser, CT), which will be published in march.
I’ve been following OpenScan the whole time, and I love the iterations on the scanning machine. This one is particularly elegant, IMO.
I’m still trying to figure out the software toolchain, though. Free-range photogrammetry tries to infer the camera position by stitching multiple photos together, and as such works best when the background and theh object are stable relative to each other. Here, the object moves relative to the background, but you also know roughly where the camera is anyway.
Anyone know if it’s using this info for the calculations?
there is a masking process going on as part of the photogrammetry process. this is relatively easy (and might not be even necessary), as the background is completely blurry due to the shallow depth of field.
A couple years back I did some large scale photogrammetry to scan an engine and transmission. (https://www.thingiverse.com/thing:5445918)
In my case I used Magnaflux SKD-S2 as a developer spray as it was reasonably easy to clean, but stuck around. In hindsight baby power and alcohol would have been a much more cost effective solution. Lighting was kept as consistent as possible and I ended up with a photoset of about a thousand photos taken with a camera and tripod. Probably overkill, but… it didn’t hurt.
The real interesting thing is that meshroom can rely heavily on the background for position tracking. At one point I had to lift the engine on a hoist to take photos of the bottom side and had issue getting these photos to incorporate into the project. I finally had to photoshop out the background to pure white which gave meshroom the engine as the only feature tracking available. At this point I was able to incorporate them into the project.
All told it took a couple weeks of tweaking settings and running 12-18hr processing sessions to get a satisfactory result. It’s not perfect as some small details are lost, but I was able to place it into a CAD model and successfully design engine amounts around it after I modeled in the key mounting points to the scan. I similarly scanned the engine bay of the car this engine went into and was able to design the engine mounting 100% in CAD and had a perfectly fitting engine on the first try.
Why?
Weeks of work to fit a tiny little V6? That’s supposed to be the motor you’re replacing. I suppose if you were powering a classic fiat 500…
You could have installed the mounts in an afternoon using old school methods. Likely pushed it Closer to the firewall.
The OpenScan hardware is a pretty basic rig and software workflow for producing the pictures necessary to feed the photogrammetry software that does the heavy lifting. That photogrammetry software (OpenScanCloud), which is needed to actually convert the images to 3d models, is completely closed source.
So they’re providing a kit and the pinkie promise that they’ll freely process your uploads for you, while you intern provide them with training data sets to develop their closed source photogrammetry software solution. And they say “well you can use VisualSFM or Meshroom to achieve similar results” but you’ll have to tweak all the settings yourself.
They’re open and upfront about this in their Blog, its’ the top pinned article. So that’s cool I guess… idk calling a closed source product OpenScanCloud seems misleading.
I might do another post about this issue. The OpenScanCloud became part of the project way after its inception. We did not build a “magically new photogrammetry pipeline” but use some existing pieces of software. The Cloud solution is the “lazy-person” one-click solution. you can definitely get same results with meshroom or others and superior results with commercial programs like metashape or realitycapture (which are somewhat affordable)..
Can you tell me the part #’s for the stepper motors that are used in the design of this scanner? I would like to be able to source locally to get them faster….