[Thomas TEMPE] has been making two-color resin prints. While printing in multiple colors is old hat for FDM printers, the way resin printers work makes it a more difficult proposition. [Thomas] has a simple solution. First, he prints an item with a cavity where he would like the second color. Then, after printing, he fills the cavity with a different color resin using a syringe and cures it. Simple, really.
Of course, it is all about technique. For fine lines, you’ll want a smaller needle, and you flood the area with the alternate resin and wipe away the excess. For wider lines, you simply fill the cavity from a larger syringe.
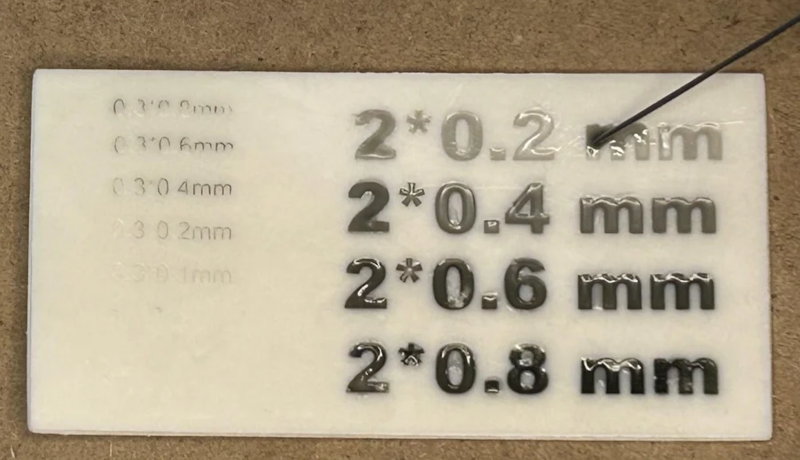
Thomas uses this to produce high-contrast text. However, it occurs to us you could do anything that was embossed into the original print. It doesn’t have to be text. There’s also no reason you have to use only one color of fill resin.
We’ve seen resin used to smooth FDM prints. We wonder if you could print the base using FDM and use this technique to add colorful resin highlights. If you try it, drop us a note.
This would be great for custom keycaps. We’ve seen keycaps printed with an air-dry clay inlay.


This would be great for multi-colored inlays in keycaps.
Like you just said. (SMH)
Great minds and all that!
Would be cool to have resins activated by different wavelengths. That way we could just mix them together and use RGB displays to harden CMY resins :)
That’s not possible, sadly. The dye activators absorb light of a certain wavelength, then kick off the reaction that cures the resin. If you had multiple activators in a mix, you could activate them with different light sources, but you couldn’t cure different resins out of a mix.
I’ve been doing this for a while. Making logo “cavities” in the tops of pieces then filling with another resin and curing. Or putting a bit of acrylic paint in, then clear UV resin and curing that. Always been tempted to pause a print and switch the resin in the vat for a truly printed multicolour piece, though…
I’ve tried it, it totally works! To make labels for the switches on my cyberdeck I printed a solid white rectangle, paused and cleaned everything while it was still on the bed, switched resins, and printed black negatives of letters directly onto the white base. I was able to make them thin enough too that a small amount of LED light could be transmitted through the back, so they are still readable in the dark. You can see some pictures on my project page here:
https://hackaday.io/project/187581-starfighter-cyberdeck-radiocarputer
That’s awesome!
I just got around to testing this method with FDM. It doesn’t work perfectly. I printed on an Ender 3 with .12 layers. After injecting the resin, it slowly seeped into the tiny gaps between the layers. I was using white filament with red resin, so the result was pink around the area I was injecting.
On a brighter note, I’ve used this method with resin prints and it works well. I adjusted the procedure by mixing red UV nail polish with red resin about 50/50. The result was beyond expectations. It really makes the finished item pop!