Like many of you, I have a bench full of electronic instruments. The newest is my Rigol oscilloscope, only a few years old, while the oldest is probably my RF signal generator that dates from some time in the early 1950s. Some of those instruments have been with me for decades, and have been crucial in the gestation of countless projects.
If I follow the manufacturer’s recommendations then just like that PAT tester I should have them calibrated frequently. This process involves sending them off to a specialised lab where their readings are compared to a standard and they are adjusted accordingly, and when they return I know I can trust their readings. It’s important if you work in an industry where everything must be verified, for example I’m certain the folks down the road at Airbus use meticulously calibrated instruments when making assemblies for their aircraft, because there is no room for error in a safety critical application at 20000 feet.
But on my bench? Not so much, nobody is likely to face danger if my frequency counter has drifted by a few Hz.
How Many PPM Have Left The Building Over The Decades?
So I have never had any of my instruments calibrated, and I’ve established that there’s no real need for me to do so. But let’s look at it another way, just how far out of calibration are they likely to be?
I can make a few educated guesses based upon what I know about the instruments in question. I am working against the inevitable degradation of components over time changing the parameters of the circuitry inside the instrument, and my estimate is based upon the quality of those parts and the type of circuit involved.
The accuracy of most instruments usually depends in some way upon two parts of its circuit; first whatever circuitry handles its signal path, and then whichever standard it uses against which to compare the incoming value to be measured. In both instances it’s likely that time will have done its work on whatever components lie in their path, perhaps changing their value, or introducing parasitic resistances.
This doesn’t matter in the case of my 1950s signal generator as its calibration was only as good as that of a pointer against a dial in the first place, but for my nearly 30 year old digital multimeter it might now be starting to show itself. Even those instruments which use references that should be beyond reproach aren’t immune, for example while a DMM may use an on-chip bandgap reference to compare voltages, it will still only be as good as the 30-year-old variable resistor used to trim it. All I can say is that if any of my instruments have drifted over time, they haven’t done so to the extent that I have been able to notice. Perhaps it’s as well that I don’t work in aerospace.
So far then, my instruments haven’t obviously let me down despite never seeing the inside of a calibration lab. But should I have done so? This is where it’s over to you, do any Hackaday readers take the time to have their instruments calibrated when they’re not required to by an exacting need at work? If so, why? Or do you have any tricks to DIY? As always, the comments are below.







No I don’t send my instruments to calibration. But I do know that errors may sum to each other to a point where mains 220V is represented by some instrument as 212V; is that a problem? for a hobbyist like myself no, but for industrial applications? most certainly.
Depends on the industry. Finely tuned systems are liable to stop working, so the majority of industrial systems aren’t made so finely to care about 8 or 10 Volts of difference in the mains voltage. It could reveal some hidden problems, but the technicians would be unlikely to spot those without extremely detailed understanding of the system.
But for the QC lab, well, you can only control quality to the point that you can measure it.
No.
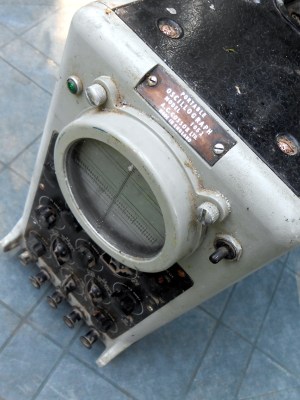
The photo looks like it ought to have “NCC-1701” on it somewhere.
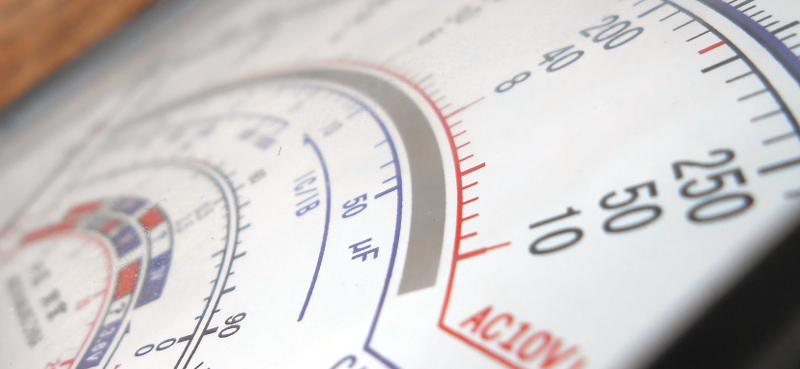
In the second photo you can see it’s a 1052 and the space before that is enough for the “NCC-“, but as it is decomisioned, it may have been remove to prevent confusion with newer versions. Also, live long and prosper and do not forget your pointy ears.
Does checking an old injection molding machine barrel temp with a modern instrument and writing offsets next to the temperature controllers count?
We all do what we have to sometimes.
I once worked in a factory where the product technical drawings had measurements in millimeters, but the chop saw used to cut those lengths had just a wooden stick for a ruler with a couple lines marked on it with a ballpoint pen, and everybody just remembered which line corresponded to which product.
How many of our measuring devices will actualy have the capability to calibrate them ? And how ?
Say you can calibrate a reference voltage in your nice desktop model dmm. That wil just work for a single range, most ranges will depend on voltage dividers which can also easily drift off value with age. The different types of measurement available might use different ways of using the voltage reference to end up with the desired measurement. The device would end up with loads of adjustment points. These could influence each other.
I often see reference voltage or resistor sources, but id this something we as a “user” could use to even roughly calibrate our gear ?
I would think they use resistor networks on a chip, which makes the drift pretty consistent. The point of those is that while it’s hard to make exact values on silicon, they will all turn out the same with extremely similar properties including aging.
In a digital DMM its are a bunch of registers, so you can (and have to) calibrate all.
an aphorism about precision and processes, maybe about how things often work;
“measure with a micrometer, mark it with a crayon, cut it with an ax”
The two ovens in my domestic cooker are both about 20 degC high. Should I send the cooker off to be calibrated?
You can probably just rub off the mark next to the dial and draw a new one on with a Sharpie.
Make Pizza.
Hotter, better.
Get stone.
I do not. I have worked in ISO9001 companies though with calibration procedures / vendors, where NIST traceability was needed. For my personal stuff, none of it is calibrated, because I don’t need it to be. Here’s the thing about calibration: For *most* equipment (not all, but most), calibration is just verifying that your equipment is working right. They don’t actually tweak anything. They put in (say a voltage) standard, measure the standard, and if it’s something simple (like a DMM) they might tweak it, but in the end, we’ve had plenty of equipment go ‘out of calibration’ simply because it couldn’t be adjusted, and no longer passed accuracy check. This is especially true for more complex things like scopes.
So, if you’re measuring a 3.3V supply, and it measures 3.1V, you get to ask yourself: Is this actually 3.1V, or is my calibration off? You might try a second DMM, but as the saying goes, a person with two watches doesn’t know what time it is. I am more prone to try measuring something else that I think should have a valid known good 3.3V rail (or maybe a 5V rail) so that if those measurements seem off, then *maybe* my calibration is off.
Newer equipment though is pretty darn good at holding calibration compared to the old analog meters.
A person with two watches knows that they’re unlikely to both show the same time unless they’ve been set recently, because all watches drift at different rates. Therefore, if two watches show different time, one or both have not been set recently.
A person with two watches therefore knows whether they know the correct time or not, while a person with one watch doesn’t even know that they don’t know.
Larry Fine (para):
I wear three watches, one runs 15 minutes fast, one runs 15 minutes slow, the other is stopped at 2.
I add the first two, then divide by the third.
Generally if something needs precision, I want to redesign so it doesn’t. Some things really just do need to be spot on, but modern digital stuff doesn’t really care if there’s noise or the voltage isn’t quite right. A cheap DMM probably isn’t gonna drift so much that 5v becomes 5.5v.
I do verify that things haven’t drifted too much, with cheap eBay standards and the like.
Yep, design so it doesn’t. The folks who design measuring equipment are sometimes cautioned to avoid “desk drawer” parts. “What’s the problem? It works fine if I use one of these 2N404 transistors that I have here, just not with those random ones in the parts bin. They’ve got hFE that’s all over the place.”
That being said, a watch that periodically sets itself from an external reference and doesn’t drift very fast is better than two that are constantly desyncing from each other.
I pay for my instruments to be pre-calibrated. If I had to re-prove the earth’s radius every time I stepped on the scale, it wouldn’t make much point to have the preceding annuls of science written into fact, now would it?
Components do drift over time, though. Ceramic caps can lose a few percent of capacitance for every decade of hours since they were fired, resistors can drift a few percent over their first thousand hours of runtime. Even pretty good thin film resistors are often rated for 1% drift over their first year of runtime.
Hence, the need for recurring calibration, to account for these drifts over time.
RIght, but decent instruments use designs with balanced identical components such that age-related effects become common-mode and cancel each other out.
It’s not perfect, but that’s why a 1% drift within a year is rarely a worry.
There are different levels of calibration. As a hobbyist, I will not send equipment to some external lab to be calibrated, but I do have multiple multimeters, and when accuracy is needed, I do a measurement with more then one multimeter, and If there is a deviation between the measurements (when doing it with 4 or 5 multimeter) then I know which one is off. But in general I don’t care much about ppm. I am not a volt nut.
“This process involves sending them off to a specialised lab where their readings are compared to a standard and they are adjusted accordingly, and when they return I know I can trust their readings.”
That is a common misconception regarding calibration, at least in my industry. The main reason for calibration is actually to show that the instrument HAS BEEN correct since last calibration. The moment the instrument leaves the calibration desk anything can happen to it which will make it give false readings (dropped, stored incorrectly…).
Therefore the calibration is more like a verification that the instrument could be trusted between two calibrations. If it fails a calibration, the products which was checked with the instrument between the two calibrations are in danger of being recalled/scrapped. Therefore you don’t want to wait too long between the calibrations.
This. Calibration is indeed mostly for looking backwards in time.
Hey, if you can hang a door that doesn’t fall off you would be an improvement at Boeing!
Nowadays telling someone they should “get a job at Boeing” carries the same valence as suggesting someone “seek Canadian healthcare…”
Yes, both internally and externally for some of the more specialist equipment.
Short answer: no. Long answer: sort of.
I have access to traceable voltage transfer standards, so I check new to me gear, but I don’t send anything out or worry about the gear I have. I have checked a few things that seemed iffy. I own a few transfer standard resistors (<10PPM uncertainty at the proper temp) and have a decent GPS disciplined oscillator for all counters and generators. <10PPB, maybe <1PBB when stable as long as the temperature hasn't varied for a day or so.
My physical measurement gear, on the other hand, yes, when I need to. It sometimes is needed for actual work. I have maybe 20 external micrometers in my current system, of various sizes and flavours, a large vernier caliper, a 2m inside mice set, and a few other things. All NIST tracable, and for most of it, I keep the standards on hand (a couple I send out every year, the rest I replace after some number of uses). For all of this, I also can monitor temp to 20mK, which, these days, is not a reach. This also means my electronics gear can be kept at a stable temp (+/-1K generally) so less worry about stability and calibration, there.
I also have two calibrated torque wrenches. Not instruments, but one of them is for RF connectors, so instrument support. DOn't use it, lose the warrantee.
THis doesn't include the, roughly, 200 other micrometers, couple dozen calipers, height gages, and so on.
The answer for this is identical for both my personal workshop, as well as the equipment at my day job. We don’t calibrate because our equipment is too good for the results that we are making. Picking on the bench DMM here, because it’s the one I even think about true accuracy with.
Work has a single 6.5 digit Keysight and several 4.5 digit Siglents (one on each engineer’s bench). My workshop has 6.5&7.5 digit Keithley and the same 6.5 digit Keysight, and a 6.5 digit Siglent.
The reason for the 6.5/7.5 digit meters is for the noise performance, the short term stability, etc. I think the tightest measurement I’ve actually made for either personal or work really had a tolerance of 0.1%. The measurement that we almost needed to actually send things in only needed about a 1% tolerance on the measurement, and really was a comparative measurement anyway since it was a check for if software changed hardware behavior (and the customer didn’t realize that). In practice we care far less about long term accuracy that can be done via calibration, and much more about the intrinsic performance you gain about building a high performance meter that has the long term accuracy to the point it *can* be calibrated to 20ppm or better.
Should work calibrate the meters at least infrequently? Probably, once in a while would be nice, and then we can transfer standard the 6.5 digit to the other meters and handhelds. Does it need to happen? No. As Martin said, modern stuff holds calibration well, because it has to to meet the tight standards.
Should I calibrate my workshop? With the many high precision things I have, probably, but I’m the toughest critic of my own measurements, and let’s be real, I have the fancy stuff because I wanted it anyway.
If something is 3.1V and should be 3.3V, any meter I or work has that I can’t trust to tell me that has long been garbage (or isn’t the tool I’d use like the old Simpson meter on the shelf we have).
I have three pieces of equipment that I keep calibrated with a local lab: one Fluke DMM, one Keysight LCR meter, and one Geiger counter. It only costs me about ~$200/year for all three. They are nice meters and they have not drifted much over the last 10 years. In fact, nearly all of my old Radio Shack and B&K DMMs (with ages from 10 to 70 years old) still compare favorably with the Fluke and are still mostly within its spec. In particular, my first DMM that I got from RadioShack as a teenager is completely within spec after nearly 40 years of heavy use. I probably helps that I live in a relatively dry climate and never store tools with batteries installed. The Geiger counter drifts quite a bit in comparison, but has always come back within expected tolerance for ageing.
Chasing digits can be fun, but 3.5 digits is usually fine for a hobbyist. A bad test setup will swamp any absolute accuracy issues anyway. That said, as a steward of a large test equipment collection, I do like to have at least one semi-trusted meter to detect trends in failing equipment in rotation on the bench.
I rarely need to chase absolute digits, even professionally, withe anything but frequency, so other than the counters, 3.5 to 5.5 digits is generally the order of magnitude better than I need to be confident enough in the data. My first Fluke 8000A is still in spec (when I last checked, at least, a couple years ago), and my HP 3469B- a daily driver as I like the display- is, as well.
The H{ 34401A comes out when I need stability or digits for relative measurements, but I am only guessing it is in spec since the last cal check it has was when I bought it second hand for repair in the previous millennia.
Place I used to work we had test equipment which required the best part of a day’s calibration every month and every time it was powered up after being off (it quickly went in a UPS!). And if things went pear shaped with it, it had to go back to the manufacturer for a proper recalibration. Such joys.
At home? If I’ve doubts I’ll test with another tool and see if they match. Not had any of my tools go out of whack far enough that I can spot it.
“…Do You Calibrate Your Instruments?”
No.
I’ve been a very active hobbyist/hacker/design & production engineer for many years.
After all these years, my conclusion is that any hobbyist–or someone who does NOT design life-critical electronics–who has a reasonable set of test gear and who feels that s/he must have it calibrated periodically is suffering from a severe case of OCD ( https://en.wikipedia.org/wiki/Obsessive%E2%80%93compulsive_disorder ).
—————————————————————————————-
“An ancient adage warns, ” ‘Never go to sea with two chronometers; take one or three.’ “–Fred Brooks
I have a few instruments I keep calibrated, because there’s a facility just up the road from me that does it, for not too much money. I can then have some certainty that they’re capable of accurate measurements.
If any of my non-calibrated instruments ever make me question whether they’re reading a value correctly, or if it’s simply been a while since I last checked their accuracy, I’ll compare them to measurements made by the calibrated ones. I’ll then adjust or tweak the instrument in question, or repair it, to get its measurements back in line, if possible. But I’ll never consider it “calibrated,” because in my mind, that means specific things, like traceability to NIST.
Three points to make here:
1. Calibrating a piece of equipment at the wrong time can be a really bad move. In professional labs that do calibrate equipment, taking a piece and recalibrating it between multiple uses of it in the same experiment/setup can be really problematic. Within a given experimental setup it is often more important to have an instrument which is consistent with itself over time, than one which is perfectly consistent with true SI units.
2. PAT testing is worthless, even if the thing is calibrated. There are simply too many types of hazard an electrical device can have which such testing won’t detect at all, particular hazards that cause something worse than mere electric shocks, namely hazards that cause fires.
3. Come on, nobody bothers calibrating equipment, except the most professional labs and even then only the particular pieces of equipment that they use to make final measurements on a product when writing up its datasheet. For everything else everyone just trusts that instrument performance doesn’t change much over time, maybe having paid the often 2x price increase so as to get calibration certificates with a new instrument and then never looking at them again.
Calibration is less of an issue with modern electronics than with older stuff.
It’s not like modern stuff has a bunch of internal potentiometers that a technician can tweak anyway. Instead, it tends to be designed with quite respectable internal standards, such as voltage references, temperature compensated oscillators, etc. It’s rare that you see things based on the particular values of passive components (capacitors, resistors) other than maybe a voltage divider, and even then, modern precision resistors are far better than the ones of old.
Modern equipment also contains more digital processing: anywhere inside the walled garden of DACs and ADCs, no calibration is needed.
And some equipment comes with its own calibration capabilities. I just spend a number of hours wrestling with the calibration process for a couple of Hewlett-Packard RF power meters, which have reference outputs that can be used to calibrate the sensors. RF network analyzers come with calibration loads. Anything that cares about precise time and frequency these days will have references inputs that can be fed from your own GPS-disciplined clock.
Of course, serious test equipment is another matter. If you have to have six digits of precision, then you probably want to send your equipment out for calibration on schedule.
> Of course, serious test equipment is another matter. If you have to have six digits of precision, then you probably want to send your equipment out for calibration on schedule.
This is what people seem to ignore here. I do power measurements and COP calculations on heatpumps. A fraction of a degree on a temperature can influence the power output calculations to the point where they’re completely incorrect.
Flow sensors in particular need to be extremely accurate, which is why they cost thousands.
Oddly enough, just today I was wondering how much it would cost to have my Mitutoyo dial calipers tested.
And how much to true my 24×18 inch carpenter’s square.
If you have a few (old) ball bearings, then you have a pretty usable standard for checking whether your calipers are still good.
Won’t tell you if your inside points are slightly bent (perhaps from being dropped).
Checking the sharp OD measure with a ball is also tricky.
But testable with a reamed hole (insert ‘your mom’ joke here) and a few decent bolts.
Best to have a micrometer on hand.
I think there’s a lot of people missing the point of calibration altogether: It’s not about how accurate your instrument is, it’s about whether you can prove it.
If you’re doing testing and commissioning work and your tools don’t have an in-date calibration certificate then you’re doing it wrong.
I own calibration gear to calibrate my gear, then I have gear to calibrate the gear I use to calibrate my gear….
The rabbit hole is deep, and currently only as good as my best equipment….
(One day I’ll have access to a calibrated 3458A….)
I will be getting some gear professionally adjusted and calibrated soon though, so I can start to climb up out of the hole with more certainty soon.
Now, if only I could find the Adjustment Program for the HP/Agilent 4263B LCR meter (Part number: 04263-65005) and 4338B Milliohm meter (Part number: 04338-65005) that I own, Keysight have absolutely refused to provide any and all support on them….. :(
I’d port the software to Python in a heartbeat if I could just find a copy.
Such a shame because they are very nice instruments, the 4263B can measure transformer parameters and the 4338B can measure the internal resistance of battery cells.
I don’t really care how accurate my TG is within certain limits, I’m only bothered that it’s repeatably inaccurate, knowing how inaccurate is useful but not essential for the majority of people.
I get off my butt and walk down to Calibration and ask the guys politely, if they can calibrate my equipment for me. One perk of working in an industrial segment, where we can do that ourselves.
I have some old tube gear (radio, signal generator, vtvm) that I need to check the components on, but I figure my LCR meter will get me close enough. Maybe get some precision reference components to check against to make sure things are in the right ballpark, otherwise no one is in harms way for any of my projects.
I worked in ILS development in the 90’s I picked up a spare audio distortion analyzer from R2D3 in Portland, LOL. Was surplus FAA PDX. We had all of our equipment, scopes, spectrum analyzers, meters… professionally calibrated over a few days. The distortion meters had different cal specs, totally different. Called it good. WTF? I’m not so sure calibration techs are diligent.
Around 1967, I recovered a very busted Simpson 260 from a trash can at the division of RCA where I worked. The date code inside the meter movement was 1951 (RCA had been building transmitters for a while). Some epoxy and new banana plugs got it working, and some years later when I got a 3 1/2 digit digital meter, I checked the 260. It was dead nuts accurate.
A must-read for hobbyists:
https://www.fluke.com/en-us/learn/blog/digital-multimeters/accuracy-precision
I’m an instrument technologist at an in-house cal lab for a power distribution company, and we see a wide variety of instruments.
Most DMMs are quite impressive and will be within manufacturer tolerance after decades of abuse.
Some instruments are pretty woeful. Temperature and humidity meters I have found to be particularly poor, and will drift out of spec quickly.
For industry, calibration is an absolute requirement. You simply cannot leave the accuracy of a gas monitor to chance when someone’s life will depend on it.
For the home player, knowing and understanding your equipment is best. Please read the manual.
The error in measurements can be corrected if you have different instruments and you know how much it deviates from a new or recently calibrated instrument.
The larger amount of “calibration” I may do is to adjust for the environment / setup mostly, rather than the device. That would be something like calibrating a VNA to make readings referenced to the end of a transmission line, rather than the ports of the device, or offsetting the output of a digital compass by the declination of my area. I don’t want to make too many changes other than the final output of a device, and I want successive uses to be comparable. Something like adjusting a controlled oscillator a few ppm to make a radio display the right frequencies or adjusting a scale a bit to read correct for multiple reference masses is fine. But only if and when I have the references readily to hand; else I would rather stick with the consistent inaccuracy than calibrate poorly.
I just bought a new DMM, a Velleman DVM030 from Jameco, for $66. The first thing I did was check it against my 39-year-old Metex 3650 DMM I also bought from Jameco, a little bit cheaper IIRC (although the dollar was bigger back then), which has never been recalibrated. They agreed within about 0.1%.